The biggest mistake that worsens color coverage is skipping or rushing surface preparation. When you don’t clean, sand, or repair the surface first, primer won’t stick properly, leading to uneven absorption and dull, streaky finishes. This poor adhesion can cause paint to peel or bubble over time. If you want your color to look vibrant and last longer, making sure your surface is properly prepared is essential. Keep going to learn more about how to get it right.
Key Takeaways
- Skipping proper surface cleaning allows dirt and grease to interfere with primer adhesion.
- Applying primer without sanding rough surfaces reduces its ability to bond evenly.
- Using the wrong primer type for the material can cause poor coverage and absorption issues.
- Rushing surface preparation leads to uneven, dull, or patchy color results.
- Neglecting repair of holes and cracks causes uneven primer absorption, affecting final color consistency.

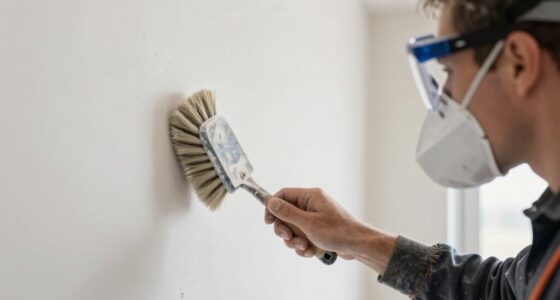
Have you ever painted a surface only to find that the new color looks uneven or dull? If so, you might be overlooking a critical step in your painting process: proper surface preparation before applying primer. The one primer mistake that can sabotage your color coverage is skipping or rushing this indispensable step. When you neglect surface preparation, your primer won’t adhere properly, leading to uneven absorption and compromised color vibrancy. This mistake can turn a simple paint job into a frustrating experience, requiring more coats or even stripping and starting over.
Primer adhesion is fundamental to achieving a smooth, even finish. If the surface isn’t correctly prepared, the primer can fail to bond effectively, creating weak spots that show through the paint. This weak adhesion results in patches where the color appears dull, streaky, or patchy. To avoid this, you need to invest time in cleaning, sanding, and repairing the surface before primer application. Dirt, grease, or old paint residues can prevent the primer from sticking properly, so a thorough cleaning with a mild detergent or degreaser is essential. Sanding rough surfaces or peeling paint creates a smooth base that promotes better primer adhesion, ensuring that the paint layers will bond uniformly. Additionally, understanding the importance of surface preparation can help you recognize the significance of each step in achieving a flawless finish. Proper surface preparation also involves understanding the material type, which can influence the choice of primer and preparation techniques. Recognizing the environmental conditions is equally important, as humidity and temperature can affect adhesion and drying times. Taking these factors into account helps ensure optimal paint performance and longevity of your work. Furthermore, good surface prep helps prevent issues like peeling or bubbling, which can ruin your paint job over time.
Surface preparation isn’t just about cleaning and sanding; it’s about creating an ideal foundation for the primer. Filling in holes, cracks, or imperfections with a suitable filler and sanding those areas flush with the rest of the surface also plays a critical role. When you skip this step, the primer can settle unevenly, which means the final coat of paint will highlight those imperfections and look uneven. Properly prepared surfaces allow the primer to penetrate evenly, providing a uniform base for your paint to adhere to and reducing the number of coats needed. Skipping or rushing this step often results in additional work and costs down the line, making it a false economy to save time initially.
Many people rush through surface preparation in an effort to save time, but this short-sighted approach often costs more in the long run. Proper surface preparation ensures good primer adhesion, which translates into better coverage, richer color, and longer-lasting results. Remember, the key to a successful paint job isn’t just the paint or primer you choose but how well you prepare the surface beforehand. By taking the time to clean, sand, and repair thoroughly, you give your primer the best chance to do its job, ultimately making your color coverage smoother, more vibrant, and more durable.

LUXFINISH Surface Prep Spray Automotive – Surface Degreaser for Auto Paint Prep, Removes Wax, Oil & Dirt Without Residue, Paint-Safe Formula, Enhances Bonding for Ceramic Coating & Sealant – 150ml/5oz
Wipes away wax, oil, and grease in minutes: Spray directly on paint. Lifts off old wax, polishing oils,…
As an affiliate, we earn on qualifying purchases.
As an affiliate, we earn on qualifying purchases.
Frequently Asked Questions
How Do I Know if My Primer Is the Right Type?
You can tell if your primer is the right type by checking its adhesion to the surface. Proper surface preparation is key; make sure the surface is clean, dry, and free of dust or grease. If the primer sticks well and forms a smooth, even layer without peeling or bubbling, it’s likely suitable. Using the correct primer for your material enhances adhesion and color coverage, preventing issues caused by an incompatible or improperly applied primer.
Can Different Primer Brands Impact Color Coverage?
Different primer brands can definitely impact color coverage because primer compatibility varies. If the primer isn’t compatible with your paint, it can hinder paint adhesion and cause uneven coverage or dull colors. Always check the label for compatibility with your paint type, and stick to trusted brands known for good adhesion. Using the right primer *guarantees* vibrant, uniform color and better long-term results for your project.
Is It Necessary to Sand the Primer Before Painting?
Think of your surface as a blank canvas awaiting your masterpiece; sanding is the brushstroke that guarantees primer adhesion and surface preparation. You don’t always need to sand, but if the primer feels rough or uneven, lightly sanding creates a smooth, receptive surface. This step prevents peeling and ensures vibrant color coverage. Skipping it risks imperfections, so assess your surface carefully before deciding to sand—it’s the foundation for a flawless finish.
How Long Should I Wait After Priming Before Painting?
You should wait at least 1-2 hours after priming before painting, but always check the primer’s drying time on the label. Proper surface preparation is vital; make sure the primer feels dry to the touch and has fully cured for the best results. Rushing this step can lead to uneven color coverage. If you’re unsure, give it extra time to guarantee the primer’s surface is adequately prepared for your paint.
What Tools Are Best for Applying Primer Evenly?
Think of your application tools as the brushes of a painter’s palette. For even primer coverage, you’ll want to use high-quality brushes or rollers designed for smooth application, like a foam roller or a synthetic brush. Primer techniques, such as using light, overlapping strokes, guarantee a uniform coat. These tools and techniques help you achieve a seamless surface, preventing streaks or uneven textures, and setting the stage for vibrant, true colors.

Romeda 8-Pack Sanding Sponge, Four Grits Per Pack 60/80/120/220, Washable and Reusable Handmade Sandpaper Block, Drywall Sandpaper Blocks for Wooden Drywall Sheetrock and Metal Glazing
【ASSORTED GRIT SANDING BLOCKS】 8 sand blocks, 4 sizes from coarse to ultra-fine sand, 60/80/120/220 grit, 2 blocks…
As an affiliate, we earn on qualifying purchases.
As an affiliate, we earn on qualifying purchases.
Conclusion
Remember, skipping or improperly applying primer is like bringing a spoon to a sword fight—you’re setting yourself up for failure. If you want vibrant, even colors that truly pop, don’t underestimate the power of a good primer. Think of it as your secret weapon, much like a trusty quill in the hands of a master scribe. Get it right, and you’ll be painting like a Renaissance artist, not a hack in a garage.

Krud Kutter Gloss-Off Prepaint Surface Preparation Cleaner, 32 oz, No Sanding Liquid Deglosser for Cabinets, Trim, Doors and Furniture, Removes Dirt Grease and Gloss for Paint Adhesion
Prepares Surfaces for Painting Without Sanding Helps remove gloss and dull previously finished surfaces to improve paint adhesion….
As an affiliate, we earn on qualifying purchases.
As an affiliate, we earn on qualifying purchases.

3M Small Hole Repair High Strength, All in One Applicator Tool, 1-Pack, Quick and Easy Repair for Nicks and Nail Holes, Includes Putty Knife, Spackle, and Sanding Pad For Wall Repairs (SHR-3-AIO)
MAKES REPAIRS 3X FASTER than traditional vinyl spackling
As an affiliate, we earn on qualifying purchases.
As an affiliate, we earn on qualifying purchases.