
To achieve cleaner ceiling-to-wall shift, focus on thorough surface preparation—clean all areas and use painter’s tape for crisp edges. Choose high-quality tools like angled brushes and rollers, and apply paint in smooth, even strokes, working in sections while maintaining a wet edge. Removing tape while paint is still slightly damp guarantees sharp lines. Pay close attention to detail and cleanup for a flawless finish. Keep exploring for tips that will take your painting skills even further.
Key Takeaways
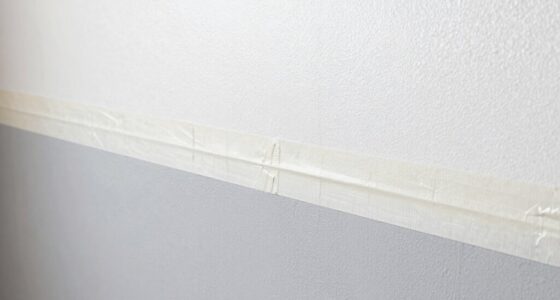
- Use painter’s tape along edges to create sharp, clean lines and prevent paint bleed.
- Properly load brushes and rollers to avoid excess paint that causes drips and uneven edges.
- Work in small sections with a wet edge to ensure smooth blending and avoid lap marks.
- Remove painter’s tape while the paint is still damp for crisp, sharp transitions.
- Apply primer when necessary to improve adhesion and achieve cleaner, more seamless results.

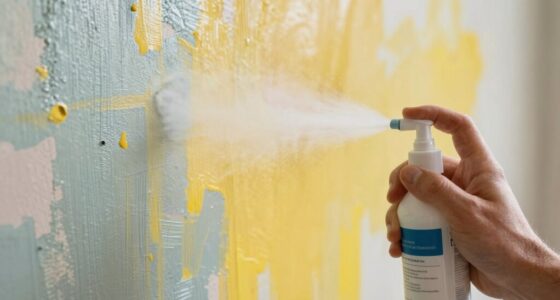
Achieving a spotless ceiling-to-wall progression can be tricky, but with the right techniques, you can make your space look flawlessly finished. The key is in proper paint preparation and choosing the right tools. Before you even dip your brush or roller, take the time to prep your surfaces thoroughly. Clean the walls and ceiling to remove dust, grease, or old paint flakes. Use painter’s tape along the edges where the wall meets the ceiling to create a crisp, clean line and prevent paint bleed. Applying a primer can also be beneficial, especially if you’re working with a new surface or making a significant color change. Proper paint preparation ensures that the paint adheres smoothly and reduces the chances of drips or uneven coverage, making your progression look seamless. Additionally, understanding smart home technology insights can help you create a more efficient painting environment, such as using automated lighting to better see your work. Using automated tools can further enhance your precision and reduce manual effort during the process. Incorporating innovative painting techniques can also help achieve a more professional finish and improve your overall results.
When it comes to tool selection, your choice of brushes and rollers plays a vital role. For the ceiling-to-wall transition, a high-quality angled brush is your best friend. It allows you to cut in precisely along the tape line and get into tight corners without smudging onto the wall or ceiling. Use a small, firm brush for detailed work near edges, and a roller with an appropriate nap length for large wall areas. A roller with a medium nap works well on most surfaces, providing even coverage without putting on too much paint, which can cause drips or uneven lines. Consider using a painter’s pole to reach higher areas comfortably, reducing fatigue and maintaining control. Proper tool selection can make a significant difference in achieving a professional-looking finish. Remember, paint application techniques are just as important as the tools you choose.
As you work, load your brush or roller properly—don’t overload it, but make certain there’s enough paint for a smooth, even application. When you start painting, work in sections, maintaining a wet edge to prevent streaks or lap marks. Proper technique with gentle, consistent strokes, especially along the progression line, is essential to blend the ceiling and wall seamlessly. Keep a damp cloth or sponge nearby to wipe away any accidental drips before they set. After finishing, carefully remove the painter’s tape while the paint is still slightly damp to avoid peeling and to keep your progression sharp. By combining meticulous paint preparation with the right tool selection, you’re setting yourself up for a flawless ceiling-to-wall progression that elevates the overall look of your space.

Pro Grade 2 Inch Angled Paint Brush (3 Pack) – Professional Angle Sash Brushes for Cutting in Trim, Walls, Cabinets & Detail Work – Works with Latex & Oil-Based Paint
2 Inch Angled Paint Brush for Precision Cutting-In – Designed for clean, sharp lines around trim, baseboards, ceilings,…
As an affiliate, we earn on qualifying purchases.
As an affiliate, we earn on qualifying purchases.
Frequently Asked Questions
What Tools Are Best for Detailed Ceiling-To-Wall Edge Work?
For detailed ceiling-to-wall edge work, you should use a combination of edge trimming tools and detail brushes. Edge trimming tools, like angled painters’ tools or corner brushes, help you get precise lines close to the ceiling. Pair these with fine-detail brushes for touch-ups and tight spots. This combo allows you to achieve clean, crisp lines and a professional finish without mess or uneven edges.
How Often Should I Reseal or Reapply Paint for Clean Transitions?
Think of your paint job as a living landscape that needs tending. You should reseal or reapply paint for clean blends every 3 to 5 years, depending on wear and tear. Keep an eye on peeling or discoloration, which signals the need for sealing frequency adjustments. Regular touch-ups keep your ceiling-to-wall edges sharp and fresh, preventing dirt and dust from dulling your flawless finish.
Can Specific Paint Types Improve Ceiling-To-Wall Adhesion?
Yes, certain paint types can improve ceiling-to-wall adhesion. Look for high-quality, latex or acrylic paints designed for interior walls, as they offer better paint adhesion. Proper surface prep is essential—clean the surfaces thoroughly, remove loose paint, and sand rough spots. Using a primer suitable for your surface also enhances adhesion, ensuring your paint bonds well and results in clean, crisp progressions without peeling or cracking over time.
What Common Mistakes Cause Uneven or Messy Transitions?
You often cause uneven shiftings by skipping edge tape or rushing the paint priming process. Without edge tape, you might accidentally get paint on the ceiling or wall, creating a mess. Skipping priming can lead to uneven paint absorption, resulting in visible lines. Take your time applying edge tape and guarantee proper paint priming; this helps create clean, sharp lines and smooth shifts between ceiling and wall surfaces.
Are There Eco-Friendly Products for Cleaner Ceiling-To-Wall Edges?
Imagine a gentle breeze carrying eco-conscious cleaners that effortlessly glide along your ceiling-to-wall edges, leaving no streaks or harsh fumes. Yes, there are sustainable painting options and eco-friendly products designed specifically for cleaner edges. These products prioritize safety for your home and the environment. By choosing eco-conscious cleaners, you support sustainable painting practices while achieving crisp, flawless progressions. Your space stays fresh, beautiful, and kind to the planet.

FrogTape Multi-Surface Painter's Tape with PAINTBLOCK, 1 in Wide (0.94 in x 60 yd), Quick Stick Medium Adhesion, Premium Green Painters Tape Removes Clean, 1 Roll
FOR MULTI-SURFACE USE: Frog Tape 2 inch wide paint tape with medium adhesion is ideal for a variety…
As an affiliate, we earn on qualifying purchases.
As an affiliate, we earn on qualifying purchases.
Conclusion
So, next time you’re “just touching up” that tricky corner, remember: perfect ceiling-to-wall blends aren’t just about aesthetics—they’re about your sanity. Skip the corner-cutting, or risk living in a perpetual art project of uneven lines and paint mishaps. Who knew that a little patience and the right tools could save you from a lifetime of regret? Embrace the secret, and finally enjoy a home that looks as flawless as your stubborn perfectionism demands.

Pro Grade – Paint Roller Covers – 1/2 X 9 Inch Microfiber 5 Pack
Our no-shed microfiber roller covers ensure a perfect paint or stain finish for stunning results.
As an affiliate, we earn on qualifying purchases.
As an affiliate, we earn on qualifying purchases.

Zinsser 02774 PERMA-WHITE Mold & Mildew Proof Interior Paint, Quart, Eggshell White
Self-Priming formula – requires no sanding
As an affiliate, we earn on qualifying purchases.
As an affiliate, we earn on qualifying purchases.