
TL;DR
Moving your rig into a closet dramatically reduces noise, especially if you prioritize placement and acoustic treatment. Using enough absorbent material, sealing gaps, and managing ventilation make the space usable for recording and work without noise distractions.
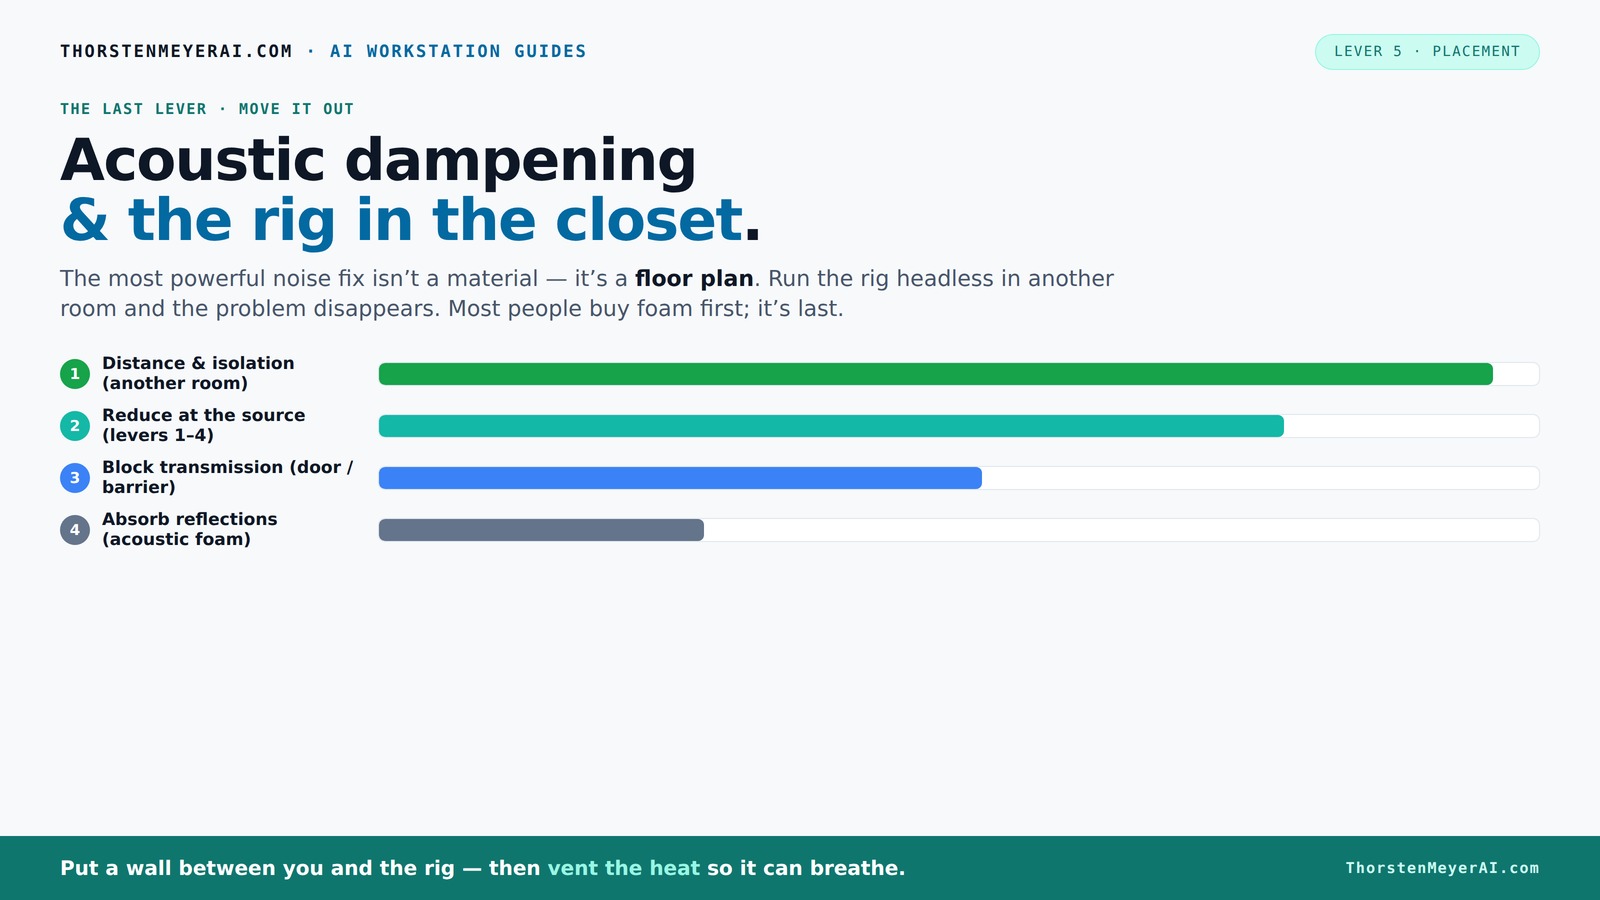
Acoustic dampening
& the rig in the closet.
The most powerful noise fix isn’t a material — it’s a floor plan. A rig you can’t hear because it’s in another room beats any amount of foam. Tap the approaches in Part 1 to see what actually works.
(another room)
(levers 1–4)
(door / barrier)
(acoustic foam)
Contain the noise, not the heat
Key Takeaways
- Moving your rig to a separate room or closet is the most effective noise reduction method.
- Ventilation is critical in a sealed closet; active airflow prevents overheating and noise escalation.
- Treat reflection points, especially behind the mic and near ceiling, with heavy textiles or foam.
- Seal gaps around the closet door with weatherstripping or blankets to cut sound leaks.
- Use enough absorbent material—aim for 20–30% wall coverage—to control echo without deadening your sound.

54 Pack Sound Proof Foam Panels |12"×12"×1" Quick-Recovery Soundproof Wall Panels | High Density Sound Dampening Panels for Home Studio |With Adhesive Stickers 270PCS
Superior Acoustic Treatment: These sound-absorbing foam panels effectively dampen echoes and reverberations for enhanced audio clarity and quality
As an affiliate, we earn on qualifying purchases.
As an affiliate, we earn on qualifying purchases.
Why Moving Your Rig Is the Easiest Way to Silence It
Placing your workstation in another room — a closet, basement, or spare corner — is the most effective way to reduce noise. Instead of fighting the sound, just keep it out of reach. Think of it like hiding a loud motorcycle in a garage — the noise no longer reaches your living space. For AI rigs or gaming PCs, this means you can keep the noise in a closet while still controlling everything remotely. A wired network connection or strong Wi-Fi makes this simple, and ventilation is the key to preventing overheating. Moving the machine away from you stops the noise from dominating your workspace and turns your room into a peaceful zone.

Audimute Soundproofing Acoustic Door Seal Kit - Door Sweep and Seal - (Standard Size)
Includes a Door Seal (3/16" x 1/2" x 25') and a Door Sweep (1/2" x 1.5" x 4').
As an affiliate, we earn on qualifying purchases.
As an affiliate, we earn on qualifying purchases.
The 'Rig in the Closet' Setup — Why Ventilation Is Your Biggest Challenge
Putting a hot, high-load machine into a closet sounds perfect — until it isn’t. Trapped heat will turn your closet into a sauna. A sealed space with no airflow will cause temperatures to soar, throttling your hardware and making fans roar louder. To keep things cool, you need active ventilation. A simple exhaust fan pulling hot air out, paired with a passive intake, can keep temperatures in check. For serious setups, consider custom soundproof cabinets with ducted airflow and thermostats. These are engineered to quiet your rig while preventing heat buildup, which is essential if you want your closet rig to run 24/7 without melting down.
For more detailed strategies, check out this guide on [reducing heat and noise in a high-powered AI workstation](https://thorstenmeyerai.com/reduce-heat-noise-ai-workstation/).

Focusound 52 Pack Acoustic Foam Panels 1" x 12" x 12" Sound Proof Foam Panles Soundproofing Noise Cancelling Wedge Panels for Home Office Recoding Studio with 300PCS Double-Side Adhesive
Soundproofing - Acoustic foam panels triangular grooves structure for better noise absorption, helps to reduce and absorb unwanted...
As an affiliate, we earn on qualifying purchases.
As an affiliate, we earn on qualifying purchases.
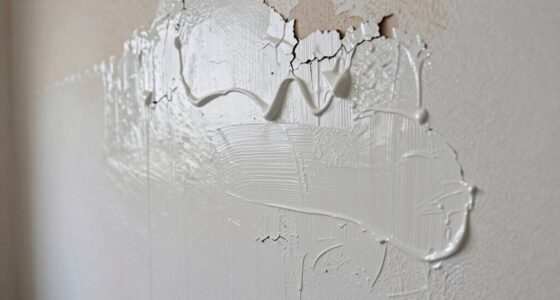
Acoustic Dampening Inside the Closet: What Works and What Doesn’t
Acoustic dampening isn’t just about blocking all sound; it’s about understanding how sound behaves within small spaces. Hard surfaces reflect sound waves, creating echoes and muddiness that can distort your recordings or make listening unpleasant. Heavy blankets, foam panels, and bass traps act as sound absorbers—they convert sound energy into heat, reducing reflections. To learn more about acoustic dampening, check out this resource on acoustic dampening and placement. But placement matters deeply. If you only cover the walls without treating reflection points behind your mic or above your head, echoes can still bounce around, undermining your efforts. Bass traps are especially effective in small, square closets because they target low-frequency buildup, which tends to linger and cause muddiness. The key is strategic coverage: focusing on reflection points and corners to balance absorption, ensuring your space sounds controlled but not overly dead. Over-treating can make your room sound unnatural—so understanding the tradeoff between absorption and liveliness is crucial for achieving a natural, clear sound.
For detailed tips on treatment, see [treat reflection points in a closet](https://thorstenmeyerai.com/reduce-heat-noise-ai-workstation/).

AC Infinity Ventilation Grille 5, for PC Computer AV Electronic Cabinets, Also Includes Hardware to Mount Two 80mm Fans
Designed to be installed into cabinets or walls to help increase ventilation
As an affiliate, we earn on qualifying purchases.
As an affiliate, we earn on qualifying purchases.
Sealing the Closet Door and Gaps — How to Stop Sound Leaks
The closet door is often the weakest link in soundproofing. For practical tips on sealing gaps and leaks, see this guide on treating gaps and leaks. Cracks, gaps, and vents let sound escape, defeating your dampening efforts. Seal these openings with weatherstripping, acoustic sealant, or hanging a thick moving blanket in front of the door. For a snug fit, add a draft stopper at the bottom. These small tweaks cut down sound leaks significantly, making your setup much quieter. Remember, even tiny gaps can leak enough sound to ruin your recordings or disturb others nearby.
For practical door sealing tips, see [treating gaps and leaks](https://soundproofcow.com/how-to-soundproof-closet/).
Should You Put Bass Traps in a Small Closet? Yes, But With Limits
Bass traps are designed to tame low-frequency buildup. In tiny closets, they can make a big difference, especially in corners where low-end waves tend to bounce and amplify. However, in a small, square space, too many traps can make the room sound dead — a muffled, boxy echo. The tradeoff is balancing bass control with maintaining some natural room liveliness. Placing bass traps in the corners helps absorb problematic low frequencies at their source, preventing them from bouncing around excessively. Treating the ceiling’s reflection points also reduces flutter echoes that can muddy recordings. The goal is to achieve a balanced sound—enough bass trapping to prevent muddiness but not so much that your space becomes unnaturally dead, which can affect vocal clarity and make editing more difficult. Carefully choosing where and how many traps to deploy is essential to maintain an accurate, natural sound environment.
See [bass trapping in small spaces](https://thorstenmeyerai.com/low-noise-pc-cases-airflow/) for more details.
How Much Wall Coverage Is Enough for a Closet? The Truth
Covering 20–30% of your closet walls with absorption material usually hits the sweet spot—striking a balance between reducing echo and maintaining some natural sound characteristics. For detailed coverage recommendations, visit this page on coverage tips. Less than that, and reflections bounce around, creating muddiness; more than that, and the room can sound unnaturally dead, diminishing the liveliness of recordings. The implication is that too much absorption can rob your voice of its natural resonance, making it sound flat or muffled. For more insights on acoustic treatment, see this article on acoustic dampening and placement. Conversely, too little leaves unwanted reflections and echoes. For vocals, higher coverage helps clarity and presence; for gaming or AI work, moderate coverage reduces distracting echoes. Achieving the right coverage involves understanding your specific needs and the space’s acoustics. Using a combination of heavy blankets, foam panels, or DIY solutions like mattress toppers allows for flexible, cost-effective coverage adjustments to optimize sound quality without over-treatment.
For a detailed breakdown, see [coverage recommendations](https://thorstenmeyerai.com/reduce-heat-noise-ai-workstation/).
Dealing with the Closet Door and Gaps — Keep the Sound Inside
The closet door is often the weak point for sound leakage. Seal cracks with weatherstripping or acoustic sealant, and add a heavy blanket or acoustic curtain in front. Hanging a thick moving blanket can absorb sound and seal gaps around the door frame. These simple DIY fixes can cut noise leaks by over 50%, making your closet a much quieter space for recording or working.
Check out [treating gaps and leaks](https://soundproofcow.com/how-to-soundproof-closet/) for step-by-step tips.
Can You Use Moving Blankets Instead of Professional Acoustic Panels?
Yes. Moving blankets are a popular, budget-friendly option for DIY closet studios. They absorb reflections and dampen echo effectively, especially when layered. Hang them on walls, ceiling, or even drape over furniture to soften sound. While they don’t technically block sound from escaping, they significantly reduce internal reflections, making your voice clearer and your space less echoey. The key is understanding that blankets primarily address internal sound behavior—they won’t prevent sound from leaking out, so for external noise concerns, additional sealing or insulation may be necessary. Combining blankets with proper placement and sealing provides an effective, cost-efficient solution for small spaces.
For the best results, combine blankets with strategic mic placement and door sealing. More info in [DIY dampening](https://soundproofcow.com/how-to-soundproof-closet/).
How to Avoid a Dead, Muffled Sound in Your Closet Booth
Over-absorbing your space can lead to a dull, lifeless sound that hampers clarity and naturalness. To prevent this, treat reflection points selectively—focusing on areas that cause unwanted echoes—while leaving some open space to preserve room liveliness. Incorporate diffusers or reflective surfaces like a desk or a light panel to bounce some sound back into the room, maintaining a sense of space. Positioning your mic away from heavily dampened walls and avoiding uniform coverage helps retain the natural dynamics of your voice. The goal is to strike a balance: enough absorption to control echo but enough openness to keep your recordings sounding natural and lively. This balance ensures your voice remains clear, engaging, and easy to edit, rather than dull or muffled.
See [controlling dead sound](https://thorstenmeyerai.com/reduce-heat-noise-ai-workstation/) for practical tips.
Picking the Right Microphone for a Closet Setup
In a small, treated closet, a cardioid microphone is your best bet. It focuses on your voice and rejects much of the room’s reflections, giving clearer recordings. Dynamic mics are less sensitive to room noise, making them ideal for close-up use. Condenser mics can pick up more detail but also more room sound, so they need careful placement and more treatment. Experiment with mic placement to find the sweet spot — usually 6-12 inches from your mouth and slightly off-axis.
More advice on mic choices is available in [best mics for home studios](https://thorstenmeyerai.com/reduce-heat-noise-ai-workstation/).
Managing Cables, Power, and Ventilation in a Tiny Rig
In small closets, clutter can quickly turn into a heat trap or a sound leak. Use organized cable management — clips, sleeves, and under-desk trays — to keep everything tidy. Power strips with surge protection are a must, but place them away from sensitive areas to prevent noise pickup. Ventilation fans should be quiet and ducted if possible. Proper airflow prevents overheating, noise, and moisture buildup, keeping your rig healthy and your space quiet. Overlooking ventilation can lead to thermal throttling, hardware failure, or increased noise from fans working harder to cool your system. Proper management ensures your setup remains both cool and quiet, avoiding the tradeoffs of overheating and excess noise that can compromise your work or recordings.
Check out [building a quiet, cool rig](https://thorstenmeyerai.com/reduce-heat-noise-ai-workstation/) for more tips.