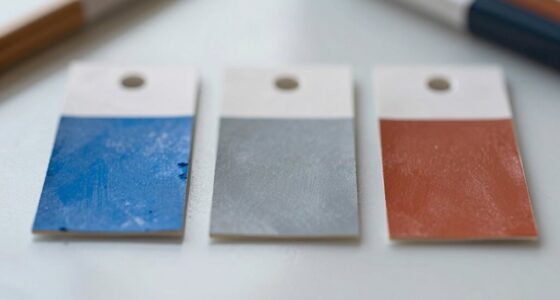
Primer flashing makes finished walls look uneven because it reveals surface imperfections like dents, cracks, and dips. When the primer isn’t applied smoothly, it pools in low spots and becomes thin over high areas, causing blotchy patches. This uneven layer prevents light from reflecting uniformly, making bumps and flaws more noticeable. To achieve a flawless finish, understanding how surface prep affects primer application is key—you’ll discover more tips that can help improve your results.
Key Takeaways
- Uneven surfaces cause primer to pool in low spots and thin on high areas, leading to flashing.
- Surface imperfections become more visible after priming, highlighting dips and ridges.
- Poor surface prep results in inconsistent primer coverage, creating visual patchiness.
- Irregular primer application affects light reflection, making walls appear uneven.
- Lack of smoothing prior to priming reduces adhesion and amplifies surface flaws in the finished wall.

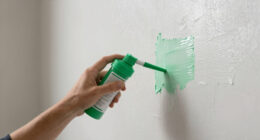
When applying primer flashing on uneven walls, it’s vital to address surface irregularities beforehand to guarantee proper adhesion and a smooth finish. If you skip this step, the primer might not adhere evenly across the surface, leading to a rough or patchy appearance after painting. Uneven surfaces can cause the primer to pool in low spots or thin out on high points, which affects how the final coat looks. This uneven application not only impacts aesthetics but can also compromise the durability of your paint job. Properly prepared walls promote better paint adhesion, ensuring that the paint bonds securely, reducing peeling or cracking over time. Additionally, addressing surface flaws enhances moisture resistance because a uniform layer of primer acts as a barrier, preventing moisture from seeping into the wall material. One common reason primer flashing makes finished walls look uneven is that it highlights surface imperfections rather than conceals them. When you apply primer over a rough or bumpy wall, the primer itself fills in some of the irregularities but also emphasizes others. As a result, the final paint may appear blotchy or patchy, especially if you don’t sand or smooth out the surface before priming. This visual inconsistency becomes more noticeable when light hits the wall, revealing dips and ridges that weren’t obvious before. The uneven surface also impacts how light reflects, making the wall look less uniform and more textured than intended. Additionally, understanding surface preparation is crucial for achieving a smooth, professional finish. Proper surface preparation not only improves the visual outcome but also enhances primer adhesion, making the entire painting process more successful. Furthermore, primer flashing can distort the perceived smoothness of your finished wall because different surface areas absorb or reflect light differently. This variation can make the surface seem uneven, even if the underlying wall is relatively flat. When the primer isn’t applied correctly or if the wall surface isn’t properly prepared, these issues become more pronounced. To avoid this, you should first fill any holes, cracks, or dents and sand the surface until it’s as smooth as possible. Doing so creates a better foundation for the primer, which helps it spread evenly. Proper surface preparation is an essential step in achieving a flawless finish, and neglecting it can undermine the entire painting process. This preparation not only improves the visual outcome but also enhances the primer’s ability to provide moisture resistance, protecting your walls from potential damage caused by dampness or humidity. Recognizing the importance of surface smoothness can significantly improve your overall painting results.

Gorilla Heavy Duty Fast Drying Wall Repair Spackling & Primer, 16 fl oz, White, Lightweight Filler for Holes & Cracks, Indoor/Outdoor, Paintable Smooth Finish
HEAVY DUTY WALL REPAIR: Strong and durable repairs on walls, ceilings, cracks and both small and large holes…
As an affiliate, we earn on qualifying purchases.
As an affiliate, we earn on qualifying purchases.
Frequently Asked Questions
Can Primer Flashing Be Applied Over Existing Wall Paint?
Yes, you can apply primer flashing over existing wall paint, but proper surface preparation is crucial for good paint adhesion. First, clean the wall thoroughly to remove dirt, grease, or loose paint. Lightly sand the surface to create a rough texture, helping the primer stick better. This guarantees the primer bonds well, leading to a smooth, even finish and preventing uneven walls after painting.
What Types of Primer Flashing Are Best for Uneven Surfaces?
For uneven surfaces, you should choose flexible primer flashing, like asphalt-based or rubberized types, which accommodate surface irregularities. Before application, guarantee proper surface preparation by cleaning, removing loose paint, and repairing cracks. Check material compatibility to prevent issues. Flexible flashing adheres better to uneven surfaces, creating a smooth, even finish. This approach helps prevent the appearance of uneven walls and ensures a durable, professional-looking result.
How Long Should Primer Flashing Dry Before Finishing the Wall?
Imagine the primer flashing as a fresh coat of paint on a canvas — you want it to dry fully before adding the final strokes. Typically, you should wait at least 24 hours for surface preparation and application techniques to set. This drying time guarantees the flashing bonds properly, preventing unevenness in your finished wall. Patience here guarantees a smooth, professional look once you apply your finishing coat.
Does Primer Flashing Affect the Durability of the Wall Finish?
Primer flashing enhances your wall’s durability by improving surface adhesion and moisture resistance. When properly applied, it creates a stronger bond between the wall surface and finishing materials, reducing the risk of peeling or cracking. Additionally, primer flashing helps prevent moisture infiltration, which can cause damage over time. As a result, your finished wall remains more resilient, maintaining its appearance and structural integrity longer, even in challenging weather conditions.
Are There Alternative Methods to Prevent Uneven Wall Surfaces?
Think of your wall as a canvas; proper surface preparation is like priming it for painting. To prevent uneven surfaces, focus on cleaning, sanding, and patching any imperfections. Ensuring material compatibility between your primer, flashing, and paint creates a smooth, cohesive finish. These steps help you avoid the pitfalls of uneven walls, giving your project a professional look without relying solely on primer flashing.

YNZDRWA 8 Pack Sanding Sponge, Washable and Reusable Sanding Blocks for Drywall Wood Metal Furniture, 60/80/120/220 Grit Sandpaper Block Assortment
【ASSORTED GRIT SANDING BLOCKS】Includes 8 sanding blocks in 4 grits, from coarse to superfine specifications in 60/80/120/180/220 grit,…
As an affiliate, we earn on qualifying purchases.
As an affiliate, we earn on qualifying purchases.
Conclusion
If you notice uneven walls after primer flashing, don’t get discouraged. For example, imagine applying primer on a textured wall only to find patches that look different in color and smoothness. This is often caused by improper flashing techniques or surface prep. To avoid this, make certain your surface is clean, dry, and evenly primed. Taking these steps can help you achieve a smooth, professional finish, making your final walls look flawless rather than uneven.

Drywall Repair Kit Drywall Hole Repair Patch Kits Wall Spackle Repair Paste with 8.5OZ White Wall Repair Putty with Scraper, Wall Surface Hole Fill Quick and Easy Solution (1Pack)
Complete Repair Kit: Contains 1 pieces repair putty(8.5oz), 2 inch wall repair patches(2pcs), 4 inch wall repair patches(1pcs),…
As an affiliate, we earn on qualifying purchases.
As an affiliate, we earn on qualifying purchases.
4-Inch Rubber Brayer Roller for Printmaking, Great for Gluing Application Also. (Original Version)
FEATURES: The drum is made of high quality rubber. It is durable and elastic. It can be well…
As an affiliate, we earn on qualifying purchases.
As an affiliate, we earn on qualifying purchases.