
Performing a small patch test before repainting helps you spot surface issues like stains, previous paint problems, or uneven coverage early on. It allows you to check how well the new paint adheres, matches your desired color, and reacts with the existing finish. This simple step can prevent major rework, saving you time and effort. Keep going to discover how a tiny patch can make your entire repainting project smoother and more successful.
Key Takeaways
- Detects surface issues early, preventing extensive rework and saving time during full repainting projects.
- Ensures proper paint adhesion and color matching before committing to large areas.
- Reveals surface conditions needing correction, reducing the risk of future paint failure.
- Confirms surface readiness, avoiding wasted effort on unsuitable surfaces or improper preparation.
- Facilitates adjustments in paint choice or preparation, leading to a smoother, more durable finish.

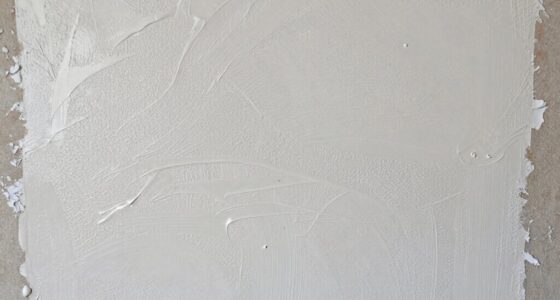
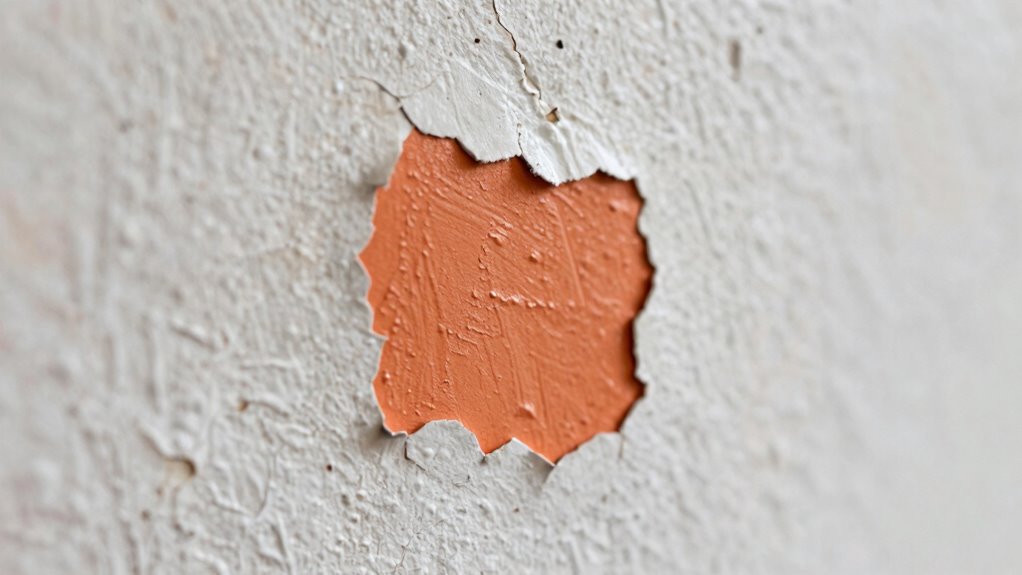
Before tackling a full repaint, it’s essential to perform a tiny patch test to guarantee the new paint will adhere properly and match your existing finish. This small step can prevent a lot of headaches later, especially if you’re dealing with tricky colors or finishes. When it comes to paint preparation, taking the time to do a patch test helps you identify potential issues early, saving you hours of rework. It allows you to see how the new paint interacts with the surface and whether it blends seamlessly with the current color. Without this vital step, you risk ending up with mismatched patches or paint that doesn’t stick, forcing you into a larger, more complicated repaint job.
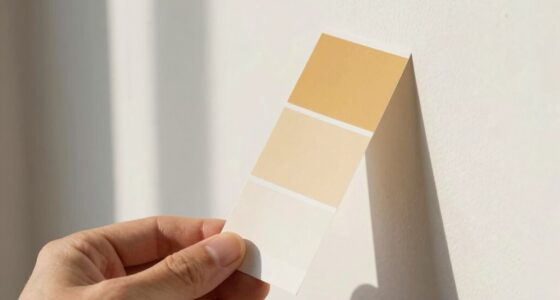
Color matching is key to a professional-looking result, and a tiny patch test gives you the chance to fine-tune your color choices before committing to the entire surface. You can compare the new paint against the existing finish, checking for hue, sheen, and coverage. If the color isn’t quite right, you can adjust your formula or choose a different shade altogether without wasting significant time or materials. This process also reveals whether the existing surface has underlying issues, such as stains or previous paint that might bleed through or cause uneven coverage. Spotting these problems early lets you address them with appropriate primer or surface prep, ensuring the final finish looks smooth and cohesive.
When you’re preparing to repaint, don’t skip the step of paint preparation. Proper surface cleaning, sanding, and priming create the ideal foundation for your new coat. A patch test allows you to see how well your prepared surface accepts the paint, confirming that your surface prep was sufficient. If the paint beads up, flakes, or shows uneven coverage during the test, you know to revisit your preparation steps before proceeding. This small effort can prevent the frustration of repainting entire sections due to poor adhesion or color mismatches. Additionally, understanding the importance of paint adhesion and how it influences the durability of your finish can help you make better preparation choices before starting your project. Performing a patch test also provides insight into the surface condition, helping you identify any issues that may need to be addressed for optimal results. Recognizing surface issues early allows you to take corrective actions, ultimately saving time and resources. Furthermore, paying attention to surface porosity can help you choose the right primer or sealer to improve paint adherence and coverage, and reviewing surface chemistry can guide you in selecting compatible paint types for your surface.

Complete Paint Removal Test Kit – Find the Right Paint Remover for Your Project – Kit Includes 8oz Samples of Peel Away 1, Smart Strip Advanced, & Smart Strip PRO, Laminated Paper & Accessories
INCLUDED IN EVERY KIT – 8oz samples of Smart Strip Advanced, Smart Strip Pro, & Peel Away 1,…
As an affiliate, we earn on qualifying purchases.
As an affiliate, we earn on qualifying purchases.
Frequently Asked Questions
How Long Should the Patch Test Area Be Left Before Assessing?
You should leave the patch test area for at least 24 to 48 hours before evaluating the results. This allows the paint to dry completely and helps you gauge color matching accurately. Proper surface preparation is essential beforehand—clean and sand the surface thoroughly. Checking the patch after this period ensures you see how the paint reacts to your surface, making it easier to match colors and avoid costly repainting later.
Can the Patch Test Be Used on All Types of Paint?
Like a detective solving a mystery, you can use the patch test on most paints, but it’s not foolproof for all types. Check paint compatibility first, especially with specialty finishes like enamel or latex. Keep in mind that drying time varies, so wait the recommended period before evaluating results. This way, you avoid surprises and guarantee your repairs blend seamlessly, saving you time and frustration.
What Are the Signs That the Patch Test Indicates a Repaint Is Necessary?
If the patch test indicates poor paint compatibility or peeling, it’s a sign you need to repaint. Look for signs like bubbling, cracking, or uneven texture, which suggest that surface preparation wasn’t sufficient or the existing paint isn’t compatible. These issues show that the current paint isn’t adhering properly, making a repaint necessary. Proper surface preparation and choosing compatible paint are key to long-lasting results and avoiding future problems.
Is There a Specific Temperature or Humidity Range for the Patch Test?
Research shows that improper environmental conditions cause over 60% of paint failures. For the patch test, keep temperatures between 50-85°F and humidity below 85% for accurate results. These ranges guarantee proper paint compatibility and adhesion. Too cold, and paint won’t cure properly; too humid, and moisture can interfere. Maintaining these environmental conditions helps you get reliable test results, preventing costly repainting and ensuring a long-lasting finish.
How Often Should the Patch Test Be Repeated for Different Paint Batches?
You should repeat the patch test whenever you get a new paint batch to guarantee color matching remains consistent. Do it after surface preparation and before full application, ideally 24 hours apart, to check for any color or texture differences. Regular testing helps catch inconsistencies early, saving you time and effort on rework. Always consider environmental factors like temperature and humidity, which can influence the test’s accuracy.
Permabond 2K Surface Preparation Primer, Dual Component, For Metal, Glass, Plastic, 20 Gram
DUAL PURPOSE: Functions as both a visual indicator of surface preparation quality and an adhesion promoter for stronger…
As an affiliate, we earn on qualifying purchases.
As an affiliate, we earn on qualifying purchases.
Conclusion
By taking this tiny patch test, you hold the key to a weekend of peace, not chaos. It’s a small step that acts as a shield, guarding your space from costly mistakes. Like a whisper before the storm, it signals whether your colors will dance or clash. Trust this simple ritual—your future self will thank you. With patience now, you craft a harmony that lasts, turning mere paint into a masterpiece of calm and confidence.

COLOR MUSE 3 Portable Color Matching and Paint Scanner Device – Wireless Digital Colorimeter Sensor for Accurate Color and Sheen Detection – Pocket-Sized, Easy Carry, Indoor/Outdoor Projects – Black
COLOR & SHEEN MATCHING TECHNOLOGY: Color Muse 3 measures both color and sheen in one scan using a…
As an affiliate, we earn on qualifying purchases.
As an affiliate, we earn on qualifying purchases.

Campanelli Pro Series Stain Remover Point & Spray Carpet & Upholstery Cleaner for Pet Stains & Odors, Food Stains, Wine, Coffee, Dirt and More! – 18oz Aerosol
Easy Point-and-Spray Application: The powerful aerosol stream delivers targeted coverage while standing, treat stains quickly without bending, rubbing…
As an affiliate, we earn on qualifying purchases.
As an affiliate, we earn on qualifying purchases.