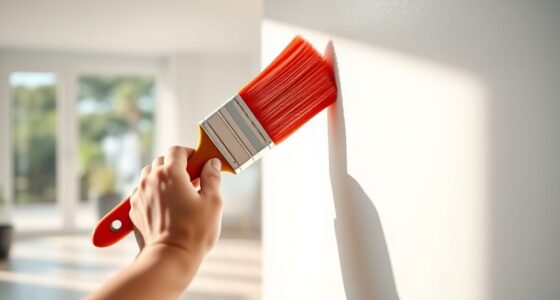
To wallpaper textured walls without frustration, start by cleaning and lightly sanding deep textures to create a smoother surface. Apply a primer suited for textured surfaces to help the adhesive bond better. Use a heavy-duty wallpaper adhesive and apply it evenly, focusing on textured areas. Carefully smooth out air bubbles and wrinkles with a wallpaper brush or smoother. With proper preparation and techniques, you’ll achieve a professional finish—if you want to master these steps, you’ll find more helpful tips here.

Get furniture and decor delivered free with Prime
- Fast, free delivery on millions of items
- Prime Video, Amazon Music and more included
- Member-only deals all year
Key Takeaways
- Lightly sand or fill deep textures to create a smoother surface for better wallpaper adhesion.
- Use a high-quality primer designed for textured surfaces to seal and prepare the wall.
- Choose a heavy-duty, textured-surface-friendly wallpaper adhesive for stronger bonding.
- Apply adhesive evenly and press wallpaper firmly, smoothing out air bubbles and wrinkles carefully.
- Allow sufficient curing time and avoid stressing the wall during drying for a durable finish.

Applying wallpaper to textured walls can seem challenging, but with the right techniques, you can achieve a smooth, professional finish. The key is to start with proper wall surface preparation and use the appropriate wallpaper adhesive. Textured surfaces often pose a challenge because the uneven surface can cause the wallpaper to bubble, peel, or not adhere properly. To avoid frustration, you need to prepare your walls thoroughly before applying the wallpaper.
Proper surface prep and the right adhesive ensure a smooth, lasting wallpaper finish on textured walls.
First, you should clean the wall surface to remove dust, grease, or any loose debris. Use a mild cleaner and a sponge to wipe down the walls, ensuring they’re dry before moving forward. Next, assess the texture. Deep textures such as heavy stucco or popcorn finishes may need more preparation. For these, you might consider lightly sanding or filling in the deepest parts with joint compound to create a more even surface. This step isn’t about making the wall perfectly smooth but reducing the depth of the texture enough to help the wallpaper adhere better.
Once the surface is prepared, it’s essential to prime the wall. A good primer will help seal the texture and create a better bonding surface for the wallpaper adhesive. When selecting wallpaper adhesive, choose one formulated specifically for textured surfaces or heavy-duty applications. These adhesives tend to have stronger bonding agents that can grip uneven surfaces more effectively. Follow the manufacturer’s instructions meticulously, mixing the adhesive to the right consistency, and apply it evenly with a roller or brush.
Applying wallpaper to textured walls requires patience and precision. Use a wallpaper brush or smoother to press the paper firmly onto the wall, especially in textured areas, to ensure good contact. Be prepared to work slowly and carefully, smoothing out air bubbles and wrinkles as you go. If necessary, apply additional adhesive behind the wallpaper with a roller to improve adhesion in stubborn spots. Understanding the importance of surface preparation can make all the difference in achieving a professional look, especially when working with difficult textures that require extra attention. Proper surface preparation includes selecting the right types of adhesive to ensure durability and longevity. Additionally, considering wall repair techniques can help tackle persistent unevenness and further improve the final result.
Finally, trim any excess wallpaper neatly and allow it to cure fully as per the adhesive’s instructions. Avoid placing furniture or excessive stress on the walls during drying. With careful wall surface preparation and the right wallpaper adhesive, you’ll find that textured walls can be transformed beautifully, without frustration or uneven results. The effort you put into preparation will pay off, giving you a polished look that withstands the test of time.
heavy-duty wallpaper adhesive for textured walls
As an affiliate, we earn on qualifying purchases.
As an affiliate, we earn on qualifying purchases.
Frequently Asked Questions
Can I Wallpaper Over Heavily Textured or Uneven Surfaces?
Yes, you can wallpaper over heavily textured or uneven surfaces, but proper surface preparation is essential. First, smooth out the surface by sanding or applying a primer designed for textured walls. Choose a heavy-duty adhesive that works well on rough surfaces to guarantee proper adhesion. Using the right primer and adhesive helps the wallpaper adhere smoothly, preventing bubbles and peeling, even on challenging surfaces.
What Types of Wallpaper Are Best for Textured Walls?
You should take into account vinyl or non-woven wallpapers for textured walls, as they’re flexible and durable. Patterns to consider include textured or embossed designs that can hide surface irregularities. Make sure to choose proper adhesive, like heavy-duty or specialized wallpaper glue, to guarantee it sticks well. These options help you achieve a seamless look while accommodating the wall’s texture, making your wallpaper project much easier and more successful.
How Do I Remove Wallpaper From Textured Surfaces?
Removing wallpaper from textured surfaces can feel like peeling away a stubborn layer of history. To do it effectively, start with gentle wallpaper removal techniques, using a scoring tool to create small holes that help the removal solution penetrate. Next, apply a wallpaper stripper or a mixture of warm water and vinegar. Surface preparation is key—ensure you’re patient and thorough, so your walls are ready for a fresh coat or new wallpaper.
Do I Need Special Tools for Applying Wallpaper on Textured Walls?
You don’t need special tools, but proper wall preparation and the right wallpaper adhesive are crucial. Start by cleaning and smoothing the surface to guarantee good adhesion. Use a high-quality adhesive designed for textured walls, which helps the wallpaper stick better. A smoothing tool or wallpaper brush can help press the wallpaper into the textured surface, minimizing air bubbles and wrinkles. Proper prep and adhesive make your wallpaper last longer and look smooth.
How Long Does Wallpaper Last on Textured Walls?
Wallpaper on textured walls typically lasts 5 to 15 years, depending on the wallpaper type and maintenance. You can prolong its durability by choosing high-quality materials and properly preparing your wall surface. Regular textured wall maintenance, like gentle cleaning and avoiding excessive moisture, helps prevent peeling or damage. Keep an eye on the condition of your wallpaper, and address issues early to guarantee it stays looking fresh longer.
As an affiliate, we earn on qualifying purchases.
Conclusion
Now that you know how to tackle textured walls, you’ll find wallpapering less intimidating. Remember, about 60% of homeowners report frustration with textured surfaces, but with the right techniques, you can achieve a smooth, beautiful finish. Don’t let the texture deter you—patience and proper prep are key. Before you know it, your walls will look stunning, and you’ll be proud of your DIY success. Happy wallpapering!
As an affiliate, we earn on qualifying purchases.
wall preparation tools for textured walls
As an affiliate, we earn on qualifying purchases.
As an affiliate, we earn on qualifying purchases.
Halloween Picks
halloween
As an affiliate, we earn on qualifying purchases.