Installing wallpaper on textured walls can be challenging but manageable with proper preparation. Expect uneven surfaces that may need smoothing, sanding, or priming to guarantee good adhesion. Light textures like orange peel are easier than heavy textures like popcorn or stucco. Choosing the right wallpaper and using quality adhesive helps achieve a smooth look. If you want tips on overcoming common issues and creating a flawless finish, keep exploring how to get professional results.
Key Takeaways
- Textured walls may require smoothing, sanding, or priming to ensure proper wallpaper adhesion and a smooth finish.
- Heavily textured surfaces might need texture removal or specialized prep to prevent uneven application.
- Light textures like orange peel can often be wallpapered directly with appropriate adhesive and primer.
- Using high-quality, suitable wallpaper materials and tools helps achieve a professional, long-lasting result.
- Regular surface preparation and proper technique are essential to minimize bubbles, seams, and peeling over time.

Roman Ultra Clear Strippable Wallpaper Adhesive for Most Types of Wallpaper, Clear PRO-880, 32 Ounce, 80 Sq. Ft.
VERSATILE – Ideal for hanging most types and weights of wallcoverings including vinyl, solid-vinyl, non-woven, paste-the-wall, paste-the-paper, and…
As an affiliate, we earn on qualifying purchases.
As an affiliate, we earn on qualifying purchases.
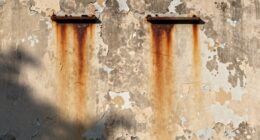
Understanding Different Types of Wall Textures

Understanding different types of wall textures is essential before you start wallpapering, because the texture can affect how well the wallpaper adheres and looks. Knowing the textured wall types helps you select the right wallpaper and avoid issues later. For example, heavily textured walls like popcorn or heavily stuccoed surfaces may require special preparation or different wallpaper types, while lightly textured walls, such as orange peel or knockdown textures, are usually more compatible. Wallpaper compatibility varies depending on the texture; some wallpapers cling better to smooth or lightly textured surfaces. By identifying your wall’s texture, you can choose a wallpaper that adheres properly and maintains its appearance over time, ensuring a professional-looking finish. Additionally, understanding wall texture characteristics can help you determine if additional prep work, like sanding or applying a primer, is necessary for optimal results.

Zinsser 286258 Bulls Eye 1-2-3 All Surface Primer, Quart, Gray
Interior/Exterior use on new or previously painted drywall, concrete, wood, masonry, metal and glossy or difficult surfaces
As an affiliate, we earn on qualifying purchases.
As an affiliate, we earn on qualifying purchases.
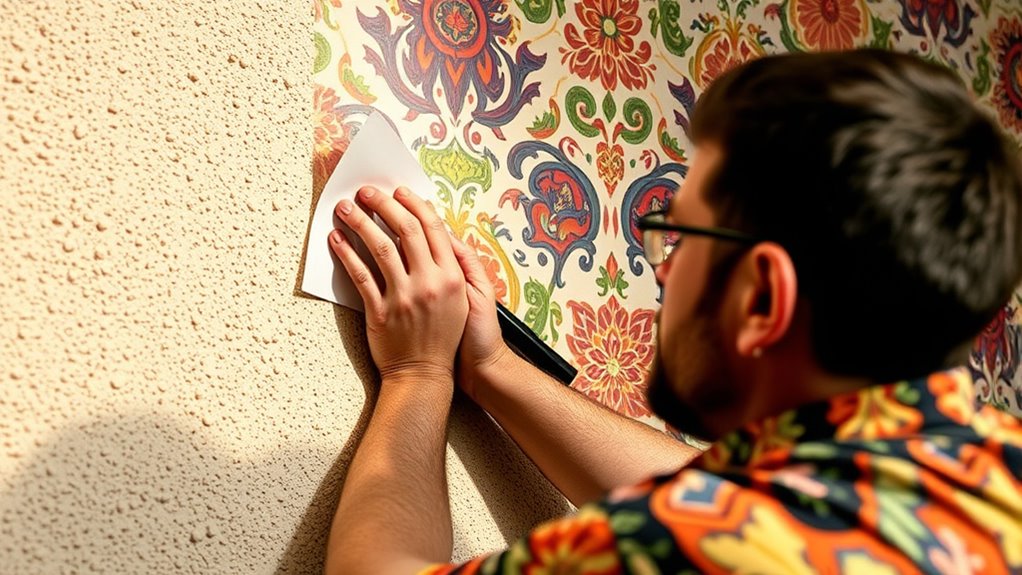
Preparing Textured Walls for Wallpaper Application

Preparing textured walls for wallpaper application is a crucial step to guarantee the wallpaper adheres properly and looks smooth. If your wall has a heavy or uneven texture, wall texture removal may be necessary to create a better surface. Use a putty knife or sanding tools to smooth out rough areas or shallow textures. Once the surface is even, apply a high-quality primer designed for textured surfaces. Primer helps seal the wall and promotes better adhesion of the wallpaper. Be sure to let the primer dry completely before proceeding. This process ensures the wallpaper sticks securely and reduces the risk of bubbling or peeling later. Proper preparation, including texture removal and primer application, is key to achieving a professional-looking finished wall. Additionally, understanding how contrast ratio affects image quality can help you select the right projector for your space, ensuring vibrant and detailed visuals. Regular maintenance of your walls, such as keeping them clean and promptly repairing any damage, can also contribute to the longevity and appearance of your wallpaper. Using appropriate wall preparation techniques can further enhance the final result and durability of your wallpaper installation. Incorporating sound healing principles into your wall treatment can even influence the ambiance and promote relaxation in your space.

9" Drywall Sander with 360° Swivel Head – Premium Manual Hand Sander for Walls & Ceilings – Hook & Loop Sanding Pad for Smooth Wall Cleaning, Polishing & Drywall Repair
Versatile Sanding Tool – This 9-inch drywall pole sander is perfect for large-area sanding, making it ideal for…
As an affiliate, we earn on qualifying purchases.
As an affiliate, we earn on qualifying purchases.
Choosing the Right Wallpaper for Textured Surfaces
After smoothing out the wall surface and applying primer, selecting the right wallpaper becomes the next important step. To guarantee a good fit for textured surfaces, consider these factors:
Choosing textured wallpapers that complement your wall’s surface ensures a seamless, stylish finish.
- Fabric patterns – Choose designs with subtle textures or small patterns that won’t clash with the wall’s surface. Incorporating vintage decor can also add to the rustic charm of your farmhouse bedroom while complementing textured walls. Additionally, selecting appropriate materials can facilitate better adhesion and durability on uneven surfaces. Being aware of the regional resources available can help you find specialized wallpaper options suited for textured walls.
- Color coordination – Opt for neutral or complementary colors that blend seamlessly with your room’s palette.
- Material flexibility – Select wallpapers made from vinyl or non-woven materials that can better conform to textures. These materials are also easier to install on uneven surfaces.
- Design scale – Pick smaller patterns or motifs to avoid overwhelming the textured backdrop.
- When choosing the right wallpaper, consider options like waterproof materials which are especially suitable for textured or moisture-prone surfaces.

15.7" X 118" Black Silk Wallpaper Embossed Self Adhesive Peel and Stick Wallpaper Contact Paper Removable Waterproof Kitchen Vinyl Wrap Cabinet Furniture Textured Renter Friendly Wall Gift Paper
Black Wallpaper–Embossing Process- It can effectively reduce the generation of bubbles. The solid color gives the room a…
As an affiliate, we earn on qualifying purchases.
As an affiliate, we earn on qualifying purchases.
Techniques for Applying Wallpaper on Textured Walls
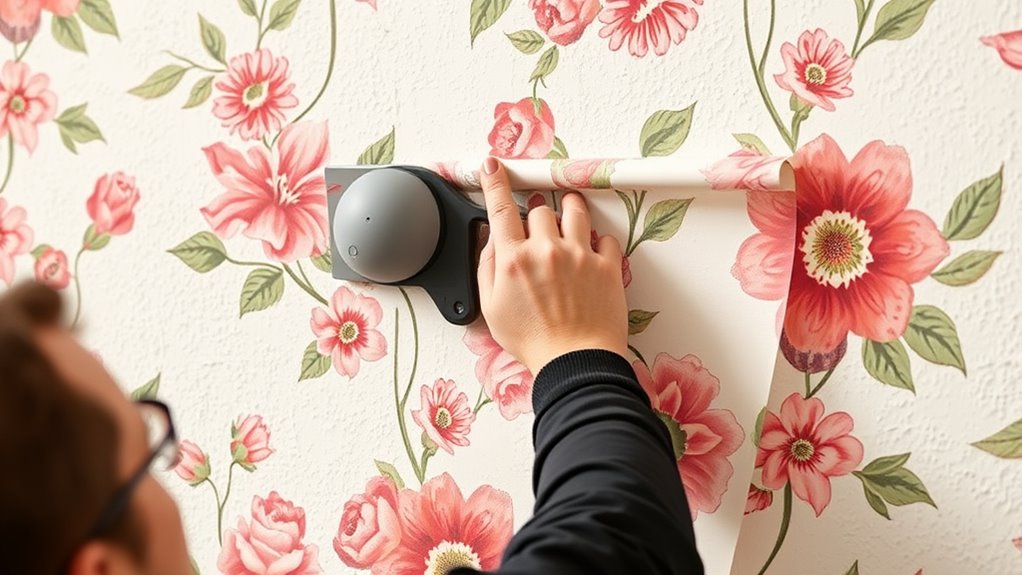
Applying wallpaper to textured walls requires a careful approach to guarantee it adheres properly and looks seamless. Start by preparing your surface, ensuring it’s clean and smooth where possible. Use a primer suitable for textured surfaces, which helps the wallpaper grip better. For intricate textured finishes, consider applying a lining paper first for a smoother surface. When hanging, choose a wallpaper with a flexible backing for better conformity to uneven surfaces. You can also incorporate wall painting as a decorative finish before wallpapering to add depth. Use the following table to understand key techniques:
| Technique | Purpose |
|---|---|
| Pasting in sections | Prevents bubbles and uneven adhesion |
| Smoothing tools | Eliminates air pockets |
| Trimming excess | Ensures clean edges |
Additionally, employing sound design techniques such as smoothing tools can be likened to achieving a seamless visual finish in wallpaper application, ensuring that all air pockets and imperfections are eliminated for a flawless appearance. Incorporating proper surface preparation can significantly improve the overall result. Furthermore, understanding the cyber threat landscape and utilizing AI security technologies can help protect your digital assets during the renovation process, especially when sharing project details online.
Common Challenges and How to Overcome Them

You might notice that uneven surfaces make wallpapering more difficult, but proper preparation can guarantee a smoother out these imperfections. Adhesion issues often occur on textured walls, so choosing the right adhesive and applying it carefully is essential. Addressing these challenges early ensures a cleaner, longer-lasting finish. Using self-adhesive wallpaper options can also help improve adhesion on challenging surfaces. Additionally, understanding AI in Education advancements can inform better strategies for tackling installation challenges through innovative solutions. For instance, digital tools and simulations can assist in visualizing the final look and planning the best approach before starting the installation, leveraging technology-assisted methods to improve accuracy and efficiency.
Uneven Surface Preparation
Uneven surfaces are one of the most common challenges when installing wallpaper on textured walls. To guarantee a smooth finish, proper surface leveling is essential. Start by evaluating your wall’s texture and identify high or low spots. Use a putty or joint compound to fill in gaps and sand down protrusions, creating a more uniform surface. When it comes to primer selection, choose a high-quality, bonding primer that can seal the textured surface and improve adhesion. Proper surface preparation ensures better adhesion and results in a more professional-looking finish. Additionally, understanding the importance of surface leveling techniques can help achieve optimal results. Here are key steps to follow:
- Clean the wall thoroughly to remove dust and debris.
- Fill any depressions or bulges with appropriate filler.
- Sand the surface smoothly, paying attention to the textured areas. Incorporating proper sanding methods can further enhance the surface uniformity.
- Apply a suitable primer to create a level, sealed base for wallpaper adhesion. Being aware of surface preparation strategies can significantly impact the final outcome.
Adhesion Difficulties
After smoothing out the textured surface with filler, sanding, and priming, the next hurdle is guaranteeing the wallpaper adheres properly. Adhesion difficulties often stem from surface irregularities that prevent the adhesive from bonding well. To overcome this, choose a high-quality, heavy-duty adhesive designed for textured surfaces. Applying a primer or a specialized bonding agent can also improve adhesion by sealing the surface and filling in minor surface irregularities. Make sure to press the wallpaper firmly, especially over rough areas, to ensure full contact. If you notice bubbles or peeling, reapply adhesive to problem spots and smooth out the wallpaper immediately. Taking these steps helps guarantee your wallpaper stays in place despite surface irregularities, preventing future adhesion issues. Additionally, selecting the right type of wallpaper suited for textured walls can significantly improve the overall adhesion success. Using an airless paint sprayer for applying primer or adhesive can also provide a more even coat, further enhancing adhesion on challenging surfaces. Incorporating surface preparation techniques can further reduce the risk of adhesion problems and ensure a durable finish. For added confidence, understanding the importance of surface texture can help you choose the most effective preparation and application methods.
Tips for Achieving a Seamless Finish
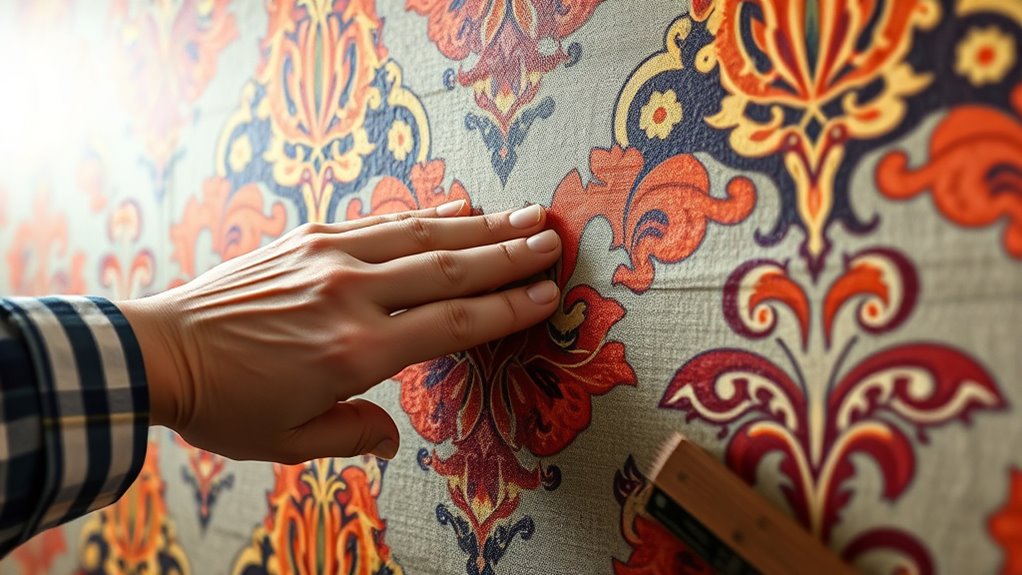
To get a seamless wallpaper finish, start with proper wall preparation to guarantee a smooth surface. Use seam tape carefully to hide joints and maintain a clean look. Keep your pattern matching consistent across strips to achieve a professional, flawless result.
Proper Wall Preparation
Achieving a seamless wallpaper finish on textured walls starts with thorough preparation. Start by evaluating your wall’s wall smoothness; if the surface is uneven, it may require additional steps. Begin by removing existing paint carefully to ensure proper adhesion. Next, follow these steps:
- Sand the surface to reduce bumps and texture irregularities.
- Fill in any holes or deep grooves with a high-quality spackle.
- Sand again after drying to create a uniform surface.
- Clean the wall thoroughly to remove dust and debris, ensuring the wallpaper adheres evenly.
Proper preparation minimizes imperfections and helps you achieve a smooth, professional look, even on textured walls. Taking these steps ensures your wallpaper will lay flat and last longer.
Use of Seam Tape
Seam tape is essential for creating a smooth, seamless wallpaper finish on textured walls. Proper seam tape installation helps hide seams and prevents peeling or bubbling over time. When applying seam tape, make sure the surface is clean and dry, then carefully align the tape over the seams, pressing firmly to eliminate air bubbles. If you encounter seam tape troubleshooting issues like wrinkles or edges lifting, gently reapply pressure or use a seam roller to secure it properly. Be patient during installation, and double-check that the tape is flush with the wall surface. Doing so minimizes visible seams and promotes a professional look. Using seam tape correctly is a key step in achieving a polished, seamless wallpaper finish on textured surfaces.
Consistent Pattern Matching
After securing the seams with tape, focusing on pattern matching guarantees your wallpaper looks flawless. Proper pattern alignment ensures that each strip seamlessly flows into the next, avoiding mismatched designs. To master repeat matching and achieve a consistent finish, keep these tips in mind:
- Measure and mark the pattern repeat to know where to align each strip.
- Lay out wallpaper sheets before hanging to check pattern continuity.
- Overlap edges slightly, then trim excess for precise pattern matching.
- Use a straightedge and smoothing tool to adjust pattern alignment during installation.
Maintenance and Long-Term Care of Wallpapered Textured Walls
Maintaining textured wallpaper over time requires regular care to keep it looking its best. Start by gently dusting the surface with a soft cloth or vacuuming with a brush attachment to prevent dirt buildup. When cleaning, use a damp cloth with mild, eco friendly adhesives or cleaning solutions to avoid damaging the wallpaper or the texture. If you used removable wallpapers, you’ll find it easier to update or replace sections without mess or damage. Avoid harsh scrubbing or abrasive cleaners that can peel or distort the surface. Check periodically for any peeling edges or loose areas and fix them promptly to prevent further damage. Proper maintenance helps preserve the texture and appearance, ensuring your wallpaper stays vibrant and intact for years to come.
Frequently Asked Questions
How Long Does Wallpaper Installation on Textured Walls Typically Take?
Installing wallpaper on textured walls typically takes about 2 to 4 days. First, you’ll need to prepare the wall, which includes cleaning and possibly smoothing the surface, and allow for proper wall preparation. Once the wallpaper is applied, it needs time to dry, usually 24-48 hours. Keep in mind, textured surfaces may require extra patience, as wallpaper drying can be slower, and additional wall prep might be needed for a smooth finish.
Can I Remove Wallpaper From Textured Walls Without Damaging the Surface?
You can remove wallpaper from textured walls without damaging the surface—just remember, “a stitch in time saves nine.” Use gentle removal techniques like scoring the paper carefully and applying a warm water or solvent solution to loosen the adhesive. Proper wall surface preparation, such as cleaning and repairing any damage beforehand, helps guarantee a smooth removal process and keeps your textured wall intact.
Are There Specific Adhesives Recommended for Textured Wall Wallpaper?
You should choose adhesives designed for textured walls, as they guarantee better adhesive compatibility with uneven surfaces. Look for products labeled for heavy-duty or textured surface application, which help the wallpaper adhere securely. Before applying, you need proper wall preparation—clean, smooth out any bumps or dust, and consider using a primer if recommended. This prep helps the adhesive bond well and prevents future peeling or bubbling.
How Do I Repair Damaged Textured Walls Before Wallpapering?
If your textured walls look like they’ve survived a hurricane, don’t panic—just start with patching techniques and surface preparation. You’ll want to sand down rough spots, fill cracks with joint compound, and smooth out gouges. Apply primer after repairs to ensure a flat, even surface. This prep work creates the perfect canvas for wallpaper, making your walls look like they’ve been through a spa treatment, not a storm.
What Are Cost Considerations When Wallpapering Textured Surfaces?
When wallpapering textured surfaces, you should consider your budget planning and material selection carefully. High-quality wallpaper and professional installation can increase costs, especially if the texture needs smoothing or special primers. To save, compare different materials like vinyl or fabric wallpaper, which vary in price and durability. Keep in mind that textured walls may require more prep work, so allocate extra funds for potential repairs or surface treatments to achieve a smooth, lasting finish.
Conclusion
Now that you know what to expect, installing wallpaper on textured walls becomes less of a mountain to climb. With proper prep, the right materials, and a steady hand, you can turn the challenge into an opportunity for a stunning transformation. Think of it as smoothing out the rough edges to reveal a beautiful new look. Trust the process, stay patient, and soon you’ll be admiring a flawless finish that’s worth every effort.