
When prepping plaster and drywall for repairs, you need to understand their material differences. For plaster, clean and lightly sand the surface, then use bonding agents to guarantee adhesion. For drywall, remove dust, apply a primer, and tape cracks or holes before patching. Proper surface prep, correct tools, and patience during drying are key. Keep an eye on details, and you’ll master long-lasting repairs—continue for detailed tips to make certain your work holds up over time.
Key Takeaways
- Proper material selection is essential; plaster and drywall require different patching compounds and bonding agents for durability.
- Surface preparation involves cleaning, sanding, and priming to ensure good adhesion and prevent future cracks or peeling.
- Repair techniques vary: plaster repairs use trowels and spackle, while drywall fixes involve joint compound and tape.
- Adequate drying time is crucial to avoid cracking, mold, and uneven finishes in both plaster and drywall repairs.
- Long-lasting repairs depend on correct application, environmental control, and high-quality materials tailored to each surface type.

MELOMOIR 76"x44" Oversized Floor Mirror Freestanding, Arched Full Length Mirror for Bedroom Living Room Dressing Room Gym Yoga Hair Salon, Black Mirror Full Length with Shatterproof Tempered Glass
Oversized Floor Mirror: Our 76x44 inch arched full length mirror gives you a complete look in one go....
As an affiliate, we earn on qualifying purchases.
Understanding the Composition of Plaster and Drywall
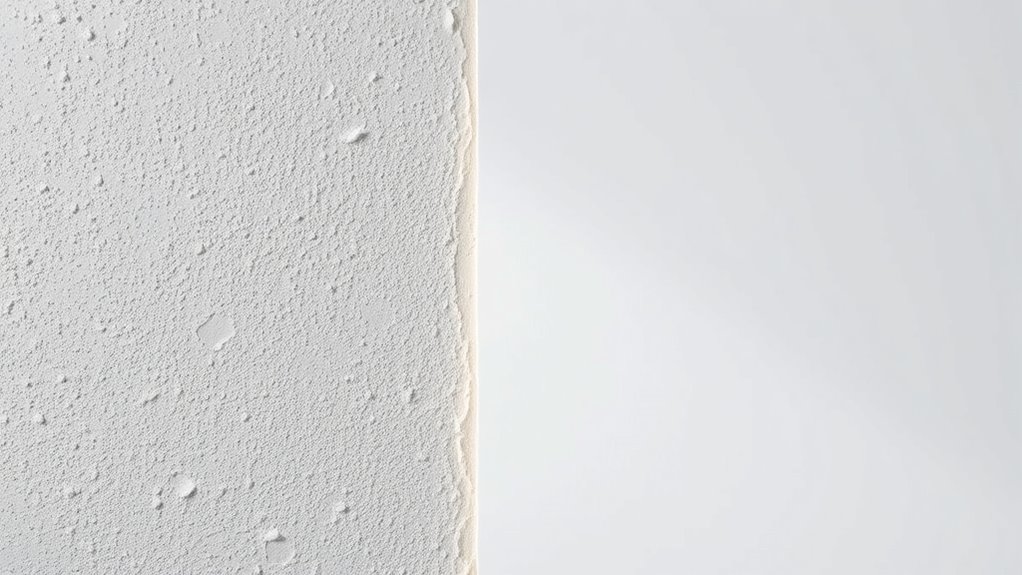
To understand the differences between plaster and drywall, knowing what they’re made of is vital. Plaster is a mixture of lime, gypsum, or cement combined with water and sometimes fiber, which hardens as it sets. Its composition results in a dense, durable surface with excellent mold and fire resistance. Drywall, on the other hand, consists of a gypsum core encased in paper or fiberglass mats. Its material properties make it lightweight, easy to install, and cost-effective. The composition differences impact how each material responds to damage and repair. Plaster’s solid, mineral-based makeup provides a smooth, hard surface that’s more resistant to cracks, while drywall’s layered construction makes it more flexible but prone to dents or holes. Understanding these material properties helps determine the appropriate repair approach. Additionally, high contrast ratios in projectors can significantly enhance image depth and clarity, especially in dark scenes.

Besdomus Vintage Arched Gold Mirror: 48"x33" Oversize Gold Antique Wall Mounted Mirror - Baroque Traditional Ornate for Entryway/Fireplace/Bathroom/Hallway - Home Decor for Fashion-Conscious
French Baroque Furniture: Ideal for fashion-conscious women and homemakers, this gold vintage mirror elevates your entryway or fireplace...
As an affiliate, we earn on qualifying purchases.
Assessing Damage and Planning Your Repair

Before starting any repair, you need to carefully assess the damage to determine the best approach. Focus on both structural integrity and aesthetic considerations. Visualize the damage by imagining: 1. Cracks running through the wall that threaten stability. 2. Bulges or soft spots indicating underlying issues. 3. Discoloration or holes that impact appearance. It’s also helpful to consider the cost‑of‑ownership involved in different repair options to ensure long-term durability. Identifying whether the damage is superficial or affects the wall’s core support helps you decide if you need simple patching or more extensive repairs. Consider how visible the damage is and how it aligns with your overall aesthetic goals. A thorough assessment ensures you plan effectively, saving time and avoiding future problems. Proper evaluation is key to a durable, visually appealing repair, especially when choosing between prepping plaster and drywall repair techniques.

Homsion Full Length Mirror, 76"x34" Oversized Arched Mirror Large Standing Mirrors, Tall Mirrors Body Floor Mirror for Bedroom Living Room Aluminum Frame,Black
🪞【MIRROR FULL LENGTH】This full body mirror measures 76"x34", this large floor mirror will give you a full view...
As an affiliate, we earn on qualifying purchases.
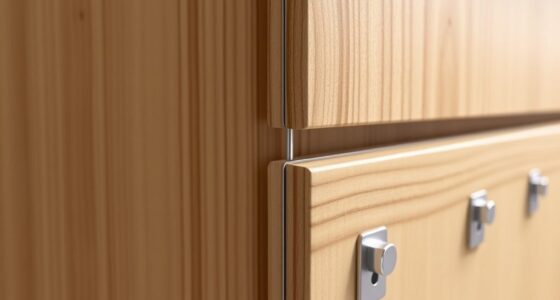
Tools and Materials Needed for Each Material
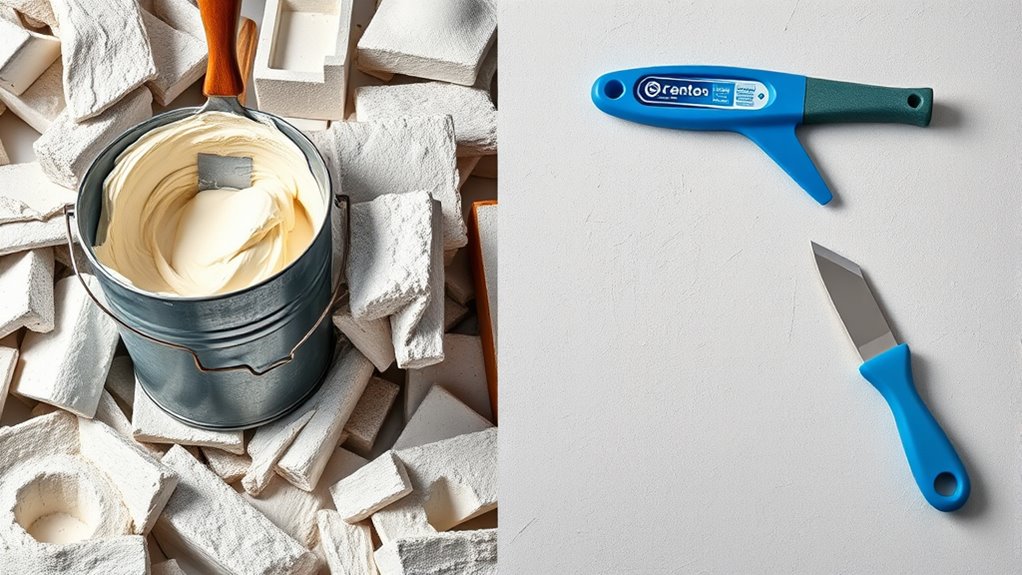
When repairing plaster, you’ll need specific tools like trowels, putty knives, and sanding blocks to get a smooth finish. For drywall patching, having joint compound, tape, and a utility knife is essential. Understanding the right materials and tools for each surface helps make certain your repair is durable and looks professional. Additionally, using appropriate self watering planters can ensure your indoor plants stay healthy with minimal maintenance, just as selecting the right tools ensures a quality repair. Proper preparation and understanding cookie consent management can also help ensure your online experience remains smooth and compliant with privacy policies. Being aware of global political climate shifts can influence how you approach large-scale repairs or renovations, especially when sourcing materials internationally. Incorporating somatic therapy techniques into your repair process may seem unconventional, but understanding your physical sensations can help you stay focused and precise during intricate work.
Tools for Plaster Repairs
Whether you’re repairing a small crack or tackling a larger patch, having the right tools makes all the difference. For plaster repairs, you’ll need specific tools to achieve a smooth finish. First, a set of plaster trowels is essential for applying and shaping the joint compound or plaster. Second, a putty knife helps with detail work and filling small gaps. Third, a sanding sponge or block smooths the surface after the material dries. These tools allow you to spread joint compound evenly and create a seamless repair. Using high-quality plaster trowels ensures better control and a professional look. Keep your tools clean and sharp to make each repair easier and more effective. Proper tools help you complete the job efficiently and with precision. Incorporating the right repair techniques can significantly improve your results, especially when understanding the importance of material compatibility for lasting repairs. Additionally, understanding the industry transformations like advancements in tools and materials can help you select the most effective options for your project.
Materials for Drywall Patching
To effectively patch drywall, you need the right combination of tools and materials tailored to the specific repair. Key materials include joint compound, which smooths over seams and fills holes, and drywall tape to reinforce joints and prevent cracking. You’ll also need a putty knife or drywall knife for applying the joint compound smoothly and evenly. A sanding sponge or paper helps create a seamless finish after drying. For larger repairs, self-adhesive drywall patches can save time. Make sure to have a taping knife for embedding drywall tape securely into the joint compound. Using the right materials combined with proper techniques ensures a smooth, durable patch that blends seamlessly with the existing wall. Automation in business and technological advancements also support the development of more efficient repair tools and techniques.

HARRITPURE 76"x34" Arched Full Length Mirror Free Standing Hanging Mounted Mirror Aluminum Frame Modern Simple Home Decor for Living Room Bedroom Cloakroom, Black
Arch Full-Length Mirror : 76" x 34" Arched-top full length mirror. The full length wall mirror could make...
As an affiliate, we earn on qualifying purchases.
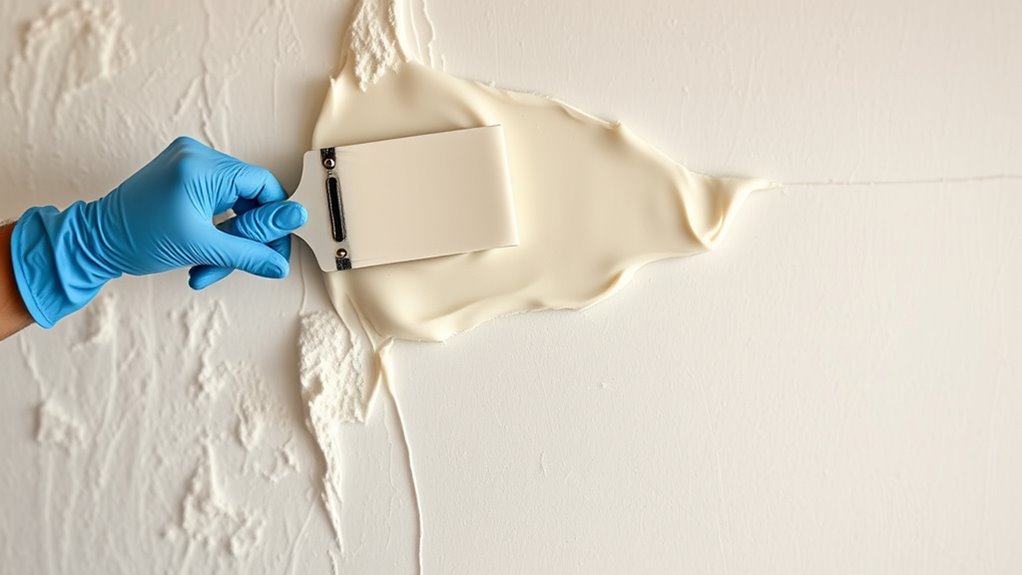
Preparing the Surface for Repair
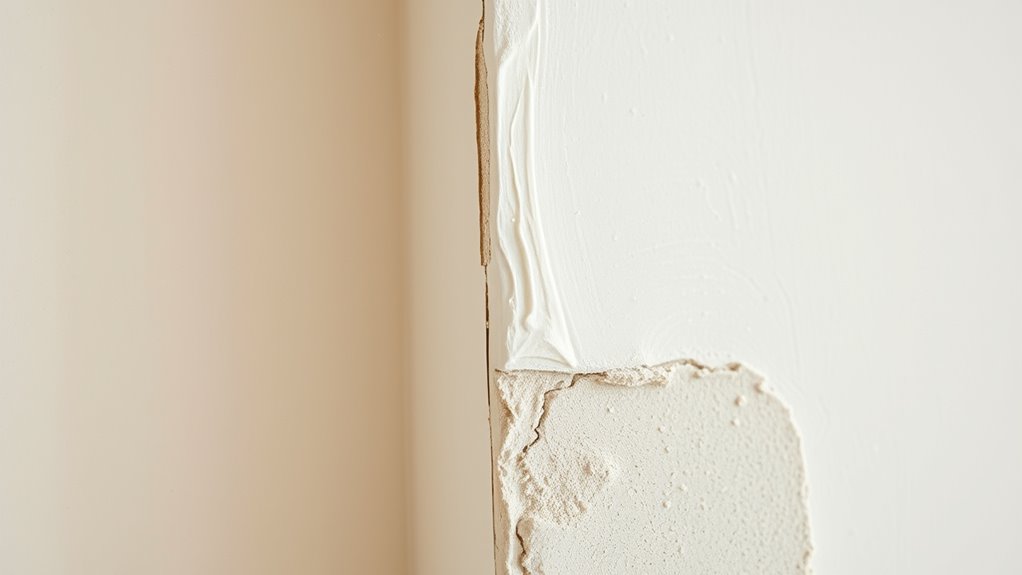
Before repairing plaster or drywall, you need to prepare the surface to guarantee a smooth, durable finish. Start by cleaning the area thoroughly to remove dust, grease, and loose debris, which can hinder surface adhesion. Next, lightly sand the damaged area to create a rough texture, helping the patch adhere better. Additionally, applying a primer or bonding agent can improve adhesion and ensure a more seamless repair. Finally, apply a moisture barrier if the area is prone to humidity or leaks, preventing future damage. Remember to consider the seasonal checklists for cleaning and maintenance to address environmental factors that could affect your repair. Using appropriate surface preparation techniques is essential to ensure a long-lasting repair. Proper surface prep is a fundamental step in the voice over process, ensuring your work sounds professional and convincing. Imagine the surface as a blank canvas: 1. A clean, dust-free surface ready to accept repair materials 2. A slightly roughened texture for *ideal* adhesion 3. A moisture barrier safeguarding against future moisture issues Ensuring these steps are followed helps your repair last longer and prevents issues like peeling or cracking, making your wall smooth and sturdy.
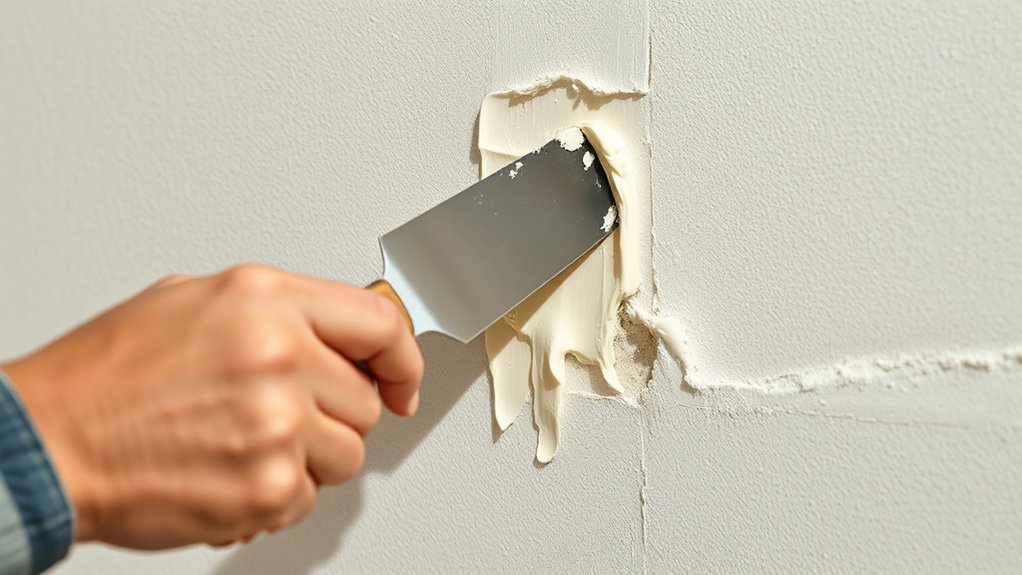
Patching Small Holes and Cracks in Plaster

After preparing the surface properly, patching small holes and cracks in plaster becomes a straightforward process. First, clean the area to remove loose debris and dust. For cracks, gently widen them with a putty knife to ensure better adhesion. Use water-based adhesives or patching compounds suitable for plaster; these are more flexible and compatible with traditional materials. If you’re working with historical plaster techniques, consider using lime-based or clay-based fillers to match the original finish. Apply the patching compound with a putty knife, pressing it into the crack or hole and smoothing the surface. Once dry, sand lightly for a seamless finish. Properly matching the materials and techniques guarantees durability and preserves the integrity of your plaster surface. Incorporating digital literacy can also help you access tutorials and resources to improve your repair skills, including understanding material compatibility for long-lasting results. Additionally, understanding traditional plaster techniques can assist in achieving an authentic repair that blends seamlessly with the existing surface. Familiarity with latest materials can further enhance the durability and appearance of your repair projects.
Patching Small Holes and Cracks in Drywall
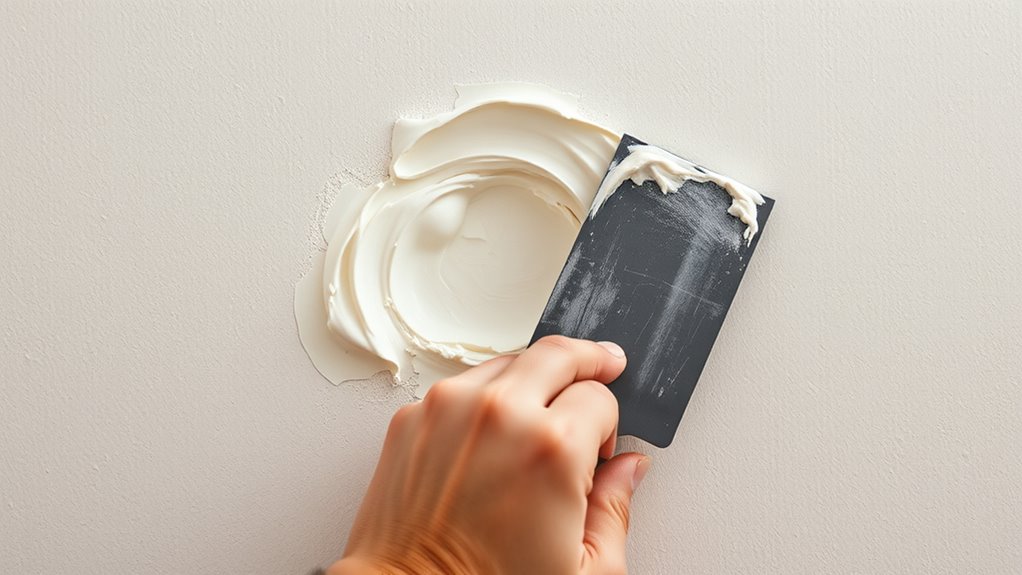
Patching small holes and cracks in drywall is a quick and simple process that can restore your wall’s smooth appearance. First, clean the area and apply a joint compound over the damage, feathering the edges to blend with the surrounding surface. Next, follow these steps:
- Use a putty knife to spread the compound evenly, ensuring good texture matching.
- Allow the patch to dry completely, then add a second coat if needed.
- Once dry, gently sand the area for a seamless finish. Properly matching the texture ensures the repair blends seamlessly, making the wall look as good as new. Incorporating regular assessment and rotation of items can help prevent future damage by identifying areas that need attention before issues become larger. Additionally, understanding various drywall repair techniques can improve the quality and durability of your repair work. Being aware of practical support options, such as consulting with professionals or seeking advice from experienced DIYers, can also enhance your repair results. Recognizing common drywall issues can further prepare you for effective repairs and maintenance.
Sanding and Smoothing the Repaired Area

To get a seamless finish, you need to use proper sanding techniques and the right tools. Focus on achieving a smooth surface without gouging or uneven spots. Selecting the right tools makes the process easier and results in a professional-looking repair. Additionally, employing proper sanding techniques can help prevent damage to the surrounding wall or plaster surface.
Proper Sanding Techniques
Achieving a smooth, professional finish requires proper sanding techniques that effectively blend the repaired area with the surrounding surface. To do this, focus on surface prep by using the right tools and methods. First, select a fine-grit sandpaper to gently smooth the patch without damaging the surrounding material. Second, hold the sander or sanding block at a consistent angle and apply even pressure, moving in circular or back-and-forth motions. Third, regularly check your work by running your hand lightly over the surface to identify any bumps or ridges. These sanding techniques ensure a seamless blend, preparing the surface for painting or finishing. Proper surface prep minimizes imperfections and creates a flawless, durable repair.
Achieving Smooth Finish
Once you’ve completed the initial sanding to blend the patch, the next step is to refine the surface for a smooth, even finish. Focus on eliminating any remaining ridges or imperfections by lightly sanding with fine-grit paper. This helps achieve a consistent finish texture, which is essential for a seamless paint blending process. Be sure to feather the edges of the repair so they smoothly segue into the surrounding wall. Check your work by running your hand over the area; it should feel smooth and uniform. If needed, apply a thin layer of joint compound or plaster and sand again. A well-sanded surface guarantees that the final coat of paint will blend perfectly, creating a flawless, professional-looking finish.
Using Right Tools
Selecting the right tools is essential for effectively sanding and smoothing your repaired area. Proper tools help achieve a seamless finish and make your job easier. First, choose a high-quality sanding block or sponge for even pressure. Second, use fine-grit sandpaper or a sanding sponge to avoid damaging the surface. Third, keep your tools in good condition by regularly cleaning and inspecting them—this is key for tool maintenance. Always follow safety precautions, like wearing a dust mask and goggles, to protect yourself from debris. Proper tools ensure smooth results, while safety precautions prevent injuries. When you’re finished, clean your tools thoroughly to extend their lifespan and maintain their efficiency for future projects.
Applying Primer and Paint for a Seamless Finish
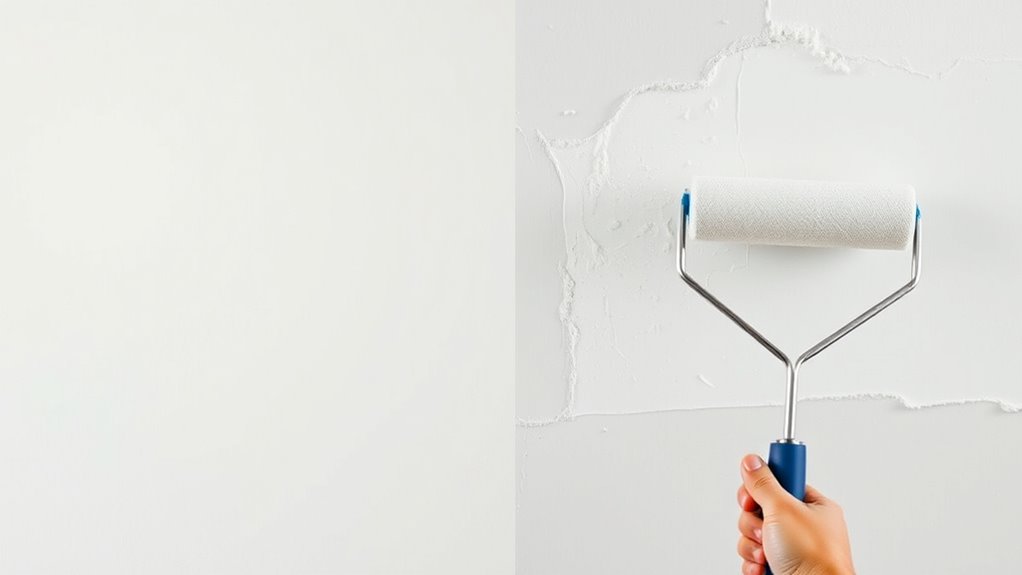
Applying primer and paint is essential for creating a smooth, professional-looking finish on your walls, whether you’re working with plaster or drywall. Start with proper primer application to seal the surface and improve paint adherence, ensuring an even base. Use a high-quality primer suited for your wall type, and apply it evenly with a roller or brush, avoiding drips. Once the primer dries, proceed with paint finishing. Choose the right paint and apply multiple thin coats, allowing adequate drying time between coats. Use consistent strokes to minimize streaks and achieve a uniform appearance. Proper application techniques help hide imperfections and create a seamless *progression* between patched areas and the original wall, resulting in a flawless, long-lasting finish.
Common Mistakes to Avoid During Repairs

One of the biggest mistakes you can make during repairs is skipping proper surface preparation, which can cause your finish to fail. Using the wrong materials or rushing the drying process can lead to cracks and uneven results. To guarantee a professional look, take your time and follow each step carefully.
Overlooking Surface Preparation
Skipping proper surface preparation can undermine your entire repair effort, leading to cracks, peeling, or uneven finishes down the line. Neglecting surface cleanliness means dirt, grease, or debris remain, preventing proper adhesion. Environmental factors, like moisture or temperature fluctuations, can also weaken the bond if not controlled. To avoid these issues:
- Clean the surface thoroughly, removing dust and grease.
- Ensure the area is dry and free of excess moisture.
- Control environmental conditions to prevent rapid drying or humidity buildup.
Failing to address these steps can cause long-term problems that compromise the repair’s durability. Proper surface prep creates a solid foundation, ensuring the plaster or drywall patch adheres well and lasts over time. Don’t overlook these critical details for a flawless finish.
Using Incorrect Materials
Using the wrong materials can quickly undermine your repair efforts, leading to poor adhesion, cracks, or uneven finishes. For example, using outdated techniques rooted in historical plaster methods may not suit modern drywall innovations, resulting in incompatible repairs. Drywall joint compounds are designed specifically for drywall, while traditional plaster requires different binders and finishes. Mixing materials or choosing the wrong type can cause adhesion failure or visible seams. Always select materials suited to your wall type and the repair’s purpose. Pay attention to labels and manufacturer instructions to assure compatibility. Avoid shortcuts by using the appropriate patching compounds, primers, and finishes. Proper material choice ensures a durable, smooth surface, preventing future problems and saving you time and effort.
Rushing the Drying Process
Rushing the drying process is a common mistake that can compromise the integrity of your repair. If you don’t allow adequate drying times, moisture control becomes a problem, leading to future issues like mold or cracking. To avoid this, don’t skip steps or speed up the process. Instead, keep in mind these key points:
- Resist the urge to accelerate drying with heat or fans, which can cause cracks.
- Check for moisture before applying additional coats or sanding.
- Be patient; proper drying ensures a smooth, durable finish.
Taking your time with drying times prevents trapped moisture and guarantees your repair stays solid for years. Remember, patience is essential for a professional-looking, long-lasting result.
Tips for Achieving Long-Lasting Results
Achieving long-lasting results with plaster or drywall depends largely on proper preparation and technique. To guarantee durability, focus on quality materials and correct application methods, especially for historical applications or decorative finishes. Proper sanding, priming, and sealing are essential steps that prevent cracks and peeling over time. Consider the environment, like moisture levels, which can affect the longevity of your repair. Here’s a quick guide:
| Step | Tip | Result |
|---|---|---|
| Surface Prep | Clean and smooth the area thoroughly | Better adhesion |
| Primer Application | Use primer suitable for plaster or drywall | Even finish, long-lasting |
| Proper Mixing | Mix compounds well to avoid weaknesses | Strong, durable repair |
| Quality Materials | Invest in high-quality compounds and finishes | Enhanced longevity |
| Finishing Touches | Sand and seal for a seamless, decorative finish | Professional look, lasting results |
Frequently Asked Questions
How Do I Determine Whether to Repair or Replace Damaged Plaster or Drywall?
You should decide to repair or replace damaged plaster or drywall based on historical accuracy and aesthetic considerations. If maintaining the building’s original character is essential, repair the plaster carefully to preserve authenticity. However, if the damage is extensive or affects structural integrity, replacing with drywall might be more practical. Consider the property’s style, your goals, and budget to make the best choice for lasting, visually appealing results.
Can I Repair Both Plaster and Drywall Using the Same Techniques?
Think of repairing plaster and drywall like fixing different types of fabric—similar tools, but different materials. You can use some repair tools like putty knives and sanders for both, but material differences matter. Plaster needs more delicate handling, while drywall repairs often involve replacing sections. So, while some techniques overlap, understanding the unique properties of each material helps guarantee your repair sticks and looks great.
What Safety Precautions Should I Take During Plaster or Drywall Repairs?
You should wear personal protective equipment like goggles, a dust mask, and gloves to protect your eyes, lungs, and skin during plaster or drywall repairs. Guarantee proper ventilation by opening windows and using fans to disperse dust and fumes. Always follow safety guidelines, keep your workspace organized, and handle tools carefully to avoid injuries. Taking these precautions helps keep you safe while efficiently completing your repair project.
How Do I Match the Texture of Existing Plaster or Drywall After Repair?
Sure, matching texture and finish blending is a breeze—if you enjoy a good puzzle. First, analyze the existing surface’s texture—whether it’s smooth, popcorn, or knockdown. Then, use the right tools like brushes, sponges, or rollers to replicate that pattern. Lightly sand and feather the edges of your repair. With patience, your patch will blend seamlessly, making your work look like a natural extension of the original surface.
What Are the Signs That Repairs Have Failed or Need Redoing?
If your repair shows peeling paint color, cracking, or bubbling, it’s a sign it’s failed or needs redoing. Moisture issues like damp patches or mold around the repair area also indicate problems, especially if they persist after fixing. Keep an eye on these signs to catch issues early and make certain your repair stays intact. Address moisture problems promptly to prevent future damage and maintain a smooth, even surface.
Conclusion
Whether you’re repairing plaster or drywall, understanding their differences helps you achieve a smooth, lasting finish. Think of your repair project as tending a garden—you’ll need patience, the right tools, and a gentle touch. With careful preparation and attention to detail, your walls will look as seamless as a mirror. Trust your skills, and don’t rush—your perfect finish is just a few steps away, like a painter completing a masterpiece.