To achieve perfect paint lines at the ceiling, apply a thin bead of painter’s caulk along the edge where the wall meets the ceiling. Smooth it out with a finger or caulk tool for a seamless finish. Once it dries, paint over the caulk, and you’ll get a crisp, professional border that minimizes touch-ups. For more tips and tricks on perfect lines, keep exploring how to make your painting look flawless from start to finish.
Key Takeaways
- Use painter’s tape carefully, ensuring it’s pressed firmly to prevent paint bleeding at the ceiling line.
- After painting, remove the tape while the paint is still slightly tacky for sharper edges.
- Apply a thin bead of caulk along the painted edge to seal any imperfections and create a clean line.
- Smooth the caulk with a damp finger or tool for a seamless transition between wall and ceiling.
- For extra precision, use a small brush to touch up caulk and paint edges after tape removal.
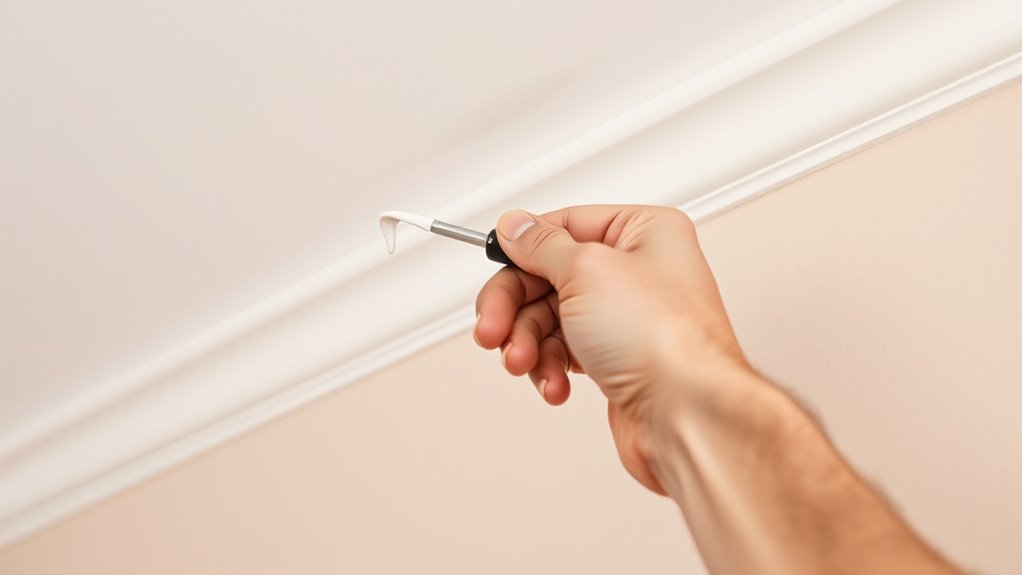
When painting a ceiling, creating clean, sharp lines along the edges can be challenging, especially without leaving paint smudges or overlaps. To achieve a professional look, mastering your brush techniques is essential. Start by using a high-quality angled brush, which allows for better control and precision. Dip just the tip of the brush into the paint, wiping off excess on the edge of the can to prevent drips. When you begin, lightly tap the brush against the edge of the can to remove any excess paint. Use smooth, steady strokes, following the edge of the ceiling with a slight angle. Don’t press too hard; instead, let the brush do the work. This approach helps you create a thin, even line without thick blobs or uneven paint buildup. Additionally, keeping a damp cloth nearby can help quickly clean up any accidental drips or mistakes as you go.
Tape removal is another critical step. Once you’ve finished painting the ceiling edge and the paint has dried to the touch, carefully peel away the painter’s tape. It’s best to remove the tape at a 45-degree angle, pulling it away from the painted surface. Doing so minimizes the risk of peeling off fresh paint or creating jagged edges. If you notice any paint bleeding under the tape, don’t panic. Use a small, sharp utility knife to gently score along the edge, then re-tape and touch up as needed. Removing tape while the paint is still slightly tacky can also help produce sharper lines, but only if you’re confident the paint won’t smudge when pulled.
Your brush techniques combined with proper tape removal can make a significant difference. When you’re ready to take off the tape, do it slowly and steadily, avoiding jerky movements that might disturb your clean lines. If you see any imperfections after tape removal, a small detail brush can help you touch up those areas with precision. Always keep your brush clean during touch-ups to prevent spreading unwanted paint. Remember, patience is key. Rushing the tape removal or hurriedly brushing along the edges can result in messy lines. Taking your time ensures your painted ceiling has crisp, professional-looking borders. Proper technique and patience are essential for achieving the best results.
Top picks for "cutt perfect paint"
Open Amazon search results for this keyword.
As an affiliate, we earn on qualifying purchases.
Frequently Asked Questions
What Type of Caulk Is Best for Painting Edges?
You should use a paintable acrylic latex caulk for painting edges. Its smooth, flexible consistency makes it easy to apply with a caulk gun or a fine-tipped applicator, ensuring clean lines. This type of caulk adheres well to surfaces, seals gaps effectively, and can be painted over seamlessly. Its ease of application and quick-drying properties help you achieve professional-looking, crisp paint edges effortlessly.
How Long Should Caulk Dry Before Painting?
You should wait at least 24 hours for the caulk to dry before painting. This drying time allows the curing process to complete, ensuring a solid, flexible seal. Rushing this step can cause cracks or peeling later. Keep the area well-ventilated during drying, and follow the manufacturer’s instructions for specific drying times, as some caulks may require longer curing periods for ideal results.
Can I Use Painter’s Tape Instead of Caulk?
You can use painter’s tape instead of caulk for edge sealing techniques, but it’s not always the best choice. Tape alternatives like high-quality painter’s tape help create clean lines, yet they may not seal gaps as effectively. For perfect edges, combine tape with a sharp tool to cut in or consider a caulk trick for seamless results. Both tools work best when used together, ensuring sharp, professional-looking paint lines.
How Do I Fix Uneven Caulk Lines?
To fix uneven caulk lines, start by smoothing the edges with a damp finger or a caulk finishing tool. If the lines are still inconsistent, use tape alternatives like painter’s tape or a flexible edging tool for better control. Remove excess caulk carefully and reapply if needed. Always work quickly before the caulk dries, and make certain you smooth the edges for a clean, professional finish.
Is It Necessary to Prime the Caulk Before Painting?
You don’t always need to prime caulk before painting, but it’s recommended for better primer preparation. Priming helps improve paint adhesion, ensuring your paint sticks well and lasts longer. If the caulk is oil-based or very glossy, applying a primer will give you a smoother, more even finish. Otherwise, if the surface is porous or matte, you might skip priming, but for the best results, it’s usually worth the extra step.
Conclusion
Now that you’ve mastered the caulk trick to cut perfect paint lines at the ceiling, you’re ready to enjoy that crisp, professional look. It’s a simple tool that transforms a messy job into a clean masterpiece, proving that small details make a big difference. So, embrace the precision—because a flawless line isn’t just about aesthetics, it’s about confidence. With this trick, you’ll find that perfection is within reach, turning a tricky task into your new favorite skill.