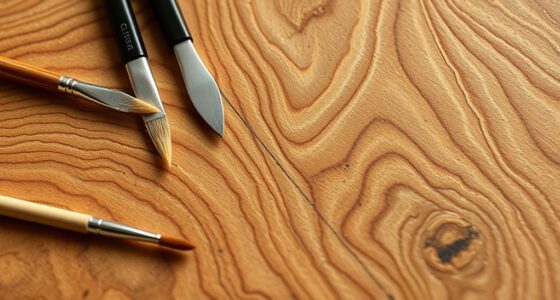
To create a sharp, vibrant geometric mountain mural with taping and layering, start by planning your design carefully, sketching it out beforehand. Use painter’s tape to section off areas and achieve clean, crisp lines, layering tape for complex shapes. Apply paint in layers, allowing each to dry to build depth and vibrancy. Precise taping prevents smudging, ensuring clear separation between colors. Keep practicing these techniques, and you’ll master the art of a striking mountain scene—more tips await if you keep going.
Key Takeaways
- Use painter’s tape to create sharp, clean lines for geometric mountain shapes before painting.
- Plan your design digitally or on paper, then transfer key lines onto the wall for accurate placement.
- Layer paint in stages, allowing each to dry, to build depth and dimension in the mountain peaks.
- Apply tape carefully, pressing firmly to prevent bleeding, and layer strips for complex intersections.
- Remove tape while paint is still damp to achieve crisp, precise edges in your geometric mountain mural.

The Geometric Mountain Mural captures your attention with its bold, angular shapes that depict mountain peaks in a striking, abstract style. As you plan your mural, you realize that choosing the right color palette is essential to bring the design to life. Bright, contrasting colors can make the peaks pop, while muted tones create a more subdued, sophisticated look. Think about how you want the viewer to experience the scene—do you want vibrant, energetic mountains or calm, subdued ranges? Your color choices will guide the mood and overall impact of the mural. Once you’ve settled on your palette, it’s time to consider taping techniques, which are crucial for achieving those sharp, clean lines characteristic of geometric art. Using painter’s tape, you can section off areas to ensure straight edges and precise angles. Start by planning your design on paper or digitally, then transfer key lines onto the wall with a pencil or light chalk. This step helps you visualize the layout and ensures symmetry where needed. When applying tape, press down firmly to prevent paint from bleeding underneath. Use different widths of tape for various angles and shapes, and create layered tapes to build complex intersections without sacrificing accuracy. Taping techniques involve carefully overlapping strips to define each geometric shape clearly, which is vital when working with layered colors. As you paint, remove the tape carefully while the paint is still slightly damp to keep edges crisp. Layering colors becomes more straightforward with this approach, as you can build depth and dimension by applying different hues in stages. For added visual interest, consider incorporating textural elements such as textured paint or mixed media, which can enhance the geometric forms. Remember, patience is key—allow each layer to dry before adding another to prevent smudging and to maintain sharp separation between colors. Your taping techniques, combined with thoughtful layering, empower you to create a cohesive and visually striking geometric mountain scene. The precision of your taping ensures that each angular shape stands out clearly, giving the mural its bold, abstract quality. Ultimately, the success of your geometric mountain mural hinges on your careful selection of the color palette and meticulous taping techniques. These tools help you harness the power of geometric abstraction, transforming a blank wall into a captivating landscape that invites viewers to explore its sharp peaks and layered depths. With attention to detail and patience, you’ll craft a mural that’s as stunning as it is precise, capturing the essence of mountain grandeur through geometric design.
Frequently Asked Questions
What Types of Tape Are Best for Creating Sharp Geometric Lines?
For sharp geometric lines, use painter’s tape with strong tape adhesion that sticks well without bleeding. Choose tapes with a precise edge sealing capability to guarantee clean, crisp lines. Blue painter’s tape or specialized painter’s tape designed for clean removal work best, as they prevent paint from seeping under the edges. Apply firmly, press down to seal the edges, and remove carefully once the paint is dry to maintain sharpness.
How Do I Prevent Paint From Bleeding Under Tape?
Think of taping as building a fortress for your sharp lines. To prevent paint from bleeding, you need to seal the edges first—use edge sealing techniques to lock in the tape’s boundary. Applying a thin layer of paint primer along the tape edges creates a barrier, ensuring clean lines. Once dry, press the tape firmly and paint carefully, like drawing within the lines of your geometric masterpiece.
What Layering Techniques Enhance the Mountain Mural’s Depth?
To enhance your mountain mural’s depth, focus on layering color carefully. Start with a base hue and gradually add darker shades for shadow creation, which gives the mountains a three-dimensional look. Use light, translucent layers to build richness without muddying colors. By blending edges softly and applying shadows strategically, you create a sense of distance and depth that makes your geometric mountain mural more dynamic and visually engaging.
How Long Should I Wait Between Tape Applications?
You should wait at least 30 minutes to an hour between tape applications to guarantee the paint dries sufficiently. This drying time helps prevent smudging or peeling when you remove the tape. Always check the paint’s surface; it should feel dry to the touch before applying another layer or removing the tape. Proper timing of tape removal minimizes paint damage and ensures crisp, clean lines in your mountain mural.
Can This Method Be Adapted for Outdoor Murals?
Yes, you can adapt this method for outdoor murals. Just consider your urban landscape and weather conditions—apply painter’s tape on a dry day, and avoid rain or high humidity. Secure your layers well, and if weather changes, shield your work with sealants or coverings. Planning around weather considerations ensures your geometric mountain mural stays neat and vibrant, even outside.
Conclusion
As you step back to admire your geometric mountain mural, you’ll notice how the layered taping subtly guides the eye, creating a harmonious balance. While the process demands patience, the delicate layers whisper of craftsmanship and care. In quietly embracing each step, you’ve crafted more than just a mural—you’ve woven a subtle dialogue between form and function. Ultimately, your work invites viewers to appreciate the quiet beauty that emerges from thoughtful layering and meticulous taping.