When installing MDF paneling, carefully align and stagger the panels for stability. Use spacers to keep consistent gaps, then apply high-quality, paintable caulk along the seams with a caulking gun. Smooth the caulk for a seamless look, and once it dries, lightly sand the surface before priming and painting. Taking your time with these steps guarantees a professional finish that looks great and lasts. Continuing with each step helps you master a flawless installation.
Key Takeaways
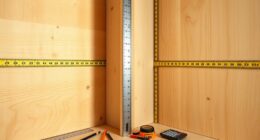
- Ensure precise panel measurement and proper staggering to minimize visible seams during installation.
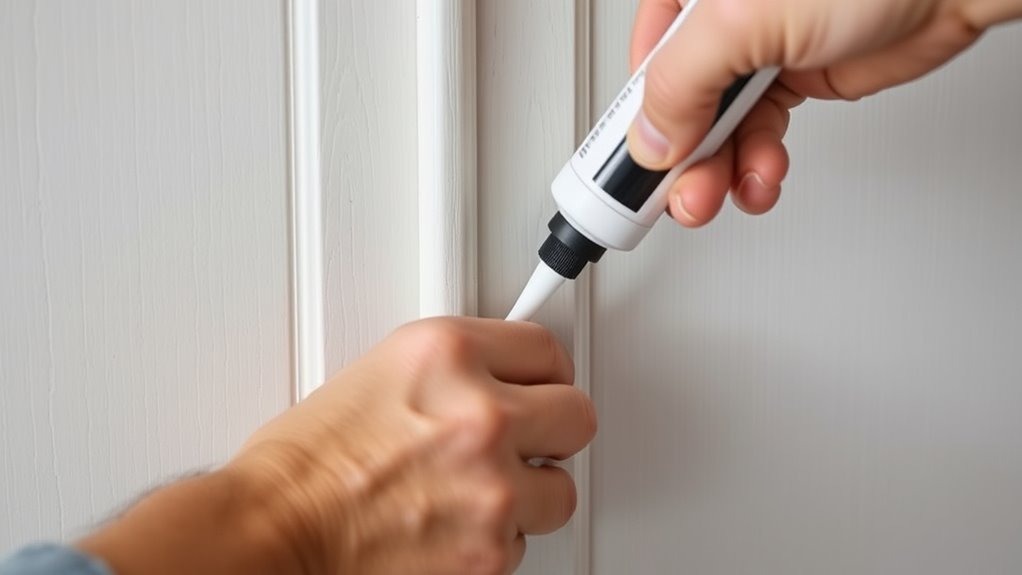
- Apply high-quality, paintable caulk along seams with a caulking gun for an even, neat bead.
- Smooth caulk with a damp finger or finishing tool for a seamless, professional appearance.
- Lightly sand dried caulk with fine-grit sandpaper to create a smooth surface before finishing.
- Use quality brushes or rollers for painting, and take your time to maintain panel alignment and hide seams.
Installing MDF paneling is a straightforward way to update the look of your walls, but proper preparation is key to achieving a smooth, professional finish. When it comes to seams and caulk, paying attention to panel alignment and finishing techniques will make all the difference. First, guarantee your panels are cut accurately and fit snugly against each other. Proper panel alignment involves measuring carefully and staggering joints so they don’t line up directly across from each other, which adds stability and a more natural appearance. As you install, use spacers or shims if needed to maintain consistent gaps between panels, making the seams easier to conceal later.
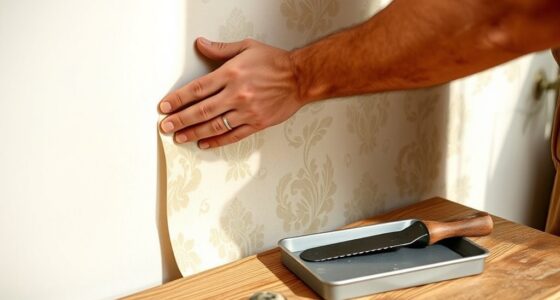
Once the panels are in place, you’ll notice small gaps or seams where the edges meet. These are normal, but they need to be addressed with the right finishing techniques. Start by applying a thin bead of caulk along each seam, using a high-quality, paintable acrylic or latex caulk designed for walls. When applying the caulk, use a caulking gun and steady hand to guarantee a smooth, even line. Afterward, use a damp finger or a caulk finishing tool to gently smooth out the bead, pressing it into the gap and creating a seamless transition between panels. This step is vital because it helps to reduce the visibility of seams and prepares the surface for painting or staining.
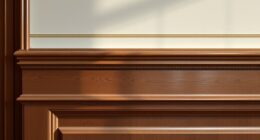
Before painting, allow the caulk to dry fully according to the manufacturer’s instructions. Once dry, lightly sand the filled seams with fine-grit sandpaper to create a uniform surface. Use a sanding block or sponge to avoid gouging the MDF. This step enhances the overall panel appearance and ensures the caulked areas blend seamlessly with the rest of the wall. To achieve the best finishing results, apply a primer designed for MDF, then proceed with your chosen paint or stain. Proper finishing techniques, like sanding between coats and using high-quality brushes or rollers, will help you attain a smooth, professional look.
Throughout the process, focus on maintaining consistent panel alignment and neat seams. Correctly applied caulk and meticulous finishing techniques can transform your MDF paneling into a polished, attractive wall feature. Taking your time at each stage guarantees the seams are hidden and the surface looks flawless. With patience and attention to detail, you’ll get a clean, seamless finish that enhances your space and lasts for years. Additionally, understanding surface preparation is crucial for achieving the best results and ensuring durability over time.
Frequently Asked Questions
How Do I Prevent MDF Paneling From Warping Over Time?
To prevent MDF paneling from warping over time, you should focus on moisture control and panel reinforcement. Keep humidity levels stable in your space and use a dehumidifier if needed. Seal the MDF with a primer or paint to protect it from moisture. Additionally, reinforce panels with proper framing and avoid direct water contact. These steps help maintain the integrity and appearance of your MDF paneling long-term.
What Type of Caulk Is Best for MDF Paneling?
Think of caulking like a master painter’s brushstroke—precision matters. For MDF paneling, use a high-quality latex or acrylic caulk, which offers flexibility and paint compatibility, preventing cracks over time. These caulking techniques ensure seamless seams and a smooth finish. Avoid oil-based caulks, as they may not adhere well or paint smoothly. Your goal is a durable, clean look that withstands the test of time.
Can MDF Paneling Be Painted Immediately After Installation?
Yes, you can paint MDF paneling immediately after installation if you prepare it properly. First, make certain the surface is smooth and free of dust. Then, apply a primer to improve paint readiness and seal the surface, preventing moisture absorption. Once the primer dries, you can start painting. This step guarantees a smooth, durable finish and helps your paint adhere better to the MDF.
How Do I Handle Uneven Wall Surfaces Before Paneling?
To handle uneven wall surfaces before paneling, start with proper wall preparation. You should assess the surface and identify high spots or bumps. Use joint compound and a putty knife to smooth out imperfections, then sand the area once it dries. Surface smoothing is essential for a clean, professional look. Ensuring the wall is even and smooth helps your MDF paneling adhere better and reduces gaps or misalignments during installation.
What Tools Are Essential for Seamless MDF Paneling Installation?
You need vital measuring tools like a tape measure, square, and level to guarantee precise cuts and proper alignment. Use these tools during installation techniques to mark and position panels accurately. A straightedge or chalk line helps you maintain even seams, while a caulking gun is essential for sealing gaps. Proper measuring and technique ensure your MDF paneling looks seamless and professional, making the entire process smoother and more successful.
Conclusion
Now that you’ve mastered installing MDF paneling, sealing those seams with caulk is the finishing touch that ties everything together. Think of it as the brushstroke on a masterpiece, transforming rough edges into a smooth, polished surface. With patience and attention to detail, your walls will stand proud like a well-rehearsed symphony. So, take a deep breath, step back, and enjoy your beautifully paneled space—a true reflection of your effort and skill.