To achieve a precise herringbone paint pattern, start by calculating your panel or tile size and determine the angle, typically 45 degrees. Use a straightedge or level to mark consistent lines and measure spacing to keep the pattern balanced. Employ painter’s tape to outline your sections carefully, ensuring sharp edges. Planning these layout math details upfront helps prevent mistakes and creates a sleek, professional look—if you keep going, you’ll discover even more tips to perfect your pattern.
Key Takeaways
- Measure the total area and determine tile or plank sizes to calculate the number of herringbone units needed.
- Use a chalk line and straightedge to establish precise, consistent angles (typically 45 degrees) for pattern alignment.
- Calculate the length and width of each herringbone segment based on the desired pattern size and spacing.
- Plan the starting point, usually at the center or a focal wall, to ensure symmetry and balanced layout.
- Create a detailed layout diagram with measurements to guide cutting, placement, and to prevent misalignment during painting.

Have you ever wondered how to create a striking and dynamic wall or floor design? The key lies in mastering the herringbone paint pattern, a timeless and eye-catching layout that adds sophistication to any space. To achieve a flawless look, you need to focus on two essential aspects: color coordination and tool selection. These elements are the foundation of a successful project, guiding your choices and ensuring a professional finish.
Master the herringbone pattern with perfect color choices and quality tools for a stunning, professional finish.
When it comes to color coordination, think about the mood you want to evoke. If you’re aiming for a modern and sleek vibe, opt for contrasting shades like charcoal gray and crisp white. For a warmer, inviting feel, consider earthy tones such as beige and terracotta. Keep in mind that the way you combine colors impacts the visual flow and depth of your pattern. Using harmonious hues will create a cohesive look, while bold contrasts will make the pattern pop. Remember, the direction of your pattern can influence how colors interact; a lighter shade can open up a space, whereas darker tones add depth. Planning your color palette in advance helps you visualize the final appearance and prevents haphazard choices that could diminish the pattern’s impact.
Tool selection is equally essential to executing a precise herringbone pattern. Start with high-quality painter’s tape, especially if you’re creating sharp, crisp lines. Use painter’s tape designed for clean removal without damaging your surface. A straightedge or level is indispensable to keep your pattern aligned perfectly, ensuring that each “V” shape remains consistent throughout. For larger projects, a chalk line can help maintain symmetry over long distances. When applying paint, choose brushes or rollers suited to your surface—smaller brushes for detailed edges and larger rollers for covering broad areas efficiently. Investing in good-quality painter’s tools minimizes errors and makes the process smoother, saving you time and frustration. Also, consider using a primer if your wall or floor has a porous surface, as it helps paint adhere better and prevents bleeding through the pattern. Additionally, understanding surface preparation is crucial to achieving a clean and durable finish.
In short, creating a stunning herringbone paint pattern depends on thoughtful color coordination paired with the right tools. Planning your color choices carefully ensures your design complements your space and stands out with vibrancy or subtlety, depending on your preference. Selecting the appropriate tools guarantees your lines are crisp, your pattern remains consistent, and your overall project looks professional. With patience and attention to detail, you can transform a plain wall or floor into a captivating feature that showcases your style and skill.
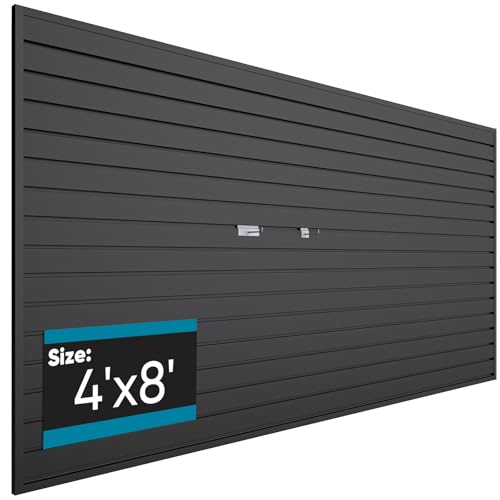
Brakki PVC Slat Wall Paneling 4x8 ft, Garage Organizer Storage System, Black Slatwall Panels for Garage Organization Product, Heavy Duty Wall Mounted Tool Storage for Home
[Saves Space]: The slatwall surface features interlocking seamless grooves, allowing you to hang shelves and various tools. This...
As an affiliate, we earn on qualifying purchases.
Frequently Asked Questions
Can Herringbone Patterns Be Used on Textured Walls?
Yes, you can use herringbone patterns on textured walls, but textured wall challenges may affect paint adhesion. To guarantee a smooth finish, clean the surface thoroughly and sand down high points. Use high-quality primer to improve adhesion, and choose a durable paint suited for textured surfaces. Applying thin, even coats and letting each dry thoroughly will help your herringbone pattern look sharp and last longer.
What Are the Best Tools for Creating a Herringbone Paint Pattern?
To craft a refined herringbone paint pattern, you’ll want precise tools. Start with painter’s tape to guarantee clean, sharp lines, and use leveling tools for accuracy and symmetry. A quality tape dispenser makes application easier, while a straightedge or laser level helps align the pattern perfectly. These tools work together to elevate your project, giving you crisp edges and a polished finish that enhances your space’s elegance.
How Long Does It Typically Take to Complete a Herringbone Paint Project?
A herringbone paint project usually takes between 2 to 4 days, depending on your space size and complexity. You should consider timing estimates carefully for project planning, including prep, taping, and drying times. If you’re meticulous with measurements and detail, it might extend a bit. Proper planning guarantees you stay on schedule and achieve a professional look without rushing.
Are Herringbone Paint Patterns Suitable for Small Spaces?
You might think herringbone paint patterns are overwhelming for small spaces, but they create a striking visual impact that actually enhances perception of size. By adding dynamic lines and texture, you draw the eye, making the space feel larger and more interesting. If you choose light colors and keep the pattern subtle, you can enjoy the sophisticated look without crowding your small room.
How Do I Correct Mistakes in a Herringbone Paint Layout?
If you notice mistakes in your herringbone paint pattern, start by carefully evaluating where the pattern is off. Use paint correction techniques like gently sanding or reapplying paint to fix small errors. For pattern adjustment, consider repainting affected sections, ensuring your new lines align perfectly with the existing pattern. Take your time, work patiently, and double-check measurements to achieve a seamless, professional look.

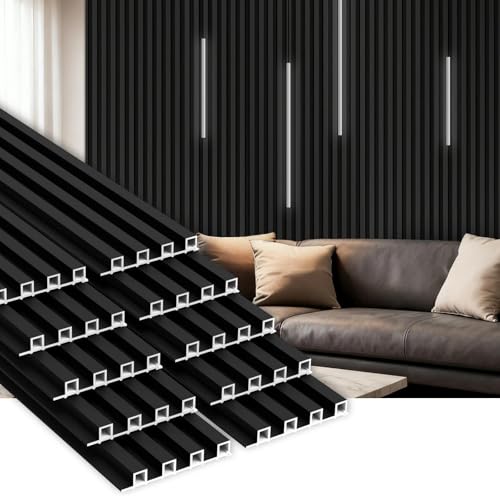
LARWORKS WPC Slat Wall Panels 8 Pack 96" x 6.6", Waterproof Fluted Wall Paneling, Accent 3D Wall Panel for Wall Decor, Bathroom, Bedroom, Office - High Grille Black (Cover Approx.35 sq.ft)
【Stylish & Modern】This wall panels showcase distinctive slat design and wood texture. As a type of fluted wall...
As an affiliate, we earn on qualifying purchases.
Conclusion
Now that you’ve mastered the herringbone paint pattern, imagine your space as a finely woven tapestry, each angled stroke symbolizing your creativity and attention to detail. Like a carefully crafted mosaic, your pattern reflects patience and precision, transforming a blank canvas into a vibrant story. With every line, you’re weaving a timeless design, where even the smallest angles contribute to a harmonious masterpiece. Your walls now stand as a symbol of your artistry and vision.

VEVOR Slat Wall Paneling, 4 x 4 ft, PVC Garage Slatwall with Modular Design, Black Slat Wall Easy-to-Install Adjustable Slatwall Panel with Coupling Structure & DIY Cutting, Fits for Storage & Display
Strong Load-Bearing Capacity: The slat wall panel can support up to 300LBS/4ft², providing stable and efficient storage for...
As an affiliate, we earn on qualifying purchases.
10Pack WPC Slat Wall Panels, 96 x 6.4 x 0.8Inches 3D Accent Wall Panels for Interior Home Decor, Fluted Wood Paneling for Living Room, TV Background, Office, Bedroom (Matte Black)
【High-Quality Wall Panels】These WPC wall panels boast a sleek, modern design that perfectly blends functionality with aesthetic appeal....
As an affiliate, we earn on qualifying purchases.