To make nail holes nearly invisible, start by thoroughly cleaning the area and choosing the right high-quality spackle or joint compound. Press the filler into the hole with a putty knife, smoothing it flush with the wall. After it dries, lightly sand for a smooth surface, then prime the area with a stain-blocking primer, feathering the edges to blend seamlessly. Finish with matching paint in thin, even coats. If you keep at it, you’ll discover how to achieve a flawless, professional look.
Key Takeaways
- Clean and sand the area thoroughly before applying high-quality spackle to ensure better adhesion.
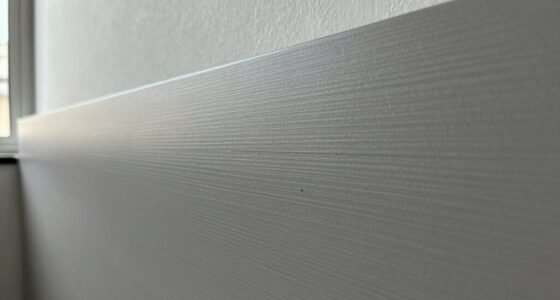
- Match the existing wall texture using specialized tools or techniques for seamless blending.
- Smooth the filler flush with the wall surface and let it dry completely before lightly sanding.
- Apply a stain-blocking or bonding primer over the patched area to promote even paint adhesion.
- Use the same paint color and finish, applying thin coats and feathering edges for an invisible repair.
Filling nail holes invisibly can dramatically improve the appearance of your walls without the need for repainting. When you want your walls to look flawless, the key is to make those tiny holes vanish seamlessly. The process starts with selecting the right filler, but equally important is how you prepare the surface and finish it off. Achieving a truly invisible repair hinges on understanding texture matching and proper primer application.
Seamless nail hole repairs require proper filler, surface prep, and texture matching for flawless walls.
First, guarantee the area around the nail holes is clean and free of dust or loose paint. Once prepped, choose a high-quality spackle or joint compound suitable for your wall type. When applying the filler, use a putty knife to press it into the hole, then smooth it out so it’s flush with the wall surface. A critical step often overlooked is matching the texture. If your wall has a subtle texture, like knockdown or orange peel, you’ll need to replicate that pattern after filling. This can be done by lightly sanding the dried filler or using specialized tools to mimic the existing surface texture. Proper texture matching helps the repair blend seamlessly, making the patch nearly invisible.
After the filler has dried thoroughly, the next essential step is primer application. Applying a primer over the patched area ensures the paint adheres evenly and prevents any differences in sheen or color from revealing the repair. Use a stain-blocking or bonding primer, especially if you’re working on a glossy or previously painted surface. Lightly sanding the area before primer application can help smooth out any uneven spots and improve adhesion. When applying primer, do so with a small brush or roller, feathering the edges to blend it into the surrounding wall. This step creates a uniform surface, making the final coat of paint look consistent across the wall. Additionally, utilizing AI-driven tools can assist in color matching for a more precise finish.
Once the primer is dry, you can proceed with painting. Use the same color and finish as the rest of your wall, applying thin, even coats. If you’ve successfully matched the texture and followed proper priming, your patched area will be virtually indistinguishable from the original surface. Remember, patience is essential—allow each layer to dry completely before proceeding. This meticulous approach ensures your nail holes are filled invisibly, leaving your walls looking pristine and professional.

3M Small Hole Repair High Strength, All in One Applicator Tool, 1-Pack, Quick and Easy Repair for Nicks and Nail Holes, Includes Putty Knife, Spackle, and Sanding Pad For Wall Repairs (SHR-3-AIO)
MAKES REPAIRS 3X FASTER than traditional vinyl spackling
As an affiliate, we earn on qualifying purchases.
As an affiliate, we earn on qualifying purchases.
Frequently Asked Questions
Can I Use Regular Wall Paint to Cover Putty?
Yes, you can use regular wall paint to cover putty, but it’s best to guarantee a good paint color match for a seamless finish. If the paint doesn’t match precisely, consider using primer alternatives or a tinted primer to help blend the repair. This approach prevents the putty from standing out and ensures a smooth, invisible look. Always let the putty thoroughly dry before applying the final coat.
How Long Should I Wait Before Painting Over Putty?
Picture a quiet wall, waiting patiently like a calm lake before dawn. You should wait at least 24 hours for the putty to dry completely, ensuring ideal paint adhesion. Rushing too soon risks cracks or peeling, so give it ample time. When the putty feels dry and smooth to the touch, you can confidently paint over it, knowing your finish will be seamless and durable.
Will the Putty Crack Over Time?
Putty can crack over time if it doesn’t adhere well or if it’s not fully dried. To prevent this, make certain of proper drying time before painting, typically 24 hours, and choose the right type of putty for your surface. Good paint adhesion depends on a smooth, properly dried putty surface. Applying paint too soon or using incompatible products may lead to cracking, so patience and correct preparation are key.
Is There a Primer Needed Before Painting Over Putty?
Applying primer before painting over putty is like giving a smooth road for your paint to travel on. You should always do primer application after surface preparation to guarantee proper adhesion and a flawless finish. Primer seals the putty, prevents paint absorption differences, and enhances durability. Skipping this step can lead to uneven paint, peeling, or cracking, so always include primer in your process for the best, lasting results.
Can I Sand the Putty Smooth With a Power Sander?
Yes, you can sand the putty smooth with a power sander. Use gentle, even sanding techniques to avoid damaging the surrounding surface. Start with a medium-grit sandpaper to finish smoothing the surface, then switch to a finer grit for a polished look. Be careful not to apply too much pressure, and frequently check your progress to guarantee a seamless finish. This method speeds up the process while achieving a professional, smooth finish.
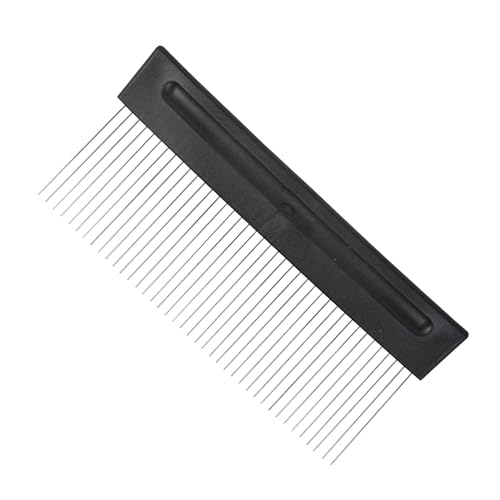
Nichiyo Stainless Steel Graining Tool for Wall Texture, 12 Inch Lightweight Scarifier, Plaster Art Scraper for Cement Decoration and Home Texture Projects(D1139B)
Professional Durability: Engineered with a robust stainless steel core, this texture comb withstands repeated, heavy-duty use without bending…
As an affiliate, we earn on qualifying purchases.
As an affiliate, we earn on qualifying purchases.
Conclusion
By choosing the right putty, applying it carefully, and painting over it seamlessly, you can make nail holes disappear effortlessly. With patience, practice, and these simple tricks, you’ll restore your walls to perfection. No more bumps, no more marks—just smooth, flawless surfaces. So, take your time, follow these steps, and enjoy the satisfaction of a job well done. Because when your walls look flawless, you feel confident, proud, and ready to move on to the next project.

1 Quart Bulls Eye 1-2-3 Primer Sealer Stain Killer
Designed for interior and exterior surfaces
As an affiliate, we earn on qualifying purchases.
As an affiliate, we earn on qualifying purchases.

Drywall Repair Kit Drywall Hole Repair Patch Kits Wall Spackle Repair Paste with 8.5OZ White Wall Repair Putty with Scraper, Wall Surface Hole Fill Quick and Easy Solution (1Pack)
Complete Repair Kit: Contains 1 pieces repair putty(8.5oz), 2 inch wall repair patches(2pcs), 4 inch wall repair patches(1pcs),…
As an affiliate, we earn on qualifying purchases.
As an affiliate, we earn on qualifying purchases.