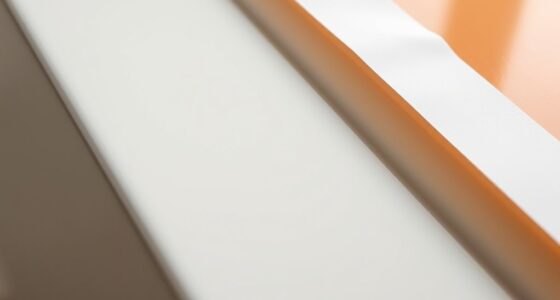
To achieve seamless ombré wall painting, focus on blending techniques like feathering with soft brushes or sponges, working in small sections before the paint dries. Keep your tools moist and overlap each stroke slightly to create smooth progressions between colors. Use high-quality paints and consistent pressure for even blending. Paying attention to details and maintaining a wet edge helps prevent harsh lines. If you want to master flawless gradients, explore these tips further—it’s easier than you think.
Key Takeaways
- Use soft, high-quality brushes like fan or flat brushes for smooth color transitions.
- Work in small sections with wet edges to prevent visible lines and ensure seamless blending.
- Employ feathering or gentle back-and-forth strokes to softly merge colors and create a gradient effect.
- Overlap each brush stroke slightly and keep tools moist for consistent, gradual color transitions.
- Regularly blend layers before they dry to maintain a cohesive, natural ombré gradient.

HYWWPFLAY 6Pcs Ombre Nail Brush Nail Art Brushes Nail Ombre Brush Nail Gradient Painting Pen Ombre Brush for Gel Nails Acrylic Manicure Brush Nail Art Tools
Valuable Package: you will get 6 pieces ombre nail blending brush, include 3pcs angle ombre nail brush and…
As an affiliate, we earn on qualifying purchases.
As an affiliate, we earn on qualifying purchases.
Choosing the Right Color Palette for Your Ombré Effect

Selecting the right color palette is essential for creating a smooth and visually appealing ombré effect. You want to focus on color harmony, choosing shades that progress seamlessly from light to dark or vice versa. Consider colors that complement each other and fit your room’s overall vibe. Opt for paint finishes that enhance the gradient; matte finishes can soften progressions, while satin or semi-gloss finishes add subtle shine. Stick with a cohesive color scheme, such as analogous or monochromatic palettes, to guarantee a harmonious flow. Avoid contrasting or clashing colors that can disrupt the gradient. Planning your palette carefully helps you achieve a balanced, professional look that enhances your space’s depth and dimension. Additionally, understanding color psychology can guide you in selecting hues that evoke the desired mood and atmosphere in your space. Incorporating visual harmony principles ensures that the transition between shades feels natural and pleasing to the eye. Being aware of emotional impact can further refine your choices and create a more compelling visual experience. Paying attention to color transitions can help ensure a smooth gradient that is easy on the eyes and visually appealing.
LAVEVE Knockdown Texture Sponge for Wall and Drywall Patch/Repair – Home Decor DIY Painting Ceiling Wall Texture – 2 Pcs
Main Function: Create decorative imitation sponge painting effect. Our knockdown sponge is intended for small repairs and areas…
As an affiliate, we earn on qualifying purchases.
As an affiliate, we earn on qualifying purchases.
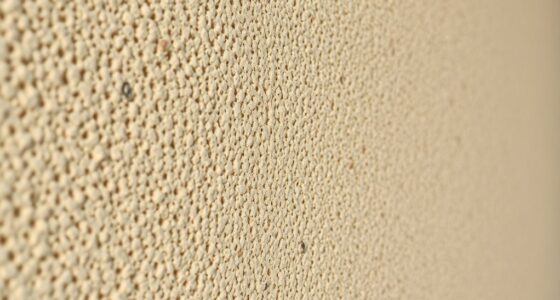
Preparing Your Wall Surface for a Smooth Gradient

Before you start painting, make sure to clean your wall thoroughly to remove dust and dirt. Sand the surface lightly to create a smooth, even base for the paint. Then, apply a primer to guarantee your ombré gradient adheres evenly and looks flawless. Ensuring proper surface preparation is essential for achieving a professional-looking gradient. Additionally, understanding how automation in business can streamline your painting process might help you plan more efficiently. Proper furniture protection during your painting project will also prevent accidental damage and keep your space tidy. Incorporating safety precautions such as wearing protective gear can further ensure a safe and successful painting experience.
Clean and Sand Surface
To guarantee your ombré wall painting turns out smoothly, start by thoroughly cleaning the surface to remove dust, dirt, and grease. A clean wall ensures better adhesion and prevents uneven spots. Next, lightly sand the wall to create a slightly rough surface, which helps the paint bond more effectively. Pay attention to the wall’s texture, smoothing out any bumps or imperfections that could disrupt your gradient. Sanding also helps to minimize reflections and lighting effects that might cause glare or uneven color transitions. After sanding, wipe the surface with a damp cloth to remove dust. Additionally, understanding the hydration and curing processes of paint can help you plan your work for optimal results. A well-prepared surface improves the overall finish, making your blending seamless and professional-looking. Proper cleaning and sanding are key to achieving a smooth, consistent ombré effect. Incorporating knowledge of AI in retail success can provide insights into innovative tools that assist in color matching and gradient planning, enhancing your project. Being aware of paint types and finishes can also help you select the best products for your specific wall surface and achieve a flawless gradient. Furthermore, considering lighting conditions in your space can help you anticipate how the gradient will appear under different illumination, ensuring a more refined outcome.
Prime for Uniformity
Applying a primer is essential to guarantee your ombré wall has a smooth, even gradient. A well-applied primer creates a uniform surface, making it easier to blend colors seamlessly. It also helps reduce the impact of existing texture patterns that could interfere with a smooth progression. When selecting a primer, opt for one that enhances the wall’s absorption, ensuring consistent lighting effects across the gradient. Proper priming minimizes uneven patches and prevents the paint from soaking in unevenly, which can disrupt your blending process. Take your time to apply the primer evenly with a roller or brush, focusing on areas with prominent texture patterns. This preparation step ensures your final ombré effect appears flawless, with a subtle, natural transition that highlights the lighting effects you want to achieve. Additionally, choosing the right primer can help prevent issues like uneven absorption, which is crucial for achieving a seamless gradient.

1 Quart Bulls Eye 1-2-3 Primer Sealer Stain Killer
Designed for interior and exterior surfaces
As an affiliate, we earn on qualifying purchases.
As an affiliate, we earn on qualifying purchases.
Techniques for Seamless Color Blending

To achieve a smooth ombré effect, you should focus on effective gradient shift methods, like feathering or soft blending. Using the right color gradient tools, such as sponges or specialized brushes, can make the process easier. Mastering blending brush techniques will help you create seamless color transitions without harsh lines or streaks. Incorporating color variation techniques can further enhance the depth and realism of your ombré wall painting. Additionally, understanding how to manage paint consistency will help prevent uneven blending and ensure a professional finish. Practicing these blending methods regularly can build your confidence and improve your overall technique. Embracing personal development principles, like patience and mindfulness, can also improve your focus and precision during the painting process.
Gradient Transition Methods
Achieving a smooth gradient shift in ombré wall painting requires careful technique and attention to detail. One effective method is using specific brush stroke techniques, such as feathering or light, overlapping strokes, to blend colors seamlessly. Start with well-mixed paints, employing color mixing tips like gradually blending hues on a palette before application. Work from the darker to the lighter shade, softening edges as you go. Keep your brush damp or slightly loaded to avoid harsh lines. Consistently blend each section into the next before the paint dries to maintain a fluid transition. Practice patience and steady hand movements to achieve a flawless gradient. Understanding the history and evolution of techniques can also enhance your approach, as innovations in art have continually refined blending methods for a more polished finish. Exploring traditional and modern methods can provide additional insights into achieving professional results. Additionally, experimenting with different tools like sponges or blending brushes can help achieve more nuanced color transitions, leading to a more professional look. This approach ensures your color transitions are smooth, professional, and visually appealing.
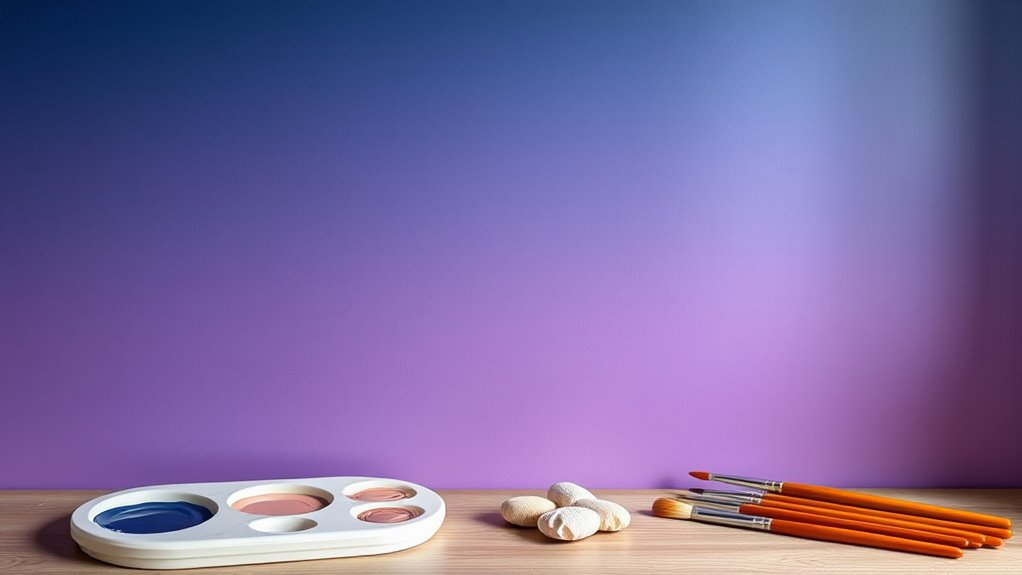
Color Gradient Tools
Using the right tools can make a significant difference in creating seamless color blends on your wall. When it comes to color gradient tools, your choice of brushes plays a vital role. Select brushes with soft, flexible bristles to facilitate smooth color mixing and prevent harsh lines. Flat or fan brushes are ideal for blending large areas, allowing you to gently transition between shades. For finer control, consider using angled brushes to refine edges and achieve even gradients. Proper brush selection guarantees you can manipulate the paint effectively, creating natural, seamless transitions. Additionally, using high-quality brushes minimizes streaks and helps blend colors more effortlessly. Being aware of city dynamics can help you choose the right techniques and tools that suit your space and style, making your ombré wall painting look more professional and polished. By pairing the right brushes with precise color mixing techniques, you’ll enhance your ability to produce stunning ombré effects that look professional and polished. Choosing the appropriate painting tools can further improve your blending process, ensuring a smooth gradient transition across your wall. Incorporating proper preparation into your workflow can also help achieve better results and a more refined finish.
Blending Brush Techniques
Mastering blending brush techniques is essential for creating smooth, seamless color shifts on your wall. To achieve this, focus on your brush strokes, applying light, even motions to blend colors effortlessly. Proper color mixing on your palette is key—combine shades gradually to prevent harsh lines. Keep your brush slightly damp to maintain fluid transitions. Use a gentle, sweeping motion across the wall, blending edges softly. Work quickly before paint dries to avoid visible lines or streaks. Practice layering colors gradually, building depth without overloading your brush. Maintain consistent pressure to keep brush strokes uniform. Clean your brush frequently to prevent muddying colors. With patience and precision, these techniques will help you master a flawless ombré effect.

Rust-Oleum 1976502 Painter's Touch Latex Paint, Quart, Flat Black, 32 Fl Oz, (Pack of 1)
Use for a variety of indoor and outdoor project surfaces including wood, metal, plaster, masonry or unglazed ceramic
As an affiliate, we earn on qualifying purchases.
As an affiliate, we earn on qualifying purchases.
Tools and Materials for Achieving the Perfect Gradient
Creating a seamless ombré wall requires the right tools and materials to blend colors smoothly. Your choice of brush selection is vital; opt for soft, wide brushes that allow for gentle progressions. Flat or fan brushes work well for blending large areas without harsh lines. Proper paint mixing is equally important—combine your colors thoroughly to guarantee a consistent gradient. Use a palette or mixing tray to blend shades gradually, avoiding abrupt color shifts. Keep your brushes clean between mixes to prevent muddying the colors. High-quality paints with good pigment dispersion help achieve a smooth finish, reducing the need for excessive blending. With the right tools and careful preparation, you’ll create a flawless ombré effect that flows beautifully across your wall.
Tips for Maintaining Consistency and Avoiding Line Marks

To maintain consistency and prevent line marks during your ombré wall painting, it is essential to work continuously along each section before the paint dries. This helps blend layers seamlessly and avoids visible streaks. Keep your brush or roller moist for smooth layering paint, ensuring no abrupt transition. Use a high-quality brush to achieve even application and reduce streaks. Overlap each pass slightly with the previous one to create a gradual gradient. Work in manageable sections to maintain a wet edge, preventing line marks from forming. Consistently blend each layer into the next to maintain the ombré effect.
- Keep your tools damp for smooth layering paint
- Work in small, manageable sections
- Overlap each stroke slightly
- Use a soft brush or roller for even application
- Regularly check for streaks and smooth them out
Creative Variations and Customization Ideas

Adding creative variations and personal touches can transform a simple ombré wall into a stunning focal point. One way to do this is by experimenting with custom color mixes to create unique gradients that match your style and space. You can also incorporate pattern integration, such as subtle geometric shapes or floral accents, to add visual interest and depth. Using stencils or painter’s tape allows you to blend patterns seamlessly into the ombré background, enhancing the overall design. Consider layering different textures or finishes to increase dimension. These customization ideas give you the freedom to tailor your wall art, ensuring it reflects your personality while elevating your room’s aesthetic. With a little creativity, your ombré wall becomes a personalized masterpiece.
Frequently Asked Questions
How Long Does It Typically Take to Complete an Ombré Wall Painting?
It usually takes around 4 to 8 hours to complete an ombré wall painting, depending on the size and your skill level. You’ll spend time on color blending, carefully shifting shades for a seamless effect. Keep in mind, drying time varies with paint type and thickness, so you might need extra time between coats. Patience guarantees smooth gradients and a professional look, making the effort well worth it.
What Are Common Mistakes to Avoid During the Blending Process?
To avoid common mistakes during blending, be careful of color bleeding and uneven blending. You might accidentally let colors bleed into each other, creating unwanted streaks, or rush the process, causing uneven progressions. To prevent this, work slowly, keep your tools clean, and blend gradually. Test your technique beforehand, and don’t rush the process—this guarantees a smooth, seamless ombré effect without unwanted color bleed or unevenness.
Can Ombré Effects Be Achieved With Spray Paint or Only With Brushes?
You can definitely achieve ombré effects with spray paint, using spray paint techniques to create smooth gradations. However, brush blending methods often give you more control for a seamless gradient, especially on detailed or textured surfaces. Spray paints are quick and effective for larger areas, but for precision, combining spray techniques with brushing can produce the best ombré results. Experiment to find the method that works best for your project.
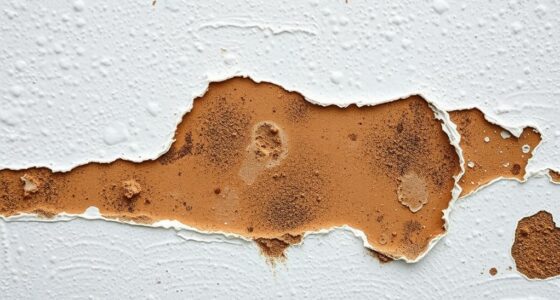
How Do I Fix Uneven Color Transitions After the Painting Is Finished?
Imagine smoothing out gentle waves in a calm lake—you can do that with your wall. To fix uneven color graduations, use touch-up techniques like lightly blending the edges with a damp sponge or brush. For more precise correction, apply a small amount of paint over the uneven area and blend it seamlessly into the surrounding colors. Patience and gentle strokes will help you achieve a harmonious, ombré effect.
Is Ombré Wall Painting Suitable for All Wall Types and Surfaces?
Ombré wall painting works on most wall materials, but proper surface preparation is key. You should clean and smooth surfaces like drywall, plaster, or concrete before painting. For textured or uneven surfaces, consider sanding or applying a primer to create a better base for blending. If you prepare the wall correctly, the ombré effect will look smooth and professional, regardless of the wall material.
Conclusion
Now that you’ve mastered the art of ombré wall painting, imagine your wall transforming into a gentle wave of colors, seamlessly blending from dark to light like a sunrise. With patience and the right tools, you’ll create a stunning gradient that flows effortlessly across your space. Every brushstroke becomes a whisper of color, turning your wall into a captivating masterpiece. Embrace the process, and let your creativity paint a smooth, beautiful progression you’ll love to admire every day.