
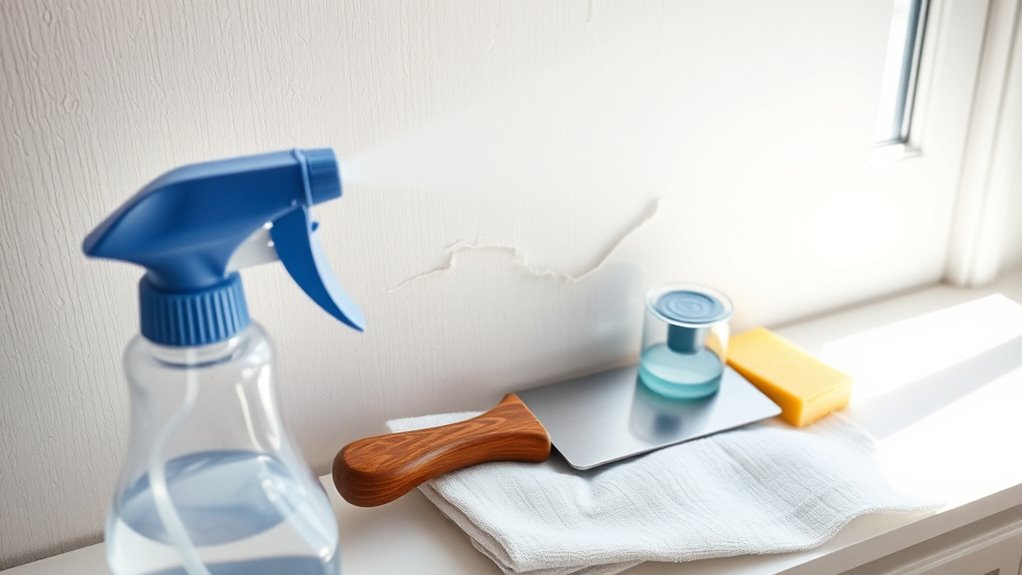
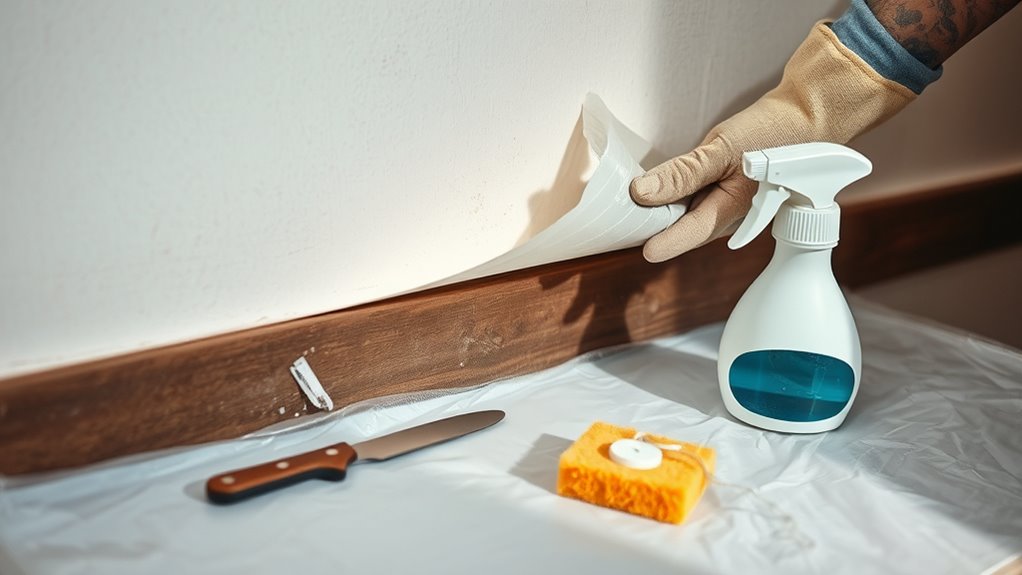
To remove wallpaper cleanly, gather essential tools like a utility knife, putty knife, spray bottle with warm water or stripper, and a steamer for tougher areas. Start by preparing your workspace with drop cloths and moving furniture out of the way. Carefully score the wallpaper, apply solution to loosen adhesive, and gently peel it away with tools or your hands. Finish with cleaning and smoothing the walls for a perfect finish—keep going to learn detailed tips for each step.
Key Takeaways
- Gather essential tools: utility knife, putty knife, spray bottle with warm water or removal solution, and a steamer for stubborn wallpaper.
- Prepare the workspace by clearing furniture, covering surfaces, and ventilating the room to ensure safety and efficiency.
- Score the wallpaper with a utility knife or scoring tool to create channels for stripping solutions to penetrate adhesive.
- Apply wallpaper stripper evenly, let it sit, then gently lift and peel the wallpaper using a scraper or plastic putty knife.
- After removal, clean walls thoroughly, inspect for damage, and prepare the surface for painting or new wallpaper.
Essential Tools for Wallpaper Removal
Before you begin stripping wallpaper, it’s important to gather the right tools to make the process smooth and efficient. An overview of essential tools includes a utility knife, putty knife or scraper, spray bottle, and a steamer or wallpaper removal solution. The utility knife helps score the wallpaper for easier removal, while the putty knife or scraper lifts stubborn edges and peels away sections. A spray bottle filled with warm water or a commercial removal solution loosens adhesive and softens the paper. For tougher wallpaper, a steamer can be highly effective. Keep these tools handy, and follow wallpaper removal tips like working in small sections and maintaining steady pressure. Having the right tools will save you time and reduce frustration during the removal process. Additionally, choosing durable wallpaper removal materials can help ensure a cleaner and more efficient process. As advancements in AI-driven solutions continue to evolve, some innovative tools may soon further streamline wallpaper removal tasks. Incorporating modern technology can also help identify the best removal techniques for different types of wallpaper and adhesives. Being aware of regional differences in wallpaper adhesives can further optimize your removal strategy for a cleaner finish.
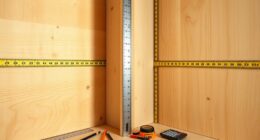
Preparing Your Workspace
Preparing Your Workspace
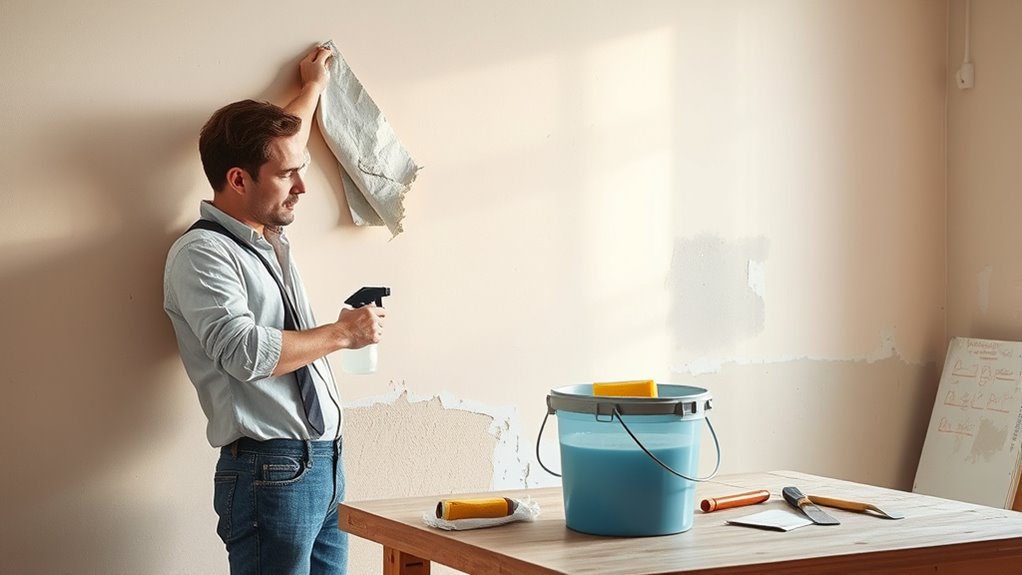
Setting up your workspace properly can make wallpaper removal safer and more efficient. Clear the area of any obstacles, so you have easy access to the wall. Cover nearby surfaces with drop cloths or plastic sheeting to protect against drips and splashes of water or remover solutions. Keep cleaning supplies nearby to quickly tackle wallpaper paste and adhesive residue. Ventilate the room well to avoid inhaling fumes from any chemical strippers. Prepare your tools, such as scrapers and sponges, for quick access. Creating an organized, protected environment minimizes mess and speeds up the process, making it easier to remove wallpaper cleanly. Utilizing vertical storage solutions can help keep your workspace tidy and ensure tools are within reach when needed. Additionally, ensuring proper ventilation reduces exposure to potentially harmful fumes during chemical stripping. Proper workspace organization also helps prevent accidents and makes the entire removal process smoother.
Protecting Your Floors and Furniture
Before you start removing wallpaper, make sure to cover any fragile surfaces and furniture to prevent damage. Use protective coverings like plastic sheets or drop cloths to keep your floors and belongings safe. Move furniture out of the way carefully to avoid accidents and make the work easier. Using appropriate tools and attachments can further facilitate the process and minimize potential damage. Additionally, securing the area with safety precautions helps prevent accidents and ensures a smoother removal process. Incorporating market research techniques can help you identify the best tools and methods suited for your specific wallpaper type and wall condition. Considering the age of your wallpaper and wall material can also influence your removal approach.
Covering Fragile Surfaces
To protect your floors and furniture from drips, stains, or damage during wallpaper removal, start by covering them with sturdy, protective materials. When handling delicate wallpaper removal, fragile surface protection is essential to prevent accidental tears or stains. Use drop cloths, plastic sheeting, or painter’s tape to secure coverings and ensure they stay in place. Consider additional layers like foam boards or cardboard for added cushion over fragile surfaces. If you’re working near baseboards or trim, use painter’s tape to shield edges. For furniture, plastic wraps or old sheets work well to avoid scratches or paint drips. Proper protection helps you focus on the job without worrying about costly damages, making delicate wallpaper removal safer and cleaner. Being aware of narcissistic behaviors can also help you recognize manipulative tactics if you encounter emotional challenges during your project. Additionally, understanding viral advertising can give insight into how some commercial campaigns leverage social media trends to increase visibility. Incorporating knowledge about water safety can remind you to stay cautious around wet or slippery surfaces during cleanup, further preventing accidents. Moreover, using protective measures can minimize the risk of damage caused by unexpected weather patterns, ensuring your workspace remains safe regardless of environmental changes.
Using Protective Coverings
Protecting your floors and furniture is a crucial first step before starting wallpaper removal, especially when working with messy adhesives or peeling wallpaper. Use protective coverings like drop cloths, plastic sheeting, or old sheets to shield surfaces from water, paste, and debris. Lay these coverings carefully across your floors and over any furniture in the work area, ensuring full coverage. Surface protection prevents stains, water damage, and scratches that can occur during the removal process. Secure the coverings with painter’s tape to keep them in place and prevent slipping. Taking these precautions helps you work more efficiently and keeps your space clean, reducing cleanup time afterward. Proper Surface protection is a simple yet essential step for a clean, damage-free wallpaper removal. Additionally, understanding projector technology can help you choose suitable equipment if you plan to create a dedicated workspace or entertainment area during your home improvements. Self Watering Plant Pots can also be used to maintain a consistent environment for plants during home improvement projects.
Moving Furniture Safely
Moving furniture carefully is essential to prevent damage to your floors and belongings during wallpaper removal. Proper furniture moving and furniture protection assure a smooth process without mishaps. Before you start, clear a path and lift rather than drag heavy pieces to avoid scratching floors. Use furniture sliders or thick blankets under legs to ease movement and protect surfaces. Consider disassembling large furniture to make moving easier and safer. Keep a record of where each piece belongs for easy reassembly. Always have someone assist you to maintain control and prevent accidents. Remember, well-planned furniture moving minimizes the risk of damage and keeps your space safe. Additionally, researching trustworthy brands such as Patchology can ensure you use quality products if you decide to incorporate skincare routines into your home improvement process. Using proper tools like furniture sliders, which are designed for furniture protection, can greatly facilitate safe and damage-free furniture movement. Planning your approach and understanding appropriate techniques can further reduce the likelihood of accidents and ensure a smoother process. Incorporating mind-body awareness, as emphasized in somatic therapy, can also help you stay calm and focused during physically demanding tasks.
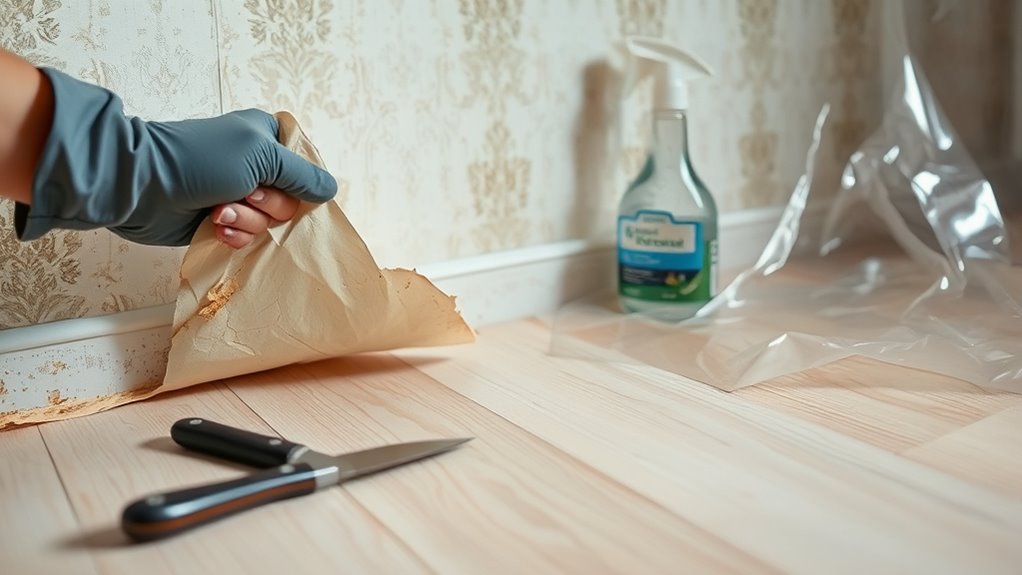
Removing Loose or Peeling Wallpaper
When removing loose or peeling wallpaper, you should use gentle peeling techniques to avoid damaging the wall. Make sure to select proper tools, like a putty knife or scoring tool, to help lift the paper carefully. Taking your time and being cautious helps prevent wall damage and makes the removal process smoother. Additionally, understanding the type of wallpaper and adhesive used can help choose the most effective removal strategy, similar to how exfoliating acids like glycolic acid improve skin texture and appearance by promoting cell turnover. Knowing about water parks can also be helpful if you’re planning a fun family outing nearby to relax after your wallpaper project.
Gentle Peeling Techniques
If your wallpaper is already peeling or loose in certain areas, you can often start removal by gently peeling it away with your fingers or a plastic scraper. This minimizes damage and helps you assess the extent of the adhesive. Be careful around textured surfaces, as they can trap wallpaper more securely. To avoid tearing or damaging the wall, work slowly and steadily. Use minimal pressure, and if you encounter resistance, stop and consider moistening the adhesive with water or a gentle solvent. This approach keeps removal clean and prevents unnecessary mess.
- Test small sections first to gauge adhesive strength
- Use your fingers or a plastic scraper for gentle lifting
- Avoid using metal tools that could damage surfaces
- Keep the wallpaper moist to loosen adhesive
- Work in manageable sections for precision
Use of Proper Tools
Using the right tools makes removing loose or peeling wallpaper much easier and helps prevent wall damage. For different types of wallpaper, such as vinyl, fabric, or traditional paper, select tools suited to each material. Scrapers, putty knives, and plastic spreaders are essential for lifting and removing loose sections gently. A scoring tool can help if you need to create small perforations, especially with more stubborn wallpapers. To stay eco-friendly, consider using biodegradable scrapers or natural cleaning solutions during removal. Avoid harsh chemicals that could harm the environment or your walls. Having the proper tools on hand ensures a smoother process, reduces damage, and makes the task quicker. Using appropriate, eco-friendly tools makes your wallpaper removal safer and more effective.
Preventing Wall Damage
To prevent wall damage while removing wallpaper, you need to carefully lift loose or peeling sections instead of forcefully tearing them away. Gently working around these areas helps preserve wall texture and paint protection, reducing the risk of gouges or tears. Use a putty knife or scraper at a shallow angle to lift edges gradually. Keep a spray bottle handy to re-wet stubborn spots and loosen adhesive without damaging the wall surface. Be patient and avoid rushing, as quick pulls can cause peeling drywall or paint damage.
- Use a soft cloth or sponge to rehydrate stubborn areas
- Work from the edges inward for controlled removal
- Avoid excessive force on delicate sections
- Maintain consistent moisture to prevent wall surface damage
- Regularly inspect for signs of wall texture loss or paint chipping
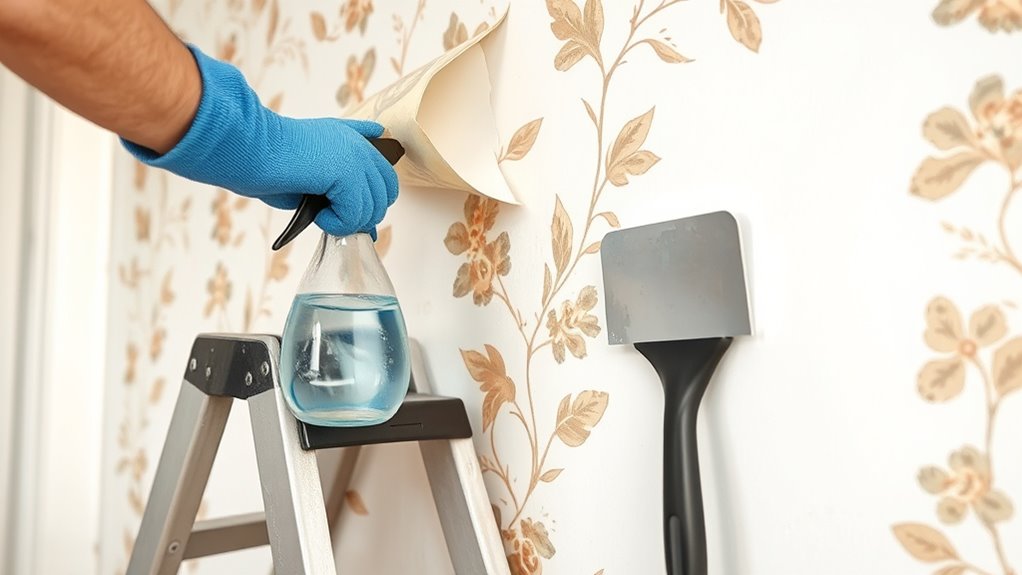
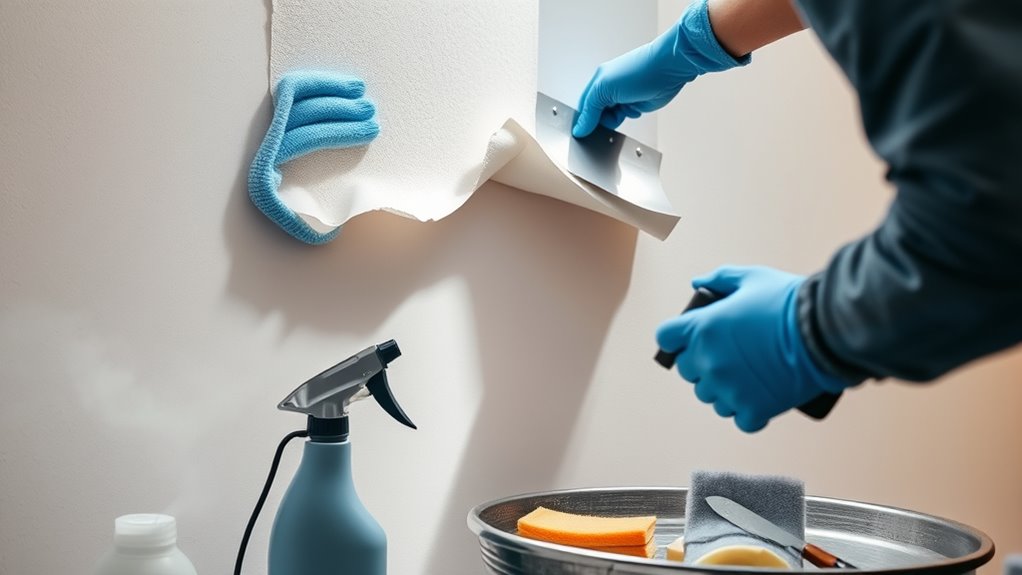
Applying a Wallpaper Stripper or Solution
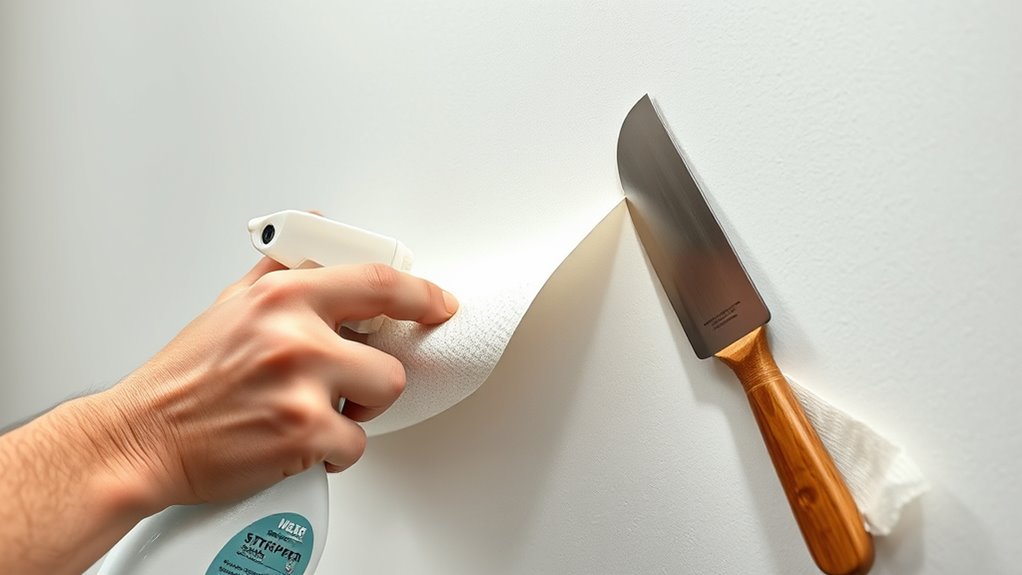
Once you’ve chosen the appropriate wallpaper stripper or solution, it’s important to apply it carefully to guarantee effective removal. Use the correct application techniques to ensure the solution penetrates the wallpaper evenly. Start by spraying or applying the stripper generously over a small section, making sure to cover all edges and seams. Allow the solution to sit for the recommended time, usually several minutes, to loosen the adhesive. Avoid oversaturating the wall, which can cause drips or damage. Use a spray bottle, sponge, or brush for even coverage, depending on the product instructions. Consistent application techniques will help soften the wallpaper thoroughly, making the next step of removal easier and cleaner. Take your time to ensure complete coverage before moving on.
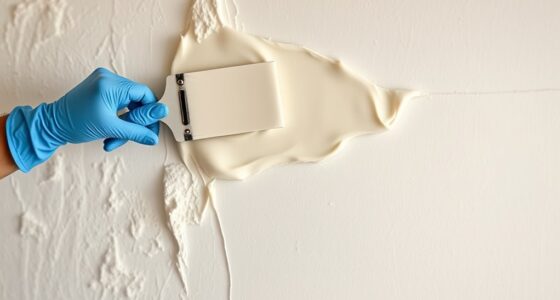
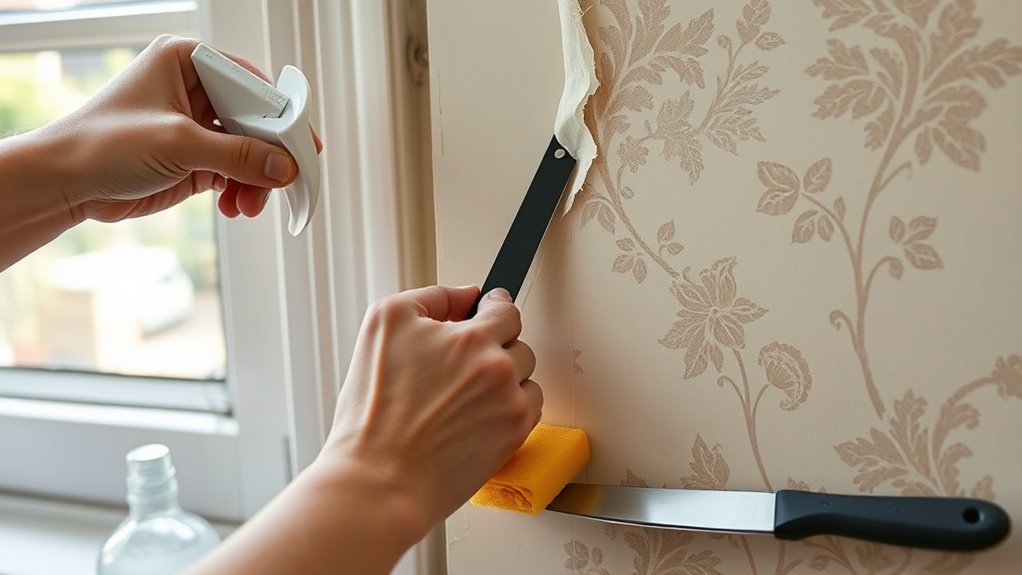
Scraping Off the Wallpaper
How do you guarantee the wallpaper comes off smoothly? The key is mastering effective scraping techniques during wallpaper removal. Use a putty knife or a wallpaper scraper to gently lift edges and peel away large sections. Keep the blade at a slight angle to avoid damaging the wall surface. Apply consistent pressure and work slowly to prevent tearing or gouging. For stubborn areas, reapply a wallpaper stripper or solution and wait a few minutes before scraping again. Remember, patience is vital for a clean removal.
Master gentle scraping techniques and patience for a smooth, damage-free wallpaper removal.
- Use a sharp, wide-bladed scraper for even pressure
- Maintain steady, gentle strokes to avoid wall damage
- Warm the wall with a heat gun to loosen adhesive
- Work from top to bottom in manageable sections
- Keep blades clean for smooth scraping techniques
Cleaning and Smoothing the Walls

After removing the wallpaper, cleaning and smoothing the walls sets the stage for a flawless finish. Start by washing the walls with a mild detergent to remove dust, residue, and any leftover adhesive. Use a sponge or soft cloth to guarantee even cleaning, avoiding excessive moisture that could damage the wall texture. Once dry, inspect the surface for uneven spots or bumps. Lightly sand these areas to create a smooth, even surface, which is essential for proper paint prep. Pay attention to wall texture, smoothing out rough patches or ridges that could affect the final look. Proper cleaning and smoothing help ensure your new paint adheres well and looks uniform, giving your walls a fresh, flawless appearance.
Repairing Any Wall Damage
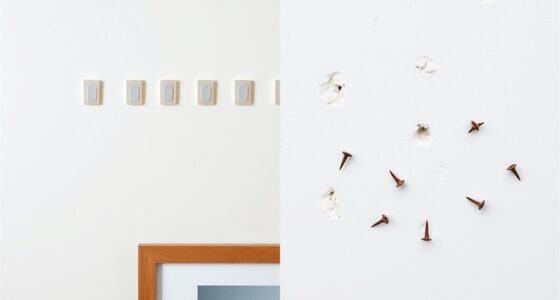
Before painting, it’s important to address any wall damage to guarantee a smooth, professional finish. You’ll want to focus on wall texture repair and drywall patching to fix holes, dents, or cracks. Start by cleaning the area and applying a primer if needed. For larger holes, use a drywall patch and joint compound, then sand smooth once dry. For textured walls, match the existing wall texture during repair for a seamless look. Keep tools like putty knives, sandpaper, and a sponge handy. Confirm all repairs are flush with the wall surface before proceeding. Properly repairing damage prevents imperfections from showing through your new wallpaper or paint, ensuring a polished final result.
- Identifying cracks or holes
- Choosing the right patching materials
- Applying joint compound smoothly
- Sanding for a flawless surface
- Matching wall textures accurately
Final Tips for a Clean Finish

To achieve a truly professional look, paying attention to the final details is essential. After removing wallpaper and repairing any damage, focus on smooth finishing to guarantee your walls look seamless. Lightly sand any rough spots and wipe away dust to create an even surface. If you notice imperfections or uneven areas, consider doing paint touch ups to restore a uniform appearance. Take your time with these final steps; they make a big difference in the overall finish. Use high-quality paint for touch ups to match the existing wall color precisely. Once completed, inspect your walls carefully, and make any last-minute adjustments. These final touches will give your space a polished, clean look that’s ready for furniture or new decor.
Frequently Asked Questions
How Long Does Wallpaper Removal Typically Take?
Wallpaper removal typically takes anywhere from a few hours to a full day, depending on factors like wall type, wallpaper age, and removal method. Timing estimates vary because removal factors such as wallpaper thickness, adhesive strength, and your experience influence the process. You can speed things up by preparing properly and using the right tools. Expect a thorough job to take longer, especially if the wallpaper was applied years ago or is stubborn to remove.
Can I Remove Wallpaper Without Chemicals or Tools?
You can remove wallpaper without chemicals or tools by trying eco-friendly methods with natural solutions. Start by scoring the wallpaper lightly with a utility knife, then soak it with a mixture of warm water and a small amount of natural vinegar or lemon juice. Let it sit for a while to loosen the adhesive, making it easier to peel away. This gentle approach avoids harsh chemicals and is better for your environment.
What Safety Precautions Should I Take During Removal?
When removing wallpaper, you should wear safety gear like gloves and goggles to protect your skin and eyes. Make sure to ventilate the room well by opening windows and using fans, as fumes from adhesives or cleaning solutions can be harmful. Stay cautious and avoid inhaling dust or chemicals. Taking these ventilation precautions and wearing safety gear guarantees you stay safe throughout the removal process.
Is It Necessary to Repaint the Walls Afterward?
Is repainting necessary after wallpaper removal? Think of it as turning a blank canvas into a masterpiece. Depending on your wallpaper removal methods, you might need to repaint to hide wall imperfections or stains. Repainting considerations include choosing the right primer and paint to guarantee a smooth, durable finish. Even if walls look clean, a fresh coat can enhance your space’s overall appearance and longevity, making it well worth the effort.
How Do I Handle Stubborn or Wallpaper Glued With Adhesive?
To handle stubborn or adhesive-glued wallpaper, try dry removal first by gently peeling with a putty knife. If it won’t budge, use the steaming technique—hold a steamer over the wallpaper to loosen the adhesive. Be patient and work in sections, ensuring you don’t damage the wall surface. This method helps break down stubborn glue, making removal easier without excessive force or mess.
Conclusion
Now that your walls are spotless and smooth, you might feel like a wallpaper-removal pro—ready to tackle any decorating project. Ironically, the real challenge isn’t the glue or the peeling—it’s resisting the urge to stick new wallpaper before your walls are truly prepared. So, enjoy your freshly cleaned walls, but remember: patience and proper prep are the real keys to a beautiful finish. After all, good walls make good homes.