
Start by inspecting your walls for cracks, peeling paint, or uneven spots, and address these issues before moving forward. Clean the surfaces thoroughly to remove dust and debris, then sand rough patches and fill holes with patching compound. Use a high-quality primer suited for vintage finishes to guarantee proper adhesion. Don’t forget to check behind walls for hidden problems like mold or moisture damage. Keep these tips in mind, and you’ll be well on your way to a beautiful, long-lasting finish—dive deeper to learn more.
Key Takeaways
- Thoroughly assess wall texture, paint, and plaster for cracks, peeling, or uneven areas before starting repairs.
- Inspect behind walls for hidden issues like moisture, mold, or structural damage, especially in basements.
- Remove loose paint, wallpaper, and debris; sand rough patches and fill cracks to create a smooth surface.
- Use high-quality, compatible primers to seal surfaces, improve adhesion, and address imperfections.
- Ensure walls are clean, dry, and free of debris to guarantee long-lasting, professional vintage finishes.

Restoring or updating the walls in an older home requires careful preparation to guarantee a smooth finish and long-lasting results. Before you start, you need to evaluate the existing condition of your walls, especially if you’re aiming for vintage finishes that highlight the home’s historic charm. Vintage finishes often demand a specific surface quality, so assessing the walls’ texture, paint, and plaster is essential. Identifying any cracks, peeling paint, or uneven spots early on allows you to address them properly, preventing issues down the line and ensuring your vintage aesthetic looks authentic and polished.
Assess wall condition early to ensure authentic vintage finishes and a smooth, polished look.
A critical part of your prep work involves conducting thorough structural assessments. Older homes can have hidden issues like compromised framing, water damage, or foundation shifts that may affect wall stability. If you neglect these assessments, you risk covering up problems that could worsen over time, leading to costly repairs later. Start by inspecting behind the walls for signs of moisture or mold, especially in basements or areas prone to leaks. If you notice any concerns, consult a professional to evaluate the structural integrity before proceeding with wall treatments. This way, you guarantee your walls are safe and sound, providing a solid foundation for your renovation. **structural integrity** is a crucial factor that should never be overlooked in older homes.
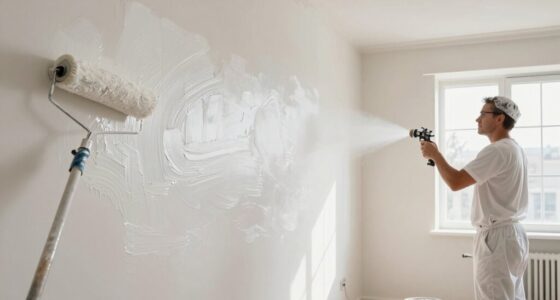
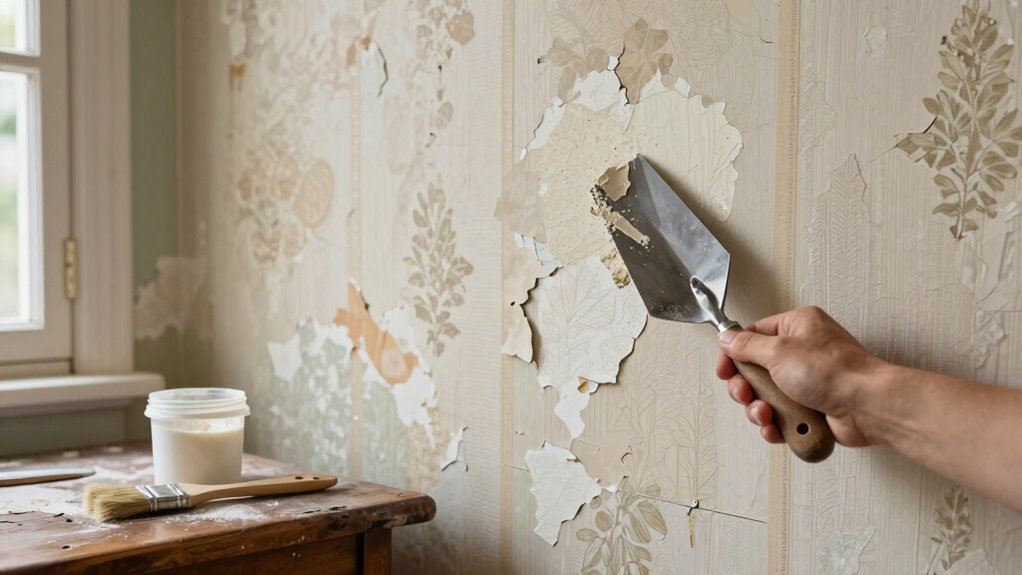
Once you’ve completed your assessments, the next step involves cleaning and preparing the surface. Remove loose paint, wallpaper, or any debris that could interfere with new finishes. Sand down rough patches and fill in cracks or holes with a suitable patching compound. For vintage finishes, you might want to preserve some of the original textures or layers, so be careful not to over-sand or strip too much. After patching and sanding, wipe down the walls to remove dust and residue. A clean, smooth surface is essential for achieving professional-looking results, whether you’re applying paint, wallpaper, or specialized vintage finishes. Proper surface preparation ensures the longevity and quality of your wall treatments.
Priming your walls is another important step. Use a high-quality primer that’s compatible with your chosen finish. Priming helps seal the surface, enhances adhesion, and evens out any discoloration or stains. This is especially important in older homes where walls might have uneven paint layers or underlying imperfections. If you’re working with vintage finishes like lime plaster or textured paint, make sure your primer is suitable for those materials. Taking the time to properly prime guarantees the final look is consistent and durable. Additionally, choosing a primer with mold and mildew resistance can help prevent issues caused by moisture in older structures. Proper priming also helps address surface imperfections, creating a more uniform base for your final coat. Furthermore, using the right primer can help improve the overall adhesion of your finishing layers, ensuring they stay intact longer.

DAP Weatherproof Patching Compound, White, 16 Oz (7079818740)
Weatherproof Patching Compound all purpose filler is ideal for the installations and finishing or repairing of fiber cement…
As an affiliate, we earn on qualifying purchases.
As an affiliate, we earn on qualifying purchases.
Frequently Asked Questions
How Do I Identify Hidden Mold Behind Old Walls?
To identify hidden mold behind old walls, start with a thorough wall inspection, looking for discoloration, warping, or a musty smell. Mold detection often requires removing small sections of drywall or paneling to see behind surfaces. Use a flashlight and possibly a moisture meter to spot damp areas where mold can thrive. If you suspect hidden mold, consider professional testing to guarantee safety and proper removal.
What Safety Gear Is Recommended for Wall Prep in Older Homes?
You should wear safety equipment and protective gear when prepping walls in older homes. Equip yourself with a dust mask or respirator to guard against mold spores and dust. Use safety goggles to protect your eyes from debris, and wear gloves to shield your skin from irritants and chemicals. Consider a long-sleeved shirt and pants for full coverage, ensuring you stay safe while handling potentially hazardous materials during wall preparation.
Can I Skip Sanding if Walls Are Already Smooth?
You should not skip sanding, even if your walls appear smooth, because surface smoothing is essential for ideal paint adhesion. Sanding helps remove any remaining imperfections, rough spots, or old paint drips, ensuring a clean surface. Skipping this step can lead to uneven paint, peeling, or cracking over time. Taking the time to properly sand guarantees a professional finish and helps your new paint adhere securely, lasting longer.
How Do I Prevent Future Wall Damage After Prep?
Think of your walls as a sturdy shield. To prevent future damage, you must keep wall moisture in check—use dehumidifiers and fix leaks promptly. Proper prep boosts paint adhesion, like applying a protective coat, making your walls resilient. Regular inspections and gentle cleaning maintain this shield, ensuring moisture doesn’t seep in and paint stays intact. This proactive approach helps your walls stand strong against time and elements.
What Are Eco-Friendly Options for Wall Primers?
You can choose eco-friendly primers made from natural or low-VOC ingredients, which reduce harmful emissions and are safer for your home and environment. Look for products labeled as eco-friendly primers or biodegradable sealants—they’re designed to minimize ecological impact while providing excellent adhesion. These options help you prep your walls effectively without compromising your commitment to sustainability, ensuring a healthier space for you and future generations.

acme Sherwin-Williams Finish 1 FP410 High Build 2K HS Gray Urethane Primer Quart Kit grey
Primer is perfect for small shops and DIY car enthusiasts
As an affiliate, we earn on qualifying purchases.
As an affiliate, we earn on qualifying purchases.
Conclusion
Think of your wall prep journey as tending to a wise old garden. With careful care, clearing out the weeds, and nourishing the soil, you set the stage for beautiful blooms—your fresh paint or finish. Just like a garden flourishes with patience and attention, your walls will reveal their true beauty once properly prepared. Embrace this process, and watch your home transform into a vibrant, timeless masterpiece that tells its own story.

Klein Tools ET140 Pinless Moisture Meter for Non-Destructive Moisture Detection in Drywall, Wood, and Masonry; Detects up to 3/4-Inch Below Surface
WATER LEAK DETECTOR detects relative moisture content from leaks and flooding
As an affiliate, we earn on qualifying purchases.
As an affiliate, we earn on qualifying purchases.

Drywall Repair Kit, 12.2oz Wall Patch Repair Kit, Spackle Wall Repair with Wall Patches/Sanding Sponge/Putty Knife/Scrapers/Gloves, Wall Mending Agent, Wall Surface Hole Fill Quick and Easy Solution
Complete Repair Tools:Including 1 can of wall putty (12.2 oz), 1 piece of 2-inch wall repair patch, 1…
As an affiliate, we earn on qualifying purchases.
As an affiliate, we earn on qualifying purchases.