
Wall-safe tape and putty are perfect for temporarily hanging pictures, decorations, or repairing small holes without damaging your walls. Use these materials when you want a gentle, damage-free way to display or adjust items that you’ll easily remove later. They work well on smooth, clean surfaces and are suitable for lightweight objects or short-term projects. Keep in mind, choosing the right option and application tips will help you achieve the best results—explore more to master these techniques.
Key Takeaways
- Use wall-safe tape or putty for temporary decorating, organizing, or light-weight items to minimize wall damage.
- Choose tape or putty when you need to remove items easily without leaving residue or harming paint.
- Apply on clean, dry surfaces to ensure proper adhesion and easy removal later.
- Use for short-term displays or frequent decorating changes, not for heavy or permanent fixtures.
- Select the appropriate material based on item weight and display duration for optimal results.
Ever wonder how you can hang pictures or decorations without damaging your walls? Wall-safe tape and putty are perfect solutions. They offer a versatile way to decorate or organize your space without the worry of leaving behind marks or holes. When choosing between tape and putty, understanding their adhesive strength and removal techniques is essential. You want something reliable enough to hold your items securely but gentle enough to remove without damaging the paint or drywall.
Wall-safe tapes are designed with a lower adhesive strength than traditional tapes, ensuring they stick well but can still be peeled away easily. These tapes are typically made from materials like painter’s tape or mounting strips that provide a good grip without leaving sticky residue. When applying tape, make sure the surface is clean and dry to maximize adhesion. This simple step ensures your decorations stay put without falling or causing damage. When it’s time to remove the tape, use slow, gentle peels, starting from one corner and pulling back at a 45-degree angle. If you notice any resistance, heating the tape slightly with a hairdryer can soften the adhesive, making removal smoother and reducing the risk of peeling paint or drywall paper.
Choose low-adhesive wall tapes, apply on clean surfaces, and peel gently at a 45-degree angle for damage-free removal.
Putty, especially the kind designed for wall use, offers a different advantage. It’s typically a pliable substance that can fill small holes or gaps and hold lightweight objects. Its adhesive strength is usually moderate, enough to keep items in place but not so strong that removal becomes a hassle. When applying wall putty, press it firmly into the desired spot and smooth out any excess to avoid messes. If you want to remove a picture or decoration attached with putty, gently pry it away without applying excessive force. For stubborn spots, softening the putty with a bit of heat or warm water can make it easier to peel off cleanly. Proper removal techniques prevent damage to your walls and minimize cleanup time.
Additionally, understanding the adhesive properties of these materials helps ensure you select the right option for your specific needs. Both wall-safe tape and putty are excellent choices for temporary displays or lightweight decorations. Knowing when to use each depends on the weight of what you want to hang and how long you plan to keep it up. These materials are designed to be gentle yet reliable, so you can change your décor as often as you like without worrying about wall damage. Just remember, the key to successful application and removal lies in understanding their adhesive strength and employing gentle removal techniques. That way, your walls stay pristine, and your decorating is hassle-free.
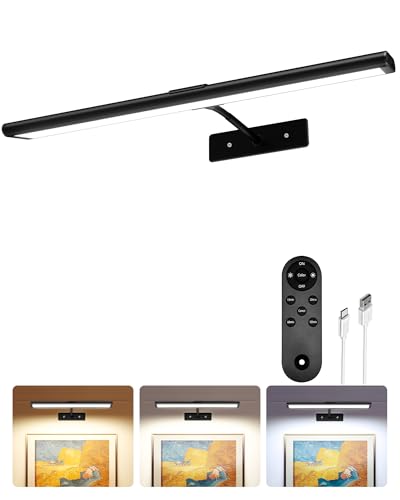
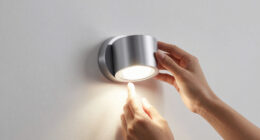
EZVALO Picture Light for Wall, 4800mAh Rechargeable Wireless Remote Battery Lights for Painting, 16In Dimmable Magnetic LED Art Display Light, Colors Temperatures, for Gallery, Living Room,Hallway
USB Rechargeable & Easy Charge: Our picture light with with built-in 4800mAh large-capacity battery and comes with a...
As an affiliate, we earn on qualifying purchases.
Frequently Asked Questions
Can Wall-Safe Tape Support Heavy Objects Long-Term?
Wall-safe tape typically can’t support heavy objects long-term. If you’re looking for heavy object support with long-term adhesion, you’ll need stronger mounting solutions like hooks, brackets, or specialized adhesives. Wall-safe tape and putty are better suited for lightweight items or temporary holds. For safety and durability, always choose an appropriate method that matches the weight and intended duration of the support.
Is Wall-Safe Putty Removable Without Damage?
You can usually remove wall-safe putty without damage if you follow proper removal techniques. Gently peel or soften the putty with heat, like a hairdryer, to ease the process. It’s compatible with most wall materials, but always test a small area first. Don’t rush; patience is key. When done carefully, you’ll find it’s a simple fix that keeps your walls looking fresh and undamaged.
How Long Does Wall-Safe Tape Typically Last?
Wall-safe tape generally lasts about 1 to 2 months, depending on factors like indoor temperature, humidity, and surface type. Its adhesive strength gradually weakens over time, especially if exposed to heat or moisture. To guarantee it stays secure longer, avoid placing it in high-traffic or damp areas. Keep in mind that the tape’s shelf life and environmental conditions can influence how long it remains effective before needing replacement.
Are There Surfaces Where Wall-Safe Tape Won’t Adhere?
You might find wall-safe tape struggles with certain surfaces like textured or highly porous ones, where adhesion challenges are common. Don’t worry—smooth, clean surfaces like painted drywall or glass usually work best. If the surface isn’t compatible, the tape may not stick well or could peel off easily. To guarantee strong adhesion, always check surface compatibility and clean the area thoroughly before applying, giving you a more secure hold.
Can Wall-Safe Putty Be Painted Over?
Yes, you can paint over wall-safe putty, but make sure it’s fully cured first. Check the surface compatibility of the putty with your wall type, as some materials may require a primer to guarantee proper adhesion. Always follow the manufacturer’s instructions for drying time, and test a small area if you’re unsure. This way, you’ll get a smooth finish without damaging your wall or the putty.

LYTARA Dimmable Cordless Picture Light with Controller and Timer, Rechargeable 5000mAh Battery Wall Sconce for Wall Pictures, Gallery Artwork, Paintings, Portraits, Dartboards (Gold)
LYTARA Dimmable Cordless Picture Light: Illuminate your wall pictures, gallery artwork, paintings, portraits, and dartboards with our elegant...
As an affiliate, we earn on qualifying purchases.
Conclusion
When you choose wall-safe tape or putty, you’re safeguarding your walls from damage that could take years to fix—like trying to erase history itself. Use tape for lightweight items and putty for more delicate or detailed work. Remember, a little care goes a long way; your walls will thank you for it. With the right tools, you’ll keep your space looking pristine, making damage seem almost impossible—like a fortress against messes!

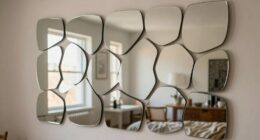
Shiftshade Mirror Wall Full Length,12X14 Inch Unbreakable Mirror Tiles for Bedroom Home Gym Door, Acrylic Mirror Full Body Shatterproof Mirror Stickers for Walls,Mirror Sheets (4pcs)
(Acrylic Material) : The mirror is made of acrylic material;Eco-friendly plexiglass mirror. shatterproof, it is a great alternative...
As an affiliate, we earn on qualifying purchases.

Hivone 40X32 LED Bathroom Mirror with Lights, Anti-Fog, Dimmable, Backlit + Front Lit, Smart Bathroom Vanity Mirror, Memory Function, Shatterproof, Tempered Glass (Horizontal/Vertical)
[Double Lighting Sources,Super Bright]: Hivone LED bathroom mirror built-in double light LED strips with backlit and front light...
As an affiliate, we earn on qualifying purchases.