To style picture ledges without making them top-heavy, stick to a cohesive color palette and vary object heights. Place taller pieces at the back or on one side, and use books or boxes as risers for added layers. Group items in clusters, overlap frames slightly, and leave space between objects for balance. Incorporate natural elements like plants and mix textures for interest. Keep an eye on overall flow, and if you want more tips, there’s plenty to explore here.

Get furniture and decor delivered free with Prime
- Fast, free delivery on millions of items
- Prime Video, Amazon Music and more included
- Member-only deals all year
Key Takeaways
- Vary item heights and sizes, placing taller pieces at the back and shorter ones at the front.
- Use a cohesive color palette to unify the display and prevent visual clutter.
- Group items in clusters with overlapping or angling for a relaxed, balanced look.
- Incorporate natural elements like plants to soften and add visual interest.
- Leave empty space between objects to maintain proportion and prevent top-heaviness.
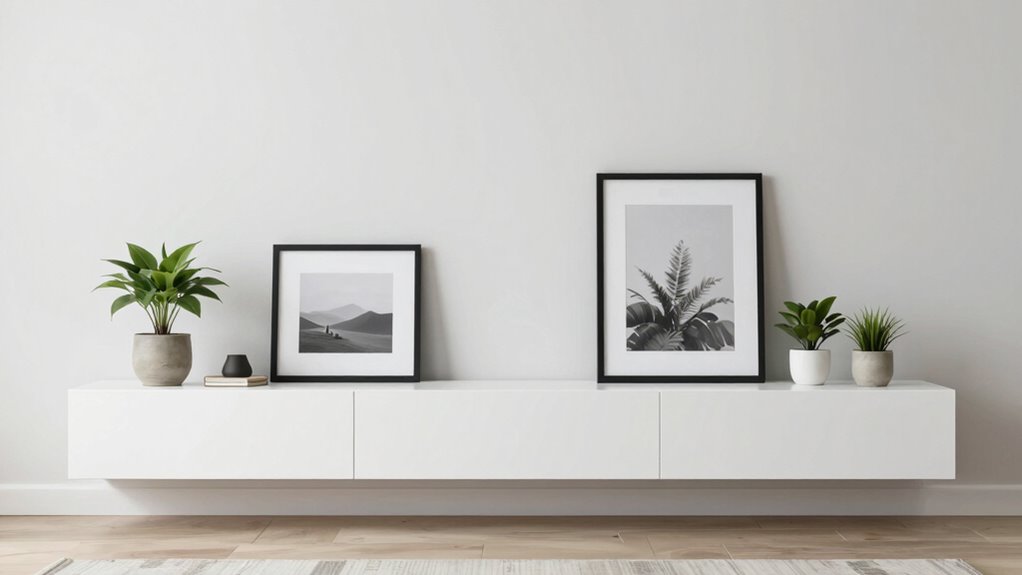
Ever wondered how to transform a simple picture ledge into a stylish focal point? The secret lies in smart styling techniques that keep your display balanced and visually appealing. One of the most effective ways to achieve this is through thoughtful color coordination. When selecting artwork, photographs, or decorative pieces, stick to a cohesive color palette that complements your room’s overall decor. Instead of cluttering the ledge with a riot of colors, choose pieces with similar tones or shades that blend well together. This creates a harmonious look that draws attention without overwhelming the space. You can also mix in a few contrasting accents for visual interest, but keep these intentional and limited to avoid chaos.
Another key element is height variation. You want your display to feel dynamic, not flat or top-heavy. To do this, vary the sizes and heights of the items on your ledge. Place taller objects toward the back or at one end, and shorter pieces toward the front or opposite end. This creates depth and movement, preventing the display from appearing static or overly crowded. Incorporate a mix of framed art, small sculptures, plants, or decorative objects at different heights. Using books or stacked boxes as risers also helps lift smaller items, adding layers to your arrangement. Additionally, incorporating visual balance ensures that your display remains aesthetically pleasing and well-proportioned. Achieving this balance is essential for a polished look that feels intentional and inviting. For a more harmonious display, consider the overall flow and how each piece relates to the others in style and placement.
When arranging your display, avoid lining everything up at the same level. Instead, experiment with grouping items in clusters, overlapping frames slightly, or angling pieces for a more relaxed, curated look. Keep some space between objects so each item can stand out, but don’t leave so much empty space that the display feels disconnected. Balance is key—distribute visual weight evenly across the ledge, ensuring no one side feels heavier than the other. Incorporating biodiversity and natural elements like plants can also add visual interest and soften the overall look. Incorporating a variety of textures and materials can enhance the sense of visual interest and make your display more engaging.
As an affiliate, we earn on qualifying purchases.
Frequently Asked Questions
What Are the Best Materials for Picture Ledges?
You should choose materials like wood, metal, or MDF for picture ledges, as they offer excellent material durability and aesthetic versatility. Wood provides warmth and natural charm, while metal gives a sleek, modern look. MDF is budget-friendly and easy to paint, allowing customization. These materials guarantee your ledges stay sturdy and stylish, making it simple to display your pictures without worrying about top-heaviness.
How High Should Picture Ledges Be Installed?
You should install picture ledges about 57 to 60 inches from the floor, aligning with your wall color and furniture height to create balance. Consider the ledge height in relation to your wall color; a lower ledge can make your space feel more open, while higher placement draws the eye upward. Adjust based on your ceiling height and the size of artwork to achieve a harmonious look.
Can Picture Ledges Be Used in Small Rooms?
Yes, picture ledges work great in small rooms, acting like visual anchors. To keep the space feeling open, use gallery lighting to highlight your favorite pieces without clutter. Focus on color coordination to create a cohesive look that enhances your room’s charm. Think of your ledges as a storybook shelf—every piece carefully chosen, every light a spotlight—making your small space feel stylish, inviting, and thoughtfully curated.
How to Clean and Maintain Picture Ledges?
To clean and maintain your picture ledges, regularly dust them with a soft cloth or microfiber duster to prevent buildup. Use mild cleaning solutions for stains, avoiding harsh chemicals that could damage the finish. Follow decorating tips by ensuring ledges are securely mounted for safety considerations, preventing accidents. Check brackets and supports periodically, and avoid overcrowding your ledges to keep them looking stylish and safe.
Are There Specific Styles That Work Best With Minimal Decor?
Did you know minimalist decor can boost a room’s serenity by 80%? For picture ledges, opt for a gallery wall style with carefully chosen frames to keep it sleek. Focus on color coordination, selecting a harmonious palette that complements your space. Keep accessories minimal and balanced, using negative space wisely. This approach creates a stylish, uncluttered look that highlights your artwork without overwhelming your room.
As an affiliate, we earn on qualifying purchases.
Conclusion
By mastering the art of balancing decor and spacing, you’ll turn your picture ledges into a curated gallery that’s both stylish and stable—think of it as creating your own miniature Museum of Modern Art. Remember, just like a symphony needs harmony, your ledges thrive on thoughtful arrangement. With a little patience and creativity, you’ll craft a display that’s visually stunning without feeling top-heavy, proving that even small touches can make a big impact.
As an affiliate, we earn on qualifying purchases.
As an affiliate, we earn on qualifying purchases.
Fall Picks
fall essentials
As an affiliate, we earn on qualifying purchases.