TL;DR

Get furniture and decor delivered free with Prime
- Fast, free delivery on millions of items
- Prime Video, Amazon Music and more included
- Member-only deals all year
Spooky Halloween wall decals give you a fast way to turn a plain wall into a haunted scene, with designs ranging from playful pumpkins to eerie bats and skeletons. Choose removable material suited to your wall, plan the layout before peeling, and test a small decal first; glow, metallic, textured, and reusable options can add impact when they suit your space.
A bare hallway can become a haunted-house entrance in ten minutes, with nothing more than a flock of black bats and a crooked-looking decal moon. Spooky Halloween wall decals give you that quick visual change without paint, nails, or a garage full of props.
The trick is choosing decals that suit your room, your wall surface, and the people who’ll see them. A grinning cartoon ghost works nicely in a child’s bedroom; a detailed raven or skeletal tree may suit an entryway where you want a darker mood. Below, you’ll find ways to pick a theme, plan a layout, apply decals cleanly, and remove or store them with less fuss.
Choose a theme that matches the room and the people who use it: playful ghosts for a child’s room, darker silhouettes for an entryway.
Check material, surface compatibility, and removal instructions before buying; test a small decal on delicate or textured paint.
Build the scene around one large focal point, then use smaller decals to guide the eye and leave some open wall.
Glow decals need light exposure, while metallic and textured finishes need suitable lighting and space to stand out.
Store reusable decals flat on their backing and keep them cool and dry, but expect some designs to be single-season products.
Choose a Halloween theme that fits your room
Spooky Halloween wall decals work best when the theme fits the room’s mood, not just the season. Popular themes include ghosts, bats, witches, spiders, skeletons, pumpkins, and haunted houses, with designs ranging from silly and bright to detailed and eerie. For instance, a string of friendly ghosts can make a child’s room feel festive without giving bedtime a horror-movie twist.
Start by deciding who uses the space and how intense you want the display to feel. A dining room can handle a dramatic black tree silhouette, while a playroom may call for orange pumpkins and smiling monsters. Color matters, too: black decals pop against a pale wall, while white ghosts can stand out against a dark painted surface.
Imagine decorating a narrow apartment hallway. Instead of covering every inch, place a large haunted-house silhouette near the end and scatter small bats toward it. That creates a sense of movement and gives visitors a visual path to follow. A renter might choose a single, easy-to-remove scene rather than multiple wall-sized designs.
For a polished result, keep one main motif and a few supporting accents. The contrast between a large anchor decal and tiny details makes the scene feel intentional, not like a sticker sheet exploded. Choose playful designs for family spaces and reserve realistic, shadowy imagery for rooms where a stronger scare feels welcome.
As an affiliate, we earn on qualifying purchases.
Compare decal materials and special effects before you buy
Vinyl and adhesive-backed paper are the common choices, but their differences affect more than price. Removable vinyl tends to flex as you position it and may be easier to peel off intact, which can matter if you want to reuse a design or adjust its placement. Paper-based decals may cost less, but can crease or tear during application; that makes them a better fit for a one-season display you can place carefully and leave alone. Neither label guarantees damage-free removal, so check the maker’s surface and removal guidance.
| Option | What it adds | Best use |
|---|---|---|
| Removable vinyl | Smooth application and potential reuse | Seasonal indoor walls |
| Glow-in-the-dark | A soft nighttime glow after light exposure | Hallways and children’s rooms |
| Metallic finish | Shimmer under room lighting | Party walls and entryways |
| Textured or 3D elements | More depth and tactile detail | Small focal areas |
Special effects are only useful when the room lets them work. A glow-in-the-dark moon needs enough light exposure to charge; if the hallway stays dim all day, the glow may be faint when you want it most. Metallic finishes can add a bright focal point, but they may reflect window light or lamps into glare. Textured pieces create more depth and shadow, though their raised edges can be easier to snag in a busy walkway. Choose the effect for the room’s actual light and traffic, not just how it looks in a product photo.
Some collections advertise reusable, biodegradable, or child-friendly materials. Those claims vary by product, so look for clear labeling and storage instructions. A reusable decal can be worthwhile if you decorate the same wall each year, but it may cost more upfront and still lose adhesion after handling. If you’re decorating a child’s room, select decals marked non-toxic and keep small removable pieces away from very young children who may pull them off. The best buy is the one whose finish, care needs, and likely lifespan match your wall and household.
As an affiliate, we earn on qualifying purchases.
Plan a wall layout that looks spooky, not crowded
A strong decal layout uses a few clear focal points and leaves enough empty wall to let them stand out. Empty space isn’t wasted: it gives each silhouette a readable outline, so a bat doesn’t disappear into a cluster of other shapes. Before you peel anything, map the scene with paper cutouts or low-tack painter’s tape, then view it from the doorway and from across the room. This quick test can reveal awkward overlaps or blocked details before moving a decal becomes difficult.
Try this simple sequence for a hallway or living-room wall:
- Pick your anchor: choose one large decal, such as a haunted house, moon, tree, or skeleton. Its size and position establish where the eye lands first.
- Set the direction: place bats, leaves, or smaller ghosts so they seem to move toward or away from the anchor. A clear direction makes separate stickers read as one scene.
- Check the height: keep key faces and details visible above furniture and away from door handles. This prevents everyday objects from interrupting the image and reduces the chance of decals being rubbed.
- Step back: look from the main entrance and adjust the spacing before removing the backing. Close-up placement can seem balanced while the whole wall looks crowded from a distance.
For instance, a large crooked tree near one corner can balance a trail of bats that rises toward the opposite corner. The eye follows the flock, making a modest wall feel wider. Vary the scale: a few large silhouettes plus small accents usually read better than dozens of same-sized stickers lined up in a row, because size contrast gives the scene hierarchy.
Think about lighting and everyday traffic as well. A shiny metallic decal can catch a lamp’s warm glow, but glare from a window may wash it out during the day. In a busy family hallway, place delicate details above shoulder height so backpacks and coat sleeves don’t scrape them off. The best layout is not only striking from the doorway; it also survives the way people use the room.
As an affiliate, we earn on qualifying purchases.
Apply decals cleanly and protect your paint
Most peel-and-stick decals are designed for DIY application, but a clean, dry, smooth wall gives you the best chance of a neat result. Dust, grease, fresh paint, and rough texture can weaken adhesion or make removal harder. On a dusty wall, the adhesive may grip the dust rather than the paint; on a rough surface, it may not make enough contact to stay flat. Check the maker’s instructions first, especially if the wall was painted recently or has a delicate finish.
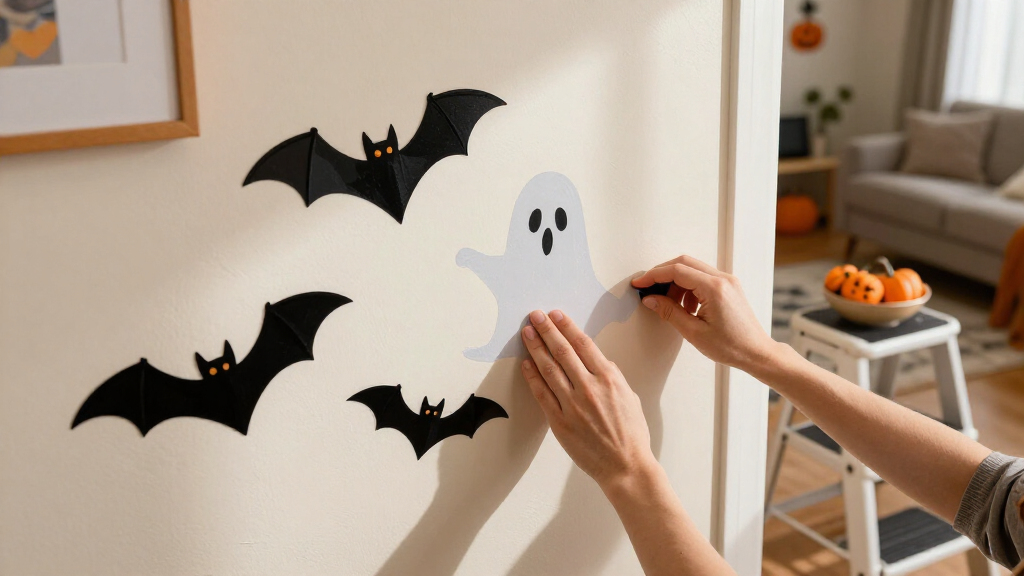
Use this practical process: wipe the area with a soft, dry cloth, then let it dry fully; hold the decal in place and mark the edges lightly with removable tape; peel back a small section of the liner; and smooth the decal outward with your hand or a soft cloth as you work. Don’t yank the backing off in one go. A slow application lets you correct the position while reducing trapped air, which can otherwise leave visible bubbles or edges that lift.
Picture a renter adding a large ghost to a bedroom wall. They test a small piece in an inconspicuous spot, wait according to the package guidance, and check how it behaves before decorating the whole room. That test helps reveal whether the adhesive sticks to the wall and whether peeling it back affects the paint. It is especially useful on older paint, textured walls, or surfaces with previous repairs, where different areas may react differently. “Removable” is not a guarantee for every paint finish.
When the season ends, peel slowly and follow the product directions rather than scraping with a blade. Pulling too quickly can stress the paint, while a blade can scratch it. If a decal resists, stop and check the maker’s removal advice instead of forcing it. Avoid placing decals on freshly painted walls until the paint has cured for the period stated by the paint or decal manufacturer; the surface may look dry before it is ready to withstand adhesive and removal.
As an affiliate, we earn on qualifying purchases.
Make the scene feel richer with glow, texture, and scale
Glow, metallic shine, and textured details can make a familiar Halloween scene feel more dimensional, but each effect works best in a small supporting role. Glow-in-the-dark decals need light exposure before the room goes dark, while metallic finishes reflect nearby lamps and textured elements create shadows that shift as you walk past. These effects add interest because they change with the room’s lighting and viewpoint, but using too many at once can make the display feel visually busy.
For a front hall, you could combine a matte black haunted-house silhouette with a few glowing windows and one metallic crescent moon. Keep the glow elements close to a light source during the day, then switch off the lamp to see how the effect reads. If the glow seems faint, add more light exposure or choose a smaller, brighter focal detail rather than covering the wall in pieces that barely show. This keeps the scene legible in daylight as well as after dark.
Some newer products advertise 3D surfaces or augmented-reality features that animate a scene through a phone app. Treat those as optional extras: check what app or lighting equipment they need, and whether the effect works on your device before buying. Added features can make a display more interactive, but they also create setup requirements and may rely on a phone or light source being available. A basic decal can still look striking when its placement creates a convincing shadow or a trail across a corner.
A family decorating together might give each person one job: one places the large silhouettes, another adds bats, and a child chooses where the glowing stars go. Leave breathing room around special-effect pieces so their texture or shine stays noticeable. A wall packed with competing finishes can look noisy instead of eerie, while a few contrasts make the details easier to notice.
Reuse or remove decals without a seasonal mess
Some Halloween decals can be reused, but reuse depends on the adhesive, the wall, and how carefully you remove and store each piece. Removable vinyl designs are more likely to survive another season than thin paper decals, though no product should be treated as reusable unless its maker says so. Even a decal designed for reuse can lose grip if it stretches during removal or collects dust, so plan on reuse as a possibility rather than a certainty. Store the original backing sheet if you can; it gives each decal a smooth surface to cling to between holidays.
When you take the display down, peel each piece slowly and keep your other hand close to the wall to support the surface. Place reusable decals flat on their backing, then store them somewhere cool and dry, away from dust and direct sunlight. Heat, sunlight, and trapped debris can affect the adhesive or distort the decal over time. A labeled envelope such as “hallway bats and moon” saves you from sorting a tangled stack next October.
For example, if a bat’s wing curls as you remove it, don’t press it onto a dusty drawer or fold it in half. Follow the package’s storage advice and lay it flat. If the adhesive has picked up lint or the edges no longer stick, the decal may be at the end of its useful life; trying to force it onto the wall can lead to peeling or a lopsided display. Reuse is a bonus, not a promise.
For a one-night party or a single season, inexpensive designs may be the practical choice. If you decorate the same room every year, a higher-quality reusable set can save time and reduce waste over several seasons, provided it actually lasts that long. Compare the price with the likely number of uses and the effort of careful storage, and consider whether the design will still suit your next Halloween setup.
Frequently Asked Questions
Are Halloween wall decals easy to apply and remove?
Most peel-and-stick decals are made for straightforward DIY application. A clean, dry wall and slow, even smoothing help prevent bubbles; removal depends on the product and paint, so test a small piece first and follow the maker’s directions.
Are spooky wall decals safe for a child’s room?
Choose products labeled non-toxic or suitable for children, and keep small pieces out of reach of young children who may peel or mouth them. Avoid placing decals where they can cover vents, switches, or other fixtures.
Can I reuse Halloween wall decals next year?
Some removable vinyl decals can be reused if you peel them carefully and store them flat on their backing. Paper decals and designs with damaged or dusty adhesive may be intended for one season, so check the packaging before planning to reuse them.
How do I get a realistic spooky look with decals?
Choose detailed silhouettes, varied sizes, and a limited palette such as black, gray, and a small glow-in-the-dark accent. Place a large anchor—like a bare tree or haunted house—then add smaller bats or shadows that lead toward it.
How long do Halloween wall decals last?
A well-applied decal can last through the Halloween season, but lifespan varies with adhesive quality, wall texture, heat, and handling. For a seasonal display, inspect edges occasionally and avoid placing decals where furniture or frequent traffic will rub them.
Conclusion
Remember this: a few well-placed decals beat a crowded wall. Choose a theme that suits your space, test the material, and plan the layout before you peel. Then let a handful of bats, a crooked moon, or one glowing ghost do the work.
When the porch light clicks off and the hallway glows softly in the dark, your wall can tell a whole Halloween story without a single nail.
Halloween Picks
halloween
As an affiliate, we earn on qualifying purchases.