Use this guide to arrange and apply spooky Halloween wall decals, from checking the wall to smoothing each piece and planning for removal. It is for beginners decorating a painted wall, door, or other smooth indoor surface. Allow about 30-60 minutes, depending on the number and size of decals; drying or curing time may vary by product. The steps focus on clean placement and reducing the chance of bubbles, peeling, or paint damage.

Get furniture and decor delivered free with Prime
- Fast, free delivery on millions of items
- Prime Video, Amazon Music and more included
- Member-only deals all year

Ladinimo Halloween Wall Decals, Haunted House, Creepy Trees and Bats
- ✔ Brand: Ladinimo
- ✔ Material: Vinyl
- ✔ Sheets: 2

Halloween Spooky Tree Wall Decals with Crows, Bats, and Pumpkins
- ✔ Material: Polyvinyl chloride (PVC)
- ✔ Color: Black
- ✔ Sheets: 3
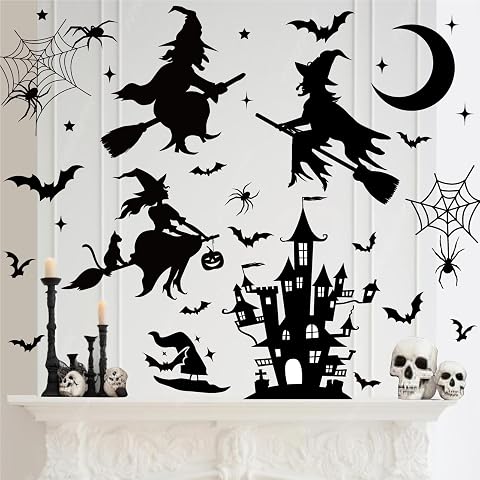
JarThenaAMCS Halloween Wall Stickers, Black Witch, Castle, Spider and Bat Decals, 8 Sheets
- ✔ Brand: JarThenaAMCS
- ✔ Material: Polyvinyl chloride (PVC)
- ✔ Color: Black
Difficulty: Beginner | Time: 30-60 minutes, plus any product-specific waiting time
What You’ll Need
Tools & Materials:
- Halloween wall decals with their packaging or application instructions
- Soft, lint-free cloth
- Mild soap and water, if the wall needs cleaning
- Tape measure or ruler
- Low-tack painter’s tape
- Pencil
- Plastic squeegee or a clean, flexible plastic card
- Step stool for high placements, if needed
Knowledge:
- Basic measuring and simple layout planning
- Ability to identify the wall’s paint or surface type, if known
Read the decal maker’s directions before starting. Check whether the decals are removable, what surfaces they support, and how long fresh paint must cure. Test the material and removal method in a hidden area first. Keep decals away from hot surfaces, damp areas, and anything that blocks an exit, switch, or safety device.
Ladinimo Halloween Wall Decals, Haunted House, Creepy Trees and Bats
Ladinimo earns our top spot because it gives Halloween decorators a recognizable scene rather than a loose assortment of symbols. Bats, creepy trees, and a haunted fence work together to suggest a spooky setting, which can make a wall feel intentionally decorated without requiring a lot of design decisions. The two vinyl sheets measure 23.62 by 11.81 inches, providing a useful sense of the supplied sheets, though the listing does not establish finished-wall coverage.Its key advantage over the tree-and-creature set is repositionability: buyers can adjust the placement while composing the display, according to the product details. It is also described as removable without residue, a helpful distinction for seasonal indoor decorating. By comparison, JarThenaAMCS supplies more sheets but lists its decals as single-use and recommends hair-dryer removal. Ladinimo is the more straightforward choice when you want a central scene that can be arranged and adjusted, not the largest assortment.There is a meaningful limitation: these decals are intended for smooth surfaces, so a textured wall may prevent a satisfactory fit. Their look also leans toward a haunted outdoor scene rather than the witch-and-castle motifs in JarThenaAMCS. We would choose Ladinimo for a focal wall, window, mirror, or furniture surface where the design can read as one composition; shoppers seeking many small accents for multiple rooms may prefer the eight-sheet option instead.
Pros:
- Coordinated bats, creepy trees, and haunted-fence theme
- Repositionable peel-and-stick vinyl
- Described as removable without residue
- Suitable for several smooth indoor surfaces, including walls, windows, mirrors, and furniture
Cons:
- Designed for smooth surfaces rather than textured walls
- Two sheets offer fewer supplied sheets than the other two sets
- The design centers on a haunted-house scene rather than witches and castles
Best for: Decorators who want a classic haunted-house scene and value repositionable decals for arranging a seasonal focal display.
Not ideal for: Anyone decorating textured walls, or shoppers who want the largest number of separate motifs for distributing around a party space.
Bottom line: We recommend Ladinimo for the strongest all-around balance of a cohesive spooky scene, flexible placement, and stated residue-free removal.
“We recommend Ladinimo for the strongest all-around balance of a cohesive spooky scene, flexible placement, and stated residue-free removal.”
Halloween Spooky Tree Wall Decals with Crows, Bats, and Pumpkins
This set is the most composition-friendly option for buyers who want to build their own scene. Its three sheets include a spooky tree alongside crows, bats, spiders, skulls, ghosts, and pumpkins, giving us more visual ingredients to distribute or cluster. The black PVC design keeps the look consistent while the mix of motifs lets decorators choose whether the wall reads as a crowded Halloween tableau or a series of smaller accents.Compared with Ladinimo, this set puts less emphasis on a ready-made haunted-house arrangement and more on custom placement. That flexibility is useful if a wall has an awkward shape, or if you want to add decals around a doorway, mirror, or furniture. It also offers one more sheet than Ladinimo. JarThenaAMCS, however, includes eight sheets, so buyers whose first priority is a larger number of supplied sheets should look there. The tradeoff is that this set’s theme is broader and may take more planning to make the pieces feel like a single scene.The product details describe the stickers as removable without sticky residue or paint damage, and say they are waterproof and easy to clean. Those claims make the set appealing for indoor seasonal decor, but the surface restriction still matters: it is intended for smooth surfaces, not rough or textured finishes. The sheet dimensions are 11.8 by 35.6 inches, but that does not by itself tell us how much wall space the individual cutouts will cover. Choose this option for variety and layout control; skip it if you prefer a simple, coordinated scene that needs little arranging.
Pros:
- Includes a tree, crows, bats, spiders, skulls, ghosts, and pumpkins
- Three sheets allow multiple layout approaches
- Described as removable without sticky residue or paint damage
- Waterproof, easy-to-clean PVC and suitable for walls, glass, mirrors, and furniture
Cons:
- Requires more arranging than a cohesive scene-focused set
- Designed for smooth surfaces only
- Has fewer sheets than the eight-sheet JarThenaAMCS set
Best for: Buyers who enjoy arranging individual Halloween motifs and want a broad mix of spooky elements for smooth indoor surfaces.
Not ideal for: Shoppers who want a ready-composed haunted-house scene, need decals for textured walls, or prioritize the highest sheet count.
Bottom line: We’d choose this set when customizable placement and a wide range of spooky motifs matter more than a preplanned scene.
“We’d choose this set when customizable placement and a wide range of spooky motifs matter more than a preplanned scene.”
JarThenaAMCS Halloween Wall Stickers, Black Witch, Castle, Spider and Bat Decals, 8 Sheets
JarThenaAMCS stands apart on quantity and theme: eight sheets of black PVC decals feature witches, bats, spiders, and castles. That makes it the clearest choice for spreading Halloween details across several smooth indoor surfaces, or for decorating a party area with repeated motifs. Its witch-and-castle imagery also shifts away from the haunted-tree focus of the other two sets, giving buyers a more storybook or spell-casting look.Against Ladinimo’s two-sheet scene, JarThenaAMCS offers more supplied sheets, but it does not share the same listed repositionable feature. The product is described as single-use and says to remove it with a hair dryer, so we would plan the arrangement before applying it. The three-sheet spooky tree set is more varied in its named creatures and gives buyers a tree-centered assortment; JarThenaAMCS is better suited to a broader spread of witch, castle, bat, and spider accents. More sheets do not guarantee a particular coverage area, since individual decal dimensions and a total coverage figure are not provided.The waterproof PVC construction is useful for seasonal indoor decorating, and the listed application range includes walls, doors, windows, and other smooth surfaces. The constraints are important, though: surfaces must be clean, dry, and smooth, and the set is not presented as reusable. That removal guidance makes it less forgiving than Ladinimo if placement needs adjustment. Pick this set when you want many separate motifs and like its witch-and-castle identity; choose another option if easy repositioning or a ready-made haunted scene is the priority.
Pros:
- Eight sheets provide the largest sheet count in this comparison
- Witch, castle, spider, and bat motifs create a distinct Halloween style
- Waterproof PVC
- Can be used on suitable walls, doors, windows, and other smooth surfaces
Cons:
- Listed as single-use rather than repositionable
- Removal guidance calls for a hair dryer
- Requires clean, dry, smooth surfaces and is not suited to textured walls
Best for: Party hosts and decorators who want many witch, castle, spider, and bat motifs to distribute across multiple smooth indoor surfaces.
Not ideal for: Buyers who need repositionable or reusable stickers, want residue-free removal explicitly stated, or have textured surfaces.
Bottom line: We recommend JarThenaAMCS for decorating several spots with witch-and-castle motifs, provided you are comfortable planning placement before applying single-use decals.
“We recommend JarThenaAMCS for decorating several spots with witch-and-castle motifs, provided you are comfortable planning placement before applying single-use decals.”
As an Amazon Associate we earn from qualifying purchases.
Before You Start
Choose a dry, room-temperature day and give the wall time to reach room temperature. Do not apply decals over fresh paint, dusty texture, peeling paint, wallpaper seams, or a damp surface unless the product instructions specifically allow it. Many decals do not adhere well to rough or greasy walls. If the paint is new, follow its manufacturer’s full curing guidance; dry-to-the-touch paint may still be too fresh for adhesive.
Decals and adhesives vary. Follow the package directions if they differ from this guide, especially for cleaning, transfer sheets, temperature, application pressure, and removal. Do not assume that a label saying “removable” guarantees damage-free removal from every paint or wallpaper finish.
Step-by-Step Instructions
Step 1: Check the wall and decal instructions
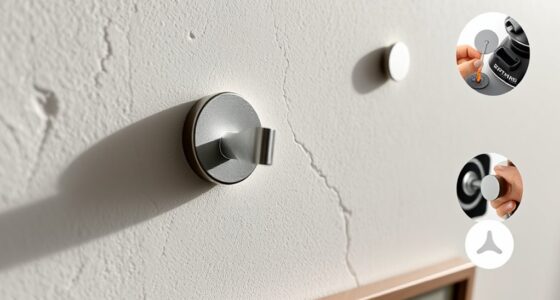
Read the package to confirm the decals suit your wall material and note any temperature, curing, or application requirements. Inspect the planned area for texture, dust, grease, flaking paint, and moisture. Press a small piece of low-tack tape onto an inconspicuous spot and remove it gently to check whether the finish lifts. If the paint comes away, do not apply decals there.
Tip: A successful tape check is not a guarantee that decal adhesive will remove without marks. Test a small decal or an edge in a hidden spot when the product allows it.
Check: The chosen surface is dry, sound, and within the product’s supported surface and temperature range.
Step 2: Clean and dry the application area
Remove dust with a clean, dry, lint-free cloth. If the wall has grime, wipe it with a cloth lightly dampened with mild soapy water, following any finish-care guidance for the paint. Wipe away soap residue with a separate clean, damp cloth, then let the wall dry fully before applying anything.
Tip: Do not spray cleaner directly onto the wall or use oily polish, solvent, abrasive pads, or strong cleaners unless the wall and decal instructions permit them. Residue can weaken adhesion or stain the finish.
Check: The wall feels dry and smooth to the touch, with no visible dust, cleaner residue, or damp patches.
Step 3: Plan the spooky layout
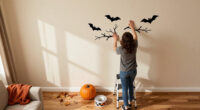
Lay the decals out on a clean, flat surface and identify which pieces form a scene. Measure the available wall space, then use painter’s tape to mark the scene’s outer edges or key points. Arrange larger pieces first, such as a haunted house, moon, tree, or large silhouette; position smaller bats, stars, ghosts, or pumpkins around them. Step back to check the balance and sight lines before peeling any backing.
Tip: Keep a clear margin around door frames, corners, furniture, and light switches. Leave enough room for people to pass without brushing the decals.
Check: The layout fits the available space, reads clearly from the room entrance, and does not cover fixtures or create an obstruction.
Step 4: Mark alignment points
Use a tape measure and small pieces of painter’s tape to mark the top edge or center point of the main decals. Use a pencil only if you know it will not mark the finish; otherwise, use tape as your guide. For a row or repeated pattern, measure the spacing between pieces and mark those positions before applying the first decal.
Tip: Avoid placing pencil marks where a decal will not cover them. Do not use permanent marker or adhesive tape that may pull off paint.
Check: Your guides show where the first and largest decals belong, and repeated pieces have consistent spacing.
Step 5: Position each decal before exposing its adhesive
Hold a decal against its planned location while its backing is still on. Use painter’s tape to temporarily secure the top edge or to mark the position, then step back and check the height and angle. Adjust the guide now rather than trying to reposition a decal after it has touched the wall.
Tip: For a large or layered design, follow the product’s transfer-sheet directions. Keep the backing flat and avoid folding or stretching the decal.
Check: The decal sits within the layout guides and looks level or intentionally angled before you remove the backing.
Step 6: Apply the decal slowly
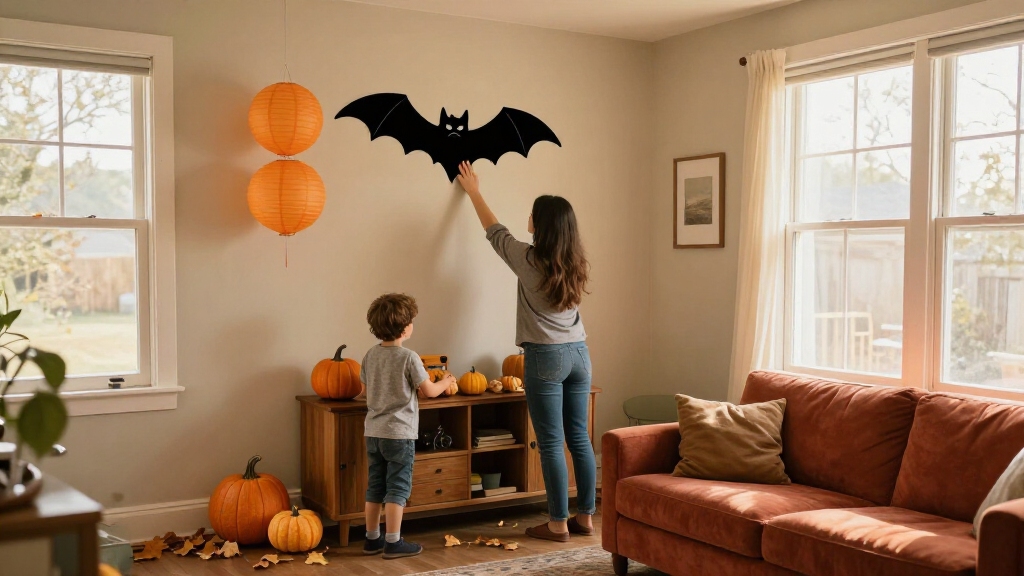
Peel the backing away gradually, following the package directions. For a larger decal, expose only a small section at a time. Align the exposed edge with your guide and press it onto the wall, then continue peeling and pressing in short sections. Smooth from the center toward the edges with a squeegee or flexible plastic card, using steady pressure rather than scraping.
Tip: Do not pull hard on the decal or stretch it. If it begins to fold or stick to itself, stop and follow the maker’s repositioning instructions before continuing.
Check: The decal lies flat against the wall, with the full design attached and no large folds or trapped air pockets.
Step 7: Finish details and check adhesion
Press along the edges and any narrow details with your fingertips or the smooth tool. If the product uses a transfer sheet, remove it at the angle and speed stated in its instructions. Add the remaining pieces using the same measured spacing, then step back and check the full scene from several points in the room.
Tip: Do not keep rubbing one spot aggressively; friction can stretch the design or scuff the wall. If an edge will not stay down, check for dust or a surface incompatibility instead of forcing it.
Check: Edges and details appear attached, the composition looks intentional from across the room, and no decal blocks a switch, vent, or safety device.
Step 8: Let the decals settle and plan removal
Leave the decals undisturbed for the time stated by the manufacturer. Keep hands, pets, and furniture away from them while they settle. Save the packaging or record the removal directions so you can use the recommended technique after Halloween.
Tip: Do not use a hair dryer or other heat source unless the decal maker specifically recommends it; heat can affect some adhesives and paint finishes.
Check: The decals remain flat after the stated settling period, and you have the product’s removal instructions available for later.
Common Mistakes to Avoid
- Applying decals to dusty, damp, freshly painted, or textured walls. — Check the surface and product directions, clean and dry the area, and wait for paint to cure according to its manufacturer. Use decals only on compatible surfaces.
- Peeling all the backing off a large decal at once. — Expose adhesive gradually and press in short sections. This gives you more control and reduces folds and bubbles.
- Skipping the layout and placing the first decal by eye. — Measure the area, tape out the overall scene, and check spacing from a distance before applying any adhesive.
- Assuming removable decals cannot damage paint. — Test a small area first, follow the maker’s removal directions, and stop if paint begins lifting during application or removal.
Troubleshooting
Problem: A decal has bubbles after application.
Solution: Smooth small air pockets from the center toward the nearest edge with a clean, flexible plastic tool. Do not puncture the decal unless the manufacturer recommends it. For a large trapped fold, stop and check the product’s repositioning instructions rather than pulling sharply.
Problem: An edge or small detail keeps lifting.
Solution: Check whether the wall is dusty, textured, damp, or outside the product’s supported surface range. Press the area gently once more with a clean tool. If it lifts again, remove the piece according to its instructions and do not add household glue or tape unless the maker approves it.
Problem: The decal is crooked or in the wrong place.
Solution: If it has just been applied and the maker permits repositioning, lift it slowly from an edge and reposition without stretching. If it resists, stop; forcing it can tear the decal or pull paint. Use the layout marks to align a replacement.
Problem: Paint lifts or leaves residue during removal.
Solution: Stop pulling. Follow the product’s removal directions and test any recommended method in a hidden spot. Avoid solvents, scraping tools, and added heat unless the product and wall-finish guidance allow them. If paint damage is spreading, leave the decal in place and ask a paint or wall-covering professional for advice.
What Success Looks Like
The Halloween scene is positioned where intended, looks balanced from the room entrance, and has smooth surfaces with edges and details adhering. The wall was clean and dry before application, decals are not obstructing fixtures or walkways, and you have saved the maker’s removal directions. After the stated settling period, check the scene again for lifting or bubbles; address any issue using the product’s guidance rather than adding unapproved adhesive.
Next Steps
Keep the room within the product’s recommended conditions and check the decal edges occasionally, especially after cleaning or moving furniture. When the display is no longer needed, remove each piece using the manufacturer’s instructions and work slowly. Do not yank decals from the wall. Dispose of the backing and decals according to local waste guidance, and wipe the wall only with a method suitable for its finish. If you plan to reuse the decals, store them only as directed by the maker; some are intended for one-time use.
Frequently Asked Questions
Can I put Halloween wall decals on freshly painted walls?
Wait for the paint to cure for the period stated by the paint manufacturer and check the decal instructions for their required waiting time. Paint that feels dry may still be too soft for adhesive, and early application can mark or lift the finish.
Will removable wall decals damage my paint?
They can. Results depend on the paint, wall condition, adhesive, and removal method. Test in a hidden spot, follow the product directions, and stop if the finish lifts. “Removable” does not promise damage-free removal on every surface.
How do I apply a large decal without bubbles?
Use a clean, dry compatible surface, align the decal before exposing the adhesive, and peel the backing gradually. Smooth each small section from the center outward with a flexible plastic tool, following the manufacturer’s method.
Can I use wall decals on textured walls?
Only if the decal maker lists your type of texture as supported. Deep or uneven texture can prevent contact and cause edges to lift. Test a small piece in an inconspicuous spot if the instructions allow it.
How should I remove the decals after Halloween?
Use the maker’s removal directions and peel slowly from an edge. Do not use heat, solvents, or sharp tools unless the instructions approve them for both the decal and wall finish. Stop if paint begins to lift.
Halloween Picks
halloween
As an affiliate, we earn on qualifying purchases.