
To prepare for limewash, choose a porous surface like brick, stone, or lime plaster, and clean it thoroughly. Repair cracks, remove debris, and prime if needed. Mix lime putty with water to create a creamy consistency, adding pigments gradually. Test your mixture on a small area and apply in thin, even coats using a brush or roller. Let it cure slowly and maintain it properly for lasting beauty. Continue to explore for detailed tips to master the process.
Key Takeaways
- Select porous, textured surfaces like brick, stone, or lime plaster, and thoroughly clean and repair them before application.
- Prime non-porous or smooth surfaces to improve adhesion and test limewash on a small area for durability.
- Mix lime putty with water to a creamy consistency, gradually add pigments, and test the mixture for color and application ease.
- Apply limewash in smooth, even strokes, working in sections with multiple thin coats for a uniform, durable finish.
- Allow proper drying and curing, inspect regularly for touch-ups, and clean gently to maintain the limewashed surface.

ROLLINGDOG 5.5" Deck Stain Limewash Brush – Wood Handle Large Deck Brush Applicator for Wall, Wood, Fence, Floor Painting
DECK PAINT BRUSH: Made of Imitation bristle that is a combination of flagged tip, conical tip and wavy…
As an affiliate, we earn on qualifying purchases.
As an affiliate, we earn on qualifying purchases.
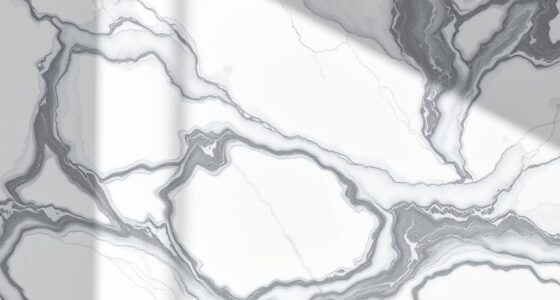
Choosing the Right Surface for Limewash
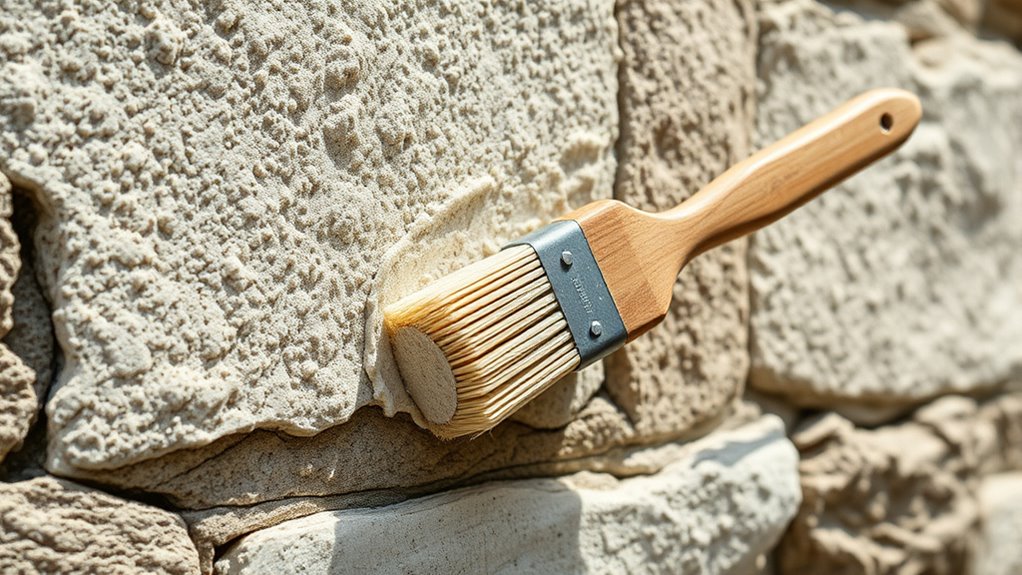
Choosing the right surface for limewash is essential to guarantee a durable and attractive finish. You should consider the surface texture, as a porous, slightly rough surface helps the limewash adhere properly and enhances its natural look. Smooth, non-porous surfaces like glazed tiles or sealed surfaces aren’t ideal because they prevent the limewash from bonding effectively. Material compatibility is also vital; limewash works best on porous materials such as brick, stone, or lime plaster. These surfaces allow the lime to penetrate and create a strong bond. Avoid surfaces that repel moisture or have a non-porous coating, as they can cause peeling or uneven coverage. Selecting a compatible surface ensures your limewash application lasts longer and maintains its aesthetic appeal.
Zinsser 290971 Bulls Eye 1-2-3 All Surface Spray Primer, 13 oz, Gray
Interior/exterior use on new or previously painted drywall, concrete, wood, masonry, metal and glossy or difficult surfaces
As an affiliate, we earn on qualifying purchases.
As an affiliate, we earn on qualifying purchases.
Preparing Your Walls Before Applying Limewash
Before applying limewash, make certain your walls are free of dust and debris. Repair any cracks or flaws to guarantee a smooth surface. Additionally, using a primer if needed can help the limewash adhere properly. Proper surface preparation is essential to ensure reliable and long-lasting coverage. Ensuring the surface is clean and well-maintained can improve the overall durability of the finish. Recognizing narcissistic behaviors can help in maintaining healthy boundaries during your project and beyond. Incorporating AI-powered data analytics can assist in assessing the best preparation techniques based on your specific wall conditions.
Clear Surface Debris
To guarantee a smooth limewash application, start by removing all surface debris from your walls. Surface contamination can cause uneven absorption and poor adhesion, so thorough debris removal is essential. Use a stiff-bristled brush or a vacuum to clear away dust, cobwebs, and loose particles. If you notice any stubborn dirt or grime, wash the surface with water and a mild detergent, then allow it to dry completely. Avoid using harsh chemicals that could interfere with the limewash’s bonding process. Ensuring your surface is free of debris creates a clean, even base, which promotes better adherence and a more uniform finish. Digital literacy programs can help seniors learn effective cleaning techniques for their walls. Taking the time to properly clear surface contamination now will make the application process smoother and improve the durability of your limewash. Additionally, understanding the surface preparation process can significantly impact the longevity and appearance of your finished project. Proper surface preparation, including assessing the surface condition, is essential to achieve a durable and attractive limewash finish.
Repair Surface Flaws
Once you’ve cleared away surface debris, it’s time to inspect your walls for any flaws that might affect the limewash. Look for surface imperfections like cracks, holes, or uneven patches. Small cracks can be filled with a compatible crack filler or lime putty, ensuring a smooth surface. Use a putty knife to apply the filler, pressing it firmly into the cracks and smoothing it out. Allow the filler to dry completely before proceeding. Inspect the wall again for any remaining imperfections, and repeat crack filling if necessary. Addressing surface flaws now prevents imperfections from showing through the limewash later. Properly repairing and smoothing your surface guarantees a clean, even finish and enhances the durability of your limewashed walls. Additionally, understanding self-watering plant pots can inspire ideas for maintaining moisture levels in wall finishes or surrounding plantings, contributing to a well-maintained and aesthetically pleasing environment. Surface preparation is essential for achieving a high-quality limewash application, ensuring that your walls are fully ready for the decorative finish. Moreover, taking the time to identify surface flaws can save you from costly corrections after applying the limewash.
Prime for Adhesion
Have you prepared your walls properly for limewash? Before applying, it’s crucial to verify good adhesion. Start with primer application if your surface is smooth or non-porous, as it helps the limewash stick better. Once primed, perform adhesion testing by applying a small amount of limewash to a hidden area. Wait 24 hours and check for peeling or flaking. If the test passes, proceed confidently; if not, consider re-priming or cleaning the surface further. Proper priming creates a solid base, improves coverage, and prevents future peeling. Remember, thorough preparation and testing are key to achieving a durable, attractive limewashed finish. Taking these steps now will save you time and frustration later. Additionally, understanding necessary cookies can help you ensure your surface is adequately prepared for long-lasting results. For optimal results, ensure the surface has proper surface preparation, including cleaning and possibly sanding to enhance adhesion. Incorporating surface porosity considerations can also improve the limewash’s bonding strength over time.

Box of 40 – Paint & Epoxy Mixing Cups Buckets – 174 Ounce (5-Quart) – Calibrated Mixing ratios on Side – Solvent Resistant, Reusable Clear Plastic Cups for Paint, Epoxy, Resin, Oil, Thinner (40)
Heavy-duty mixing cups is designed to handle your largest paint, epoxy, and resin mixing projects with ease! Made…
As an affiliate, we earn on qualifying purchases.
As an affiliate, we earn on qualifying purchases.
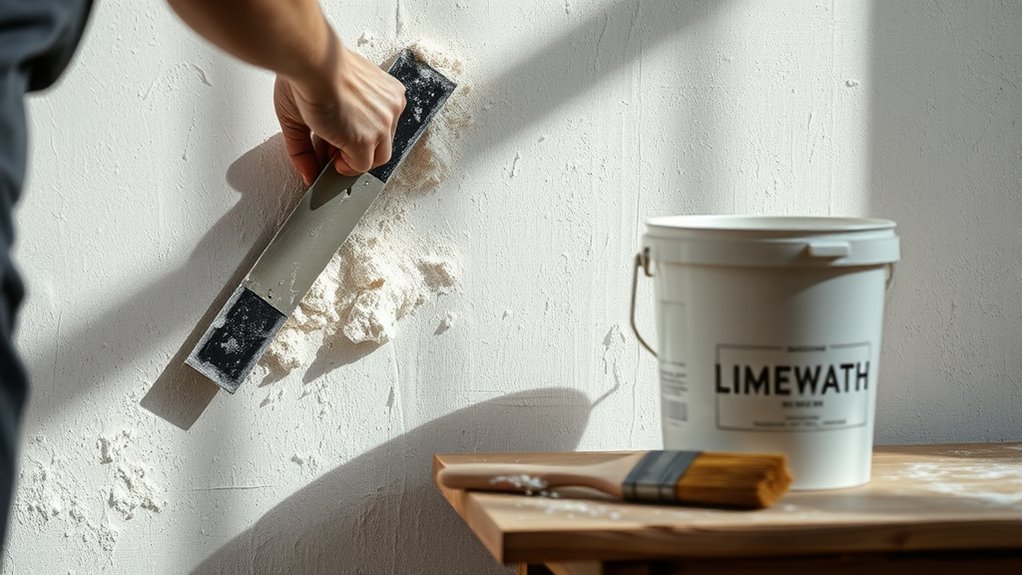
Cleaning and Repairing the Surface
Before applying limewash paint, it’s essential to thoroughly clean and repair the surface to guarantee proper adhesion and a smooth finish. Start by removing dirt, dust, and loose paint or plaster. Check for surface discoloration caused by dirt or previous coatings and clean these areas with a gentle scrub or power washer if needed. Address moisture issues by sealing leaks or damp spots, as excess moisture can cause peeling or mold growth under the limewash. Repair cracks and holes with suitable filler, ensuring a level surface. If the surface is uneven or damaged, sand rough spots to create a uniform base. Proper cleaning and repairs prevent future problems and ensure your limewash adheres correctly, resulting in a beautiful, long-lasting finish. Additionally, understanding the surface preparation process is crucial for achieving the best results with limewash application. For optimal results, consider using proper wicking materials to maintain surface moisture levels during application, especially on porous surfaces.

Matte Ultramarine Blue Oxide Pigment Powder – 5oz/142g – Concrete Pigment, Cement Color Pigment, Resin Epoxy Dye, Colorant for Gypsum, Plaster, Putty, Grout, Lime-Wash, Milk Paints
Oxide ultramarine blue are man-made pigments from natural elements. Color pigment powder for use in arts, crafts and…
As an affiliate, we earn on qualifying purchases.
As an affiliate, we earn on qualifying purchases.
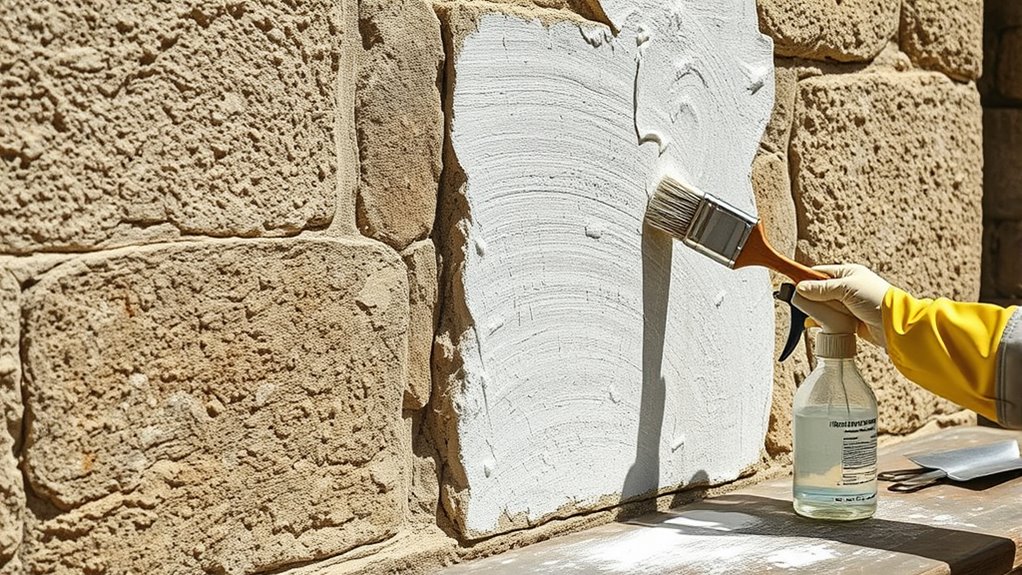
Mixing Limewash: Ratios and Consistency
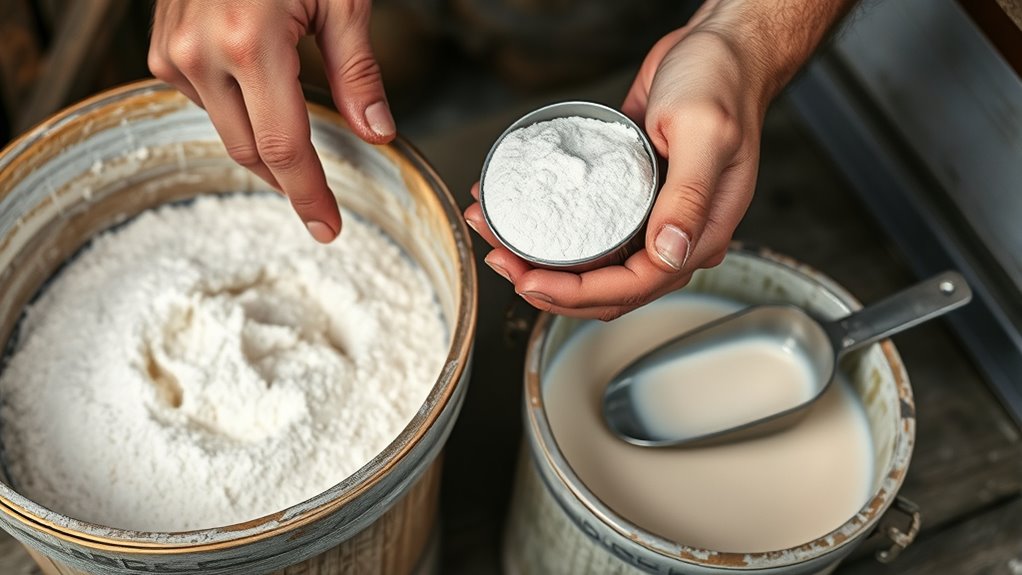
After cleaning and repairing the surface, the next step is to prepare your limewash mixture. Start by mixing lime putty or lime hydrate with water, typically using a ratio of 1 part lime to 2-3 parts water, depending on desired consistency. Aim for a creamy, smooth texture; too thick and it’ll be hard to apply, too thin and it won’t cover well. When color matching, add pigments gradually to achieve your preferred hue, ensuring thorough blending for uniform color. Always follow safety precautions—wear gloves, goggles, and a mask to avoid inhaling lime dust or fumes. Adjust your mixture as needed, testing consistency on a small area before full application. Proper mixing guarantees durability, color accuracy, and ease of application. Additionally, understanding the consistency of limewash helps in achieving a uniform coat and optimal coverage, and recognizing the performance of the mixture is essential for a lasting finish.
Testing Your Limewash Mixture

To guarantee your limewash mixture is just right, it’s essential to test it before applying it to the entire surface. Start with a small area to perform a color testing, ensuring the hue matches your vision. This step helps you verify if the mixture’s color is consistent and uniform. Next, do a consistency check by brushing a small sample onto a test patch. The mixture should be smooth and spreadable without drips or lumps. If it’s too thick, add a little water; if too thin, add more limewash. This testing phase prevents surprises during application and ensures your finish looks even and professional. Taking these extra steps helps you achieve a beautiful, durable limewashed surface.
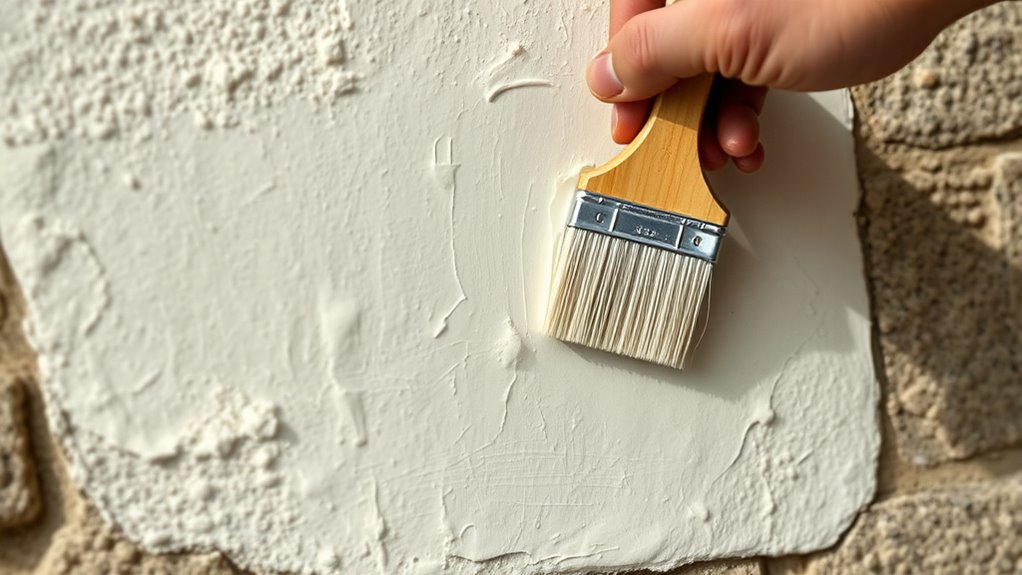
Applying the First Coat of Limewash

Before you start, make sure the surface is clean, dry, and properly prepared. As you apply the limewash, use smooth, even strokes to avoid streaks. Keep the thickness consistent to guarantee a uniform finish and proper adhesion. Developing full attention during application will help achieve the best results. Being mindful of application techniques can also prevent common issues like uneven coverage or drips. Proper surface preparation techniques, including cleaning and priming, ensure better adhesion and longevity of the limewash finish.
Preparing Surface Properly
Ensuring the surface is properly prepared is essential for a smooth and durable limewash application. First, assess the surface texture; it should be rough enough to allow the limewash to adhere well. Remove any loose paint, dirt, or debris, and repair cracks or holes to create an even base. Moisture levels are crucial—avoid applying limewash to damp surfaces, as excess moisture can cause peeling or uneven coverage. Check environmental conditions, guaranteeing the weather is dry and temperatures are within the recommended range, typically between 50°F and 85°F. Proper surface preparation ensures the limewash bonds effectively, preventing peeling or flaking over time. Additionally, understanding the importance of surface preparation can significantly influence the overall success of your project. Being aware of material suitability can help you select the best surface for limewash application, ensuring longevity and aesthetic appeal. Ensuring proper surface cleaning techniques also contributes to optimal adhesion and a flawless finish.
Applying Even Strokes
Once you’re ready to begin applying the limewash, focus on maintaining even strokes across the surface. Use smooth brush techniques, keeping your strokes consistent in direction and pressure. This helps prevent uneven texture and color variation. Always load your brush with enough limewash to avoid dry patches, and work methodically to cover the entire area seamlessly. To facilitate stroke consistency, follow a regular pattern, such as horizontal or vertical strokes, without overloading or dragging the brush. Practice on a small section first to develop a steady hand. Below is a simple guide to help you keep your technique on track:
| Technique | Tip | Result |
|---|---|---|
| Brush loading | Load brush evenly before each stroke | Consistent coverage |
| Stroke direction | Stick to one direction per pass | Uniform appearance |
| Pressure control | Apply gentle, steady pressure | Smooth finish |
| Overlap strokes | Slightly overlap each stroke | Seamless transition |
Maintaining Consistent Thickness
To achieve a smooth and even first coat of limewash, you need to focus on maintaining a consistent thickness as you work. This helps ensure proper color matching and prevents uneven fading over time. Use a steady hand and apply the limewash in uniform strokes, monitoring the layer’s thickness regularly. Environmental considerations, like humidity and temperature, can affect how the limewash settles; working in stable conditions helps maintain consistency. Avoid overloading your brush or roller, as excess material can lead to drips and uneven coverage. Keep your application thin but thorough, building up layers gradually. Consistent thickness not only enhances the aesthetic appeal but also improves durability, ensuring your limewash maintains its color and texture longer.
Techniques for a Smooth and Even Finish

Achieving a smooth and even limewash finish requires careful preparation and proper technique. Start with consistent brush techniques, using long, overlapping strokes to ensure uniform coverage without streaks. When applying limewash with a brush, maintain a wet edge to prevent lap marks and work steadily across the surface. Alternatively, roller application can speed up the process and produce an even layer, but choose a roller with a thick nap suited for textured surfaces. Keep your tools clean and well-maintained to avoid uneven patches. Always work in manageable sections, blending edges seamlessly. Applying multiple thin coats rather than one thick layer helps achieve a smoother finish. Patience and attention to detail are key to creating a beautifully even limewash surface.
Drying, Curing, and Maintaining Limewashed Walls

Properly drying and curing limewashed walls is essential to guarantee the finish sets correctly and remains durable over time. During this process, moisture evaporates gradually, allowing the lime to harden and form a strong bond with the surface. This patience enhances limewash longevity, ensuring your walls stay beautiful longer. Proper maintenance also involves gentle cleaning and avoiding harsh chemicals, which helps preserve the eco-friendly nature of limewash and reduces environmental impact. As the limewash cures, it becomes more resistant to weathering and wear, making your investment worthwhile. Keep in mind that consistent upkeep, like inspecting for cracks or chips and touching up when necessary, maintains the integrity of the finish. With proper care, your limewashed walls will continue to showcase their natural charm for years.
Frequently Asked Questions
How Long Does Limewash Typically Last Before Needing Reapplication?
Limewash typically lasts about 5 to 10 years before you need to reapply, depending on your climate and surface preparation. Its durability lifespan can be prolonged with proper maintenance and periodic cleaning. If you notice fading or wear, it’s a good idea to touch up or recoat to preserve its appearance and protective qualities. Regular upkeep ensures your limewash remains vibrant and effective over time.
Can Limewash Be Applied Over Existing Paint or Wallpaper?
Applying limewash over existing paint is like trying to paint a smooth canvas on a rough surface. You can do it, but only if the existing paint is compatible and well-adhered. If you have wallpaper, it’s best to remove it using proper techniques before applying limewash. This guarantees the limewash bonds properly and lasts longer, giving your walls a fresh, authentic look without peeling or cracking over time.
What Environmental Conditions Affect Limewash Drying Time?
You’ll find that high humidity levels slow down limewash drying, as moisture takes longer to evaporate. Conversely, low humidity speeds up the process. Sunlight exposure also plays a role; direct sunlight helps limewash dry faster, while shaded areas can prolong drying time. To guarantee proper adhesion and finish, monitor these environmental conditions, and consider adjusting application timing or location based on humidity and sunlight, for best results.
Is Special Equipment Required for Applying Limewash Professionally?
You don’t need special equipment to apply limewash professionally, but using proper tools can make a big difference. Typical application techniques involve brushes, rollers, or spray systems designed for lime-based paints. Investing in quality equipment guarantees even coverage and better adhesion. For larger projects, a spray gun with adjustable settings helps achieve a smooth finish efficiently. Proper tools and techniques are key to a professional-looking, durable limewash application.
How Do I Prevent Efflorescence on Limewashed Surfaces?
Think of efflorescence like a stubborn stain on your favorite shirt—you want to prevent it before it sets. To do so, guarantee proper efflorescence prevention by using limewash additives that block moisture migration. Applying a breathable, well-prepared surface and avoiding excessive moisture during application also helps. These steps keep your limewashed surface looking pristine, much like a freshly cleaned shirt that stays spotless longer.
Conclusion
Once you’ve mastered preparing and applying limewash, your walls can transform beautifully. Imagine restoring an old brick fireplace, giving it a fresh, textured finish that highlights its character. With proper prep and technique, your limewashed surfaces will not only look stunning but also stand the test of time. Just like that fireplace, your walls can become a timeless feature—simple to achieve and truly rewarding.