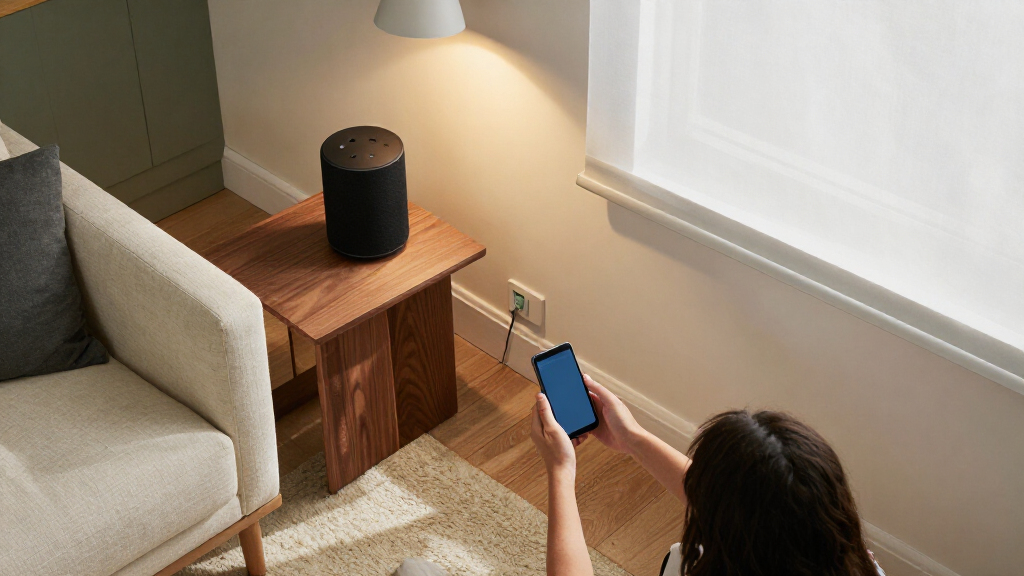

Set up a small smart home system by connecting devices to a hub or app, then create an automation that responds to a chosen time, sensor, or voice command. This guide is for beginners who can use a smartphone and home Wi-Fi. Allow 1-2 hours for setup; adding many devices or resolving network issues can take longer.

Get furniture and decor delivered free with Prime
- Fast, free delivery on millions of items
- Prime Video, Amazon Music and more included
- Member-only deals all year

Home Assistant Green Smart Home Hub with Advanced Automation
- ✔ Operating system: Home Assistant OS
- ✔ Processor: Quad-core
- ✔ Memory: 4 GB RAM

Echo Hub – 8" Smart Home Control Panel
- ✔ Display: 8-inch touchscreen, 1280 × 800
- ✔ Wi-Fi: Dual-band 802.11a/b/g/n/ac
- ✔ Smart-home connectivity: Bluetooth LE Mesh, Zigbee, Thread, Matter, Amazon Sidewalk

SONOFF NSPanel Pro 120 Smart Control Panel
- ✔ Display: 4.7-inch touchscreen
- ✔ Smart-home hub: Built-in Zigbee gateway
- ✔ Camera viewing: Live view for up to four supported camera types
Difficulty: Beginner | Time: 1-2 hours
What You’ll Need
Tools & Materials:
- Smartphone or tablet with the manufacturer’s app installed
- Smart home hub or compatible smart speaker, if required by your devices
- Smart home devices, such as a plug, bulb, or motion sensor
- Wi-Fi network name and password
- Device account credentials
Knowledge:
- Basic smartphone use
- How to connect a device to your home Wi-Fi
- The difference between a trigger and an action in an automation
Check each device’s supported Wi-Fi bands, hub requirements, and smart home platform before buying or opening it. Some devices require 2.4 GHz Wi-Fi or a specific hub. Keep the router and hub powered on, and have access to the electrical switch or outlet that controls each device.
Home Assistant Green Smart Home Hub with Advanced Automation
For households that want devices to work together on their own terms, Home Assistant Green is the most automation-focused option here. It arrives with Home Assistant OS installed, so we can start with a hub rather than assemble a computer and install the platform ourselves. Its quad-core processor, 4 GB of RAM, and 32 GB of storage provide the base for a dedicated home automation system, while official Nabu Casa support gives the platform a clear update path.Compared with Echo Hub and NSPanel Pro 120, Green is less about putting a control screen on the wall and more about coordinating devices and automations behind the scenes. That makes it a better starting point for a household willing to configure routines and expand over time. USB expansion can add radios for Zigbee, Z-Wave, or Thread, but those capabilities are not built in. We also need a wired Ethernet connection, and the two USB ports limit how many peripherals we can attach directly. Choose Green for control and room to grow; skip it if we want a ready-to-use touchscreen with wireless networking built in.
Pros:
- Home Assistant OS is pre-installed for a straightforward start.
- Official Nabu Casa support provides firmware updates.
- Fanless design runs silently and uses only a few watts.
- USB expansion can add Z-Wave, Zigbee, or Thread connectivity.
Cons:
- Wired Ethernet is required; there is no built-in Wi-Fi.
- Only two USB ports are available for expansion.
- Zigbee, Z-Wave, and Thread require separately added radios.
Best for: People who want a dedicated, expandable Home Assistant hub and are comfortable using Ethernet and configuring automations.
Not ideal for: Buyers who want a built-in touchscreen, Wi-Fi networking, or Zigbee, Z-Wave, and Thread radios without adding hardware.
Bottom line: We recommend Home Assistant Green when custom automations and an expandable hub matter more than an integrated control screen.
“We recommend Home Assistant Green when custom automations and an expandable hub matter more than an integrated control screen.”
Echo Hub – 8" Smart Home Control Panel
Echo Hub is the clearest choice when the household needs a visible place to manage smart devices. Its 8-inch, 1280 × 800 touchscreen lets us arrange and resize controls into a personalized dashboard, so commonly used lights, routines, and other device controls can be easier to reach than through a phone app. Alexa voice control adds another way to trigger routines, and Ring camera event summaries make it especially relevant to homes already using Ring.Unlike Home Assistant Green, Echo Hub includes Zigbee, Thread, Matter, Bluetooth, and Wi-Fi connectivity, reducing the need to add radios for supported devices. That built-in breadth makes it the more approachable panel for an Alexa-centered setup. It does not provide Green’s same emphasis on an independently configurable automation platform, however, and buyers should check that their specific devices and desired routines work with Alexa. The panel can be wall-mounted or used with a stand, but PoE requires a compatible converter, and cable management may call for separate accessories. Pick it for accessible, room-based control; look elsewhere if we want an open-ended hub first or a compact panel that takes less wall space.
Pros:
- 8-inch touchscreen supports an adjustable control dashboard.
- Built-in Wi-Fi, Bluetooth, Zigbee, Thread, Matter, and Sidewalk support.
- Alexa routines and Ring camera summaries suit Amazon-centered homes.
- Wall mounting or stand placement allows different room setups.
Cons:
- PoE needs a compatible USB-C converter that is not included.
- Some Bluetooth profiles, including HFP, are unsupported.
- Stationary design is not intended for handheld or portable use.
Best for: Alexa households that want a large, shared touchscreen for device controls, routines, and Ring camera summaries.
Not ideal for: People who want an automation hub centered on extensive custom configuration, a portable display, or an installation with no extra power accessories.
Bottom line: We recommend Echo Hub for households that value a large, flexible Alexa control surface with several smart-home radios built in.
“We recommend Echo Hub for households that value a large, flexible Alexa control surface with several smart-home radios built in.”
SONOFF NSPanel Pro 120 Smart Control Panel
When a large wall display feels excessive, the SONOFF NSPanel Pro 120 puts everyday smart-home controls into a smaller 4.7-inch touchscreen. Its built-in Zigbee gateway makes it a natural fit for controlling compatible lights and other Zigbee devices, while the panel also offers thermostat adjustments, energy-use monitoring, security modes, and live views for up to four cameras. These functions give it a broader role than a simple lighting switch, especially when we want key information available at a fixed spot in the home.Compared with the Echo Hub, the SONOFF panel takes less space but provides less screen area for browsing and arranging controls. It also differs from Home Assistant Green: this is a room-level interface with a Zigbee gateway, rather than the most flexible foundation for building a whole-home automation system. The listed compatibility includes Alexa, Google Assistant, Apple HomeKit, and Home Assistant, although buyers should confirm that their specific devices and desired features work together. Its compact size may feel less reassuring under frequent interaction, and live camera support is limited to four camera types. Choose it for installed, at-a-glance control; skip it if we need a large dashboard or broad camera support.
Pros:
- Built-in Zigbee gateway controls compatible devices without an added radio.
- 4.7-inch touchscreen provides at-a-glance device and thermostat access.
- Can show energy-use information and live views from supported cameras.
- Listed compatibility spans Alexa, Google Assistant, Apple HomeKit, and Home Assistant.
Cons:
- Live monitoring is limited to four camera types.
- Smaller display offers less room than Echo Hub for dashboard controls.
- Compact physical build may feel fragile with frequent use.
Best for: Buyers who want a compact touchscreen with built-in Zigbee control, energy information, thermostat access, and compatible camera views.
Not ideal for: People who want a large, room-wide dashboard, broad camera compatibility, or a hub focused on advanced custom automation.
Bottom line: We recommend NSPanel Pro 120 when a small installed panel and Zigbee control fit the home better than a large dashboard.
“We recommend NSPanel Pro 120 when a small installed panel and Zigbee control fit the home better than a large dashboard.”
As an Amazon Associate we earn from qualifying purchases.
Before You Start
Choose a small first project. For example, set a smart plug to turn on a lamp at sunset, or use a motion sensor to switch on a hallway light. Confirm that the device and automation platform support the trigger and action you want.
Follow the device’s electrical and placement instructions. Do not open wiring, modify outlets, or install a wired switch unless you are qualified to do so. Keep account passwords private, and use a strong unique password for your smart home account.
Step-by-Step Instructions
Step 1: Choose the first automation
Write down one event that should trigger an action and the action you want. A trigger could be a time, motion detection, or a voice command. An action could be turning on a light or plug. Keep the first automation simple so you can tell whether it works.
Tip: Check that your chosen devices and platform support the same trigger and action. A motion sensor may need a hub even if a smart bulb connects directly to Wi-Fi.
Check: You can describe the automation in one sentence, such as “When motion is detected after sunset, turn on the hallway light.”
Step 2: Check device and network compatibility
Read the device packaging or product settings page and confirm that it supports your Wi-Fi band, hub, and smart home platform. Check whether the device needs Bluetooth during setup, a manufacturer account, or a firmware update. If your router combines 2.4 GHz and 5 GHz under one network name, check the device maker’s setup instructions for any pairing requirements.
Tip: Do not assume that devices work together just because they are all labeled “smart home.” Confirm that your chosen app or hub can control each device and run the planned automation.
Check: You know which app or hub will manage each device and have noted any special setup requirement.
Step 3: Install and prepare the devices
Place each device according to its instructions. Screw in a smart bulb with the wall switch off, plug in a smart plug, or position a sensor where it can detect the intended movement. Restore power when installation is complete. Leave sensors accessible while pairing, and avoid placing them behind furniture or near heat sources unless the instructions permit it.
Tip: Keep the device, its setup code, and any reset instructions nearby. A code may be printed on the device or included on a card.
Check: Each device has power, appears ready to pair, and is placed where it can perform its intended task.
Step 4: Add each device in its app
Open the manufacturer’s app or your chosen smart home app and sign in. Select the option to add a device, then follow the on-screen pairing instructions. Scan the setup code if prompted, choose the correct Wi-Fi network, and enter its password carefully. Give each device a clear name and assign it to a room.
Tip: Pair one device at a time. If setup fails, check the app’s instructions before resetting the device; some reset procedures erase settings.
Check: The app lists each device by its chosen name, and you can control it from the device screen.
Step 5: Connect devices to a hub or platform
If your devices use a hub, add them to that hub using the hub’s app or instructions. If you use a platform that links manufacturer accounts, open its device or service settings and connect the relevant account. Grant only the access needed for device control, then check that the devices appear in the platform where you plan to create the automation.
Tip: Some devices show up in the manufacturer’s app first and take a few minutes to appear in a linked platform. Keep both apps open and follow any confirmation prompts.
Check: The intended automation app can see every device it needs to use.
Step 6: Create the automation
Open the automation, routine, or scene section in your chosen app and select the option to create one. Add the trigger you chose, such as a schedule or sensor event. Add the action, select the correct device, and set its desired state. If the app offers conditions, such as time of day, add only the conditions needed for this first routine. Save the automation with a name that describes what it does.
Tip: Check whether the app interprets schedules using your home’s time zone and whether sunrise or sunset schedules need a location. Avoid adding several triggers until the basic routine works.
Check: The saved automation shows the intended trigger, action, device, and any conditions.
Step 7: Run a controlled test
Use the app’s test or run option if available. Otherwise, create the trigger deliberately: wait for the scheduled time, walk into the sensor’s detection area, or use the selected voice command. Watch the target device and check the automation’s activity history if the app provides one. Allow a short delay if the device or platform needs time to respond.
Tip: Test when you can observe the device safely. For a lamp, stay near the switch so you can turn it off if the routine behaves unexpectedly.
Check: The trigger occurs and the intended device performs the action once.
Step 8: Review settings and secure the system
Check the routine’s schedule, enabled status, and device selection. Update the device and hub firmware through their official apps if updates are offered. Turn on multifactor authentication for the smart home account when available, and remove devices or integrations you no longer use.
Tip: For routines that control locks, alarms, heaters, or other higher-impact equipment, review the device maker’s safety guidance and test the routine while you can monitor it.
Check: The automation is enabled, the account uses appropriate security settings, and the system has no unexpected devices or integrations.
Common Mistakes to Avoid
- Buying devices without checking their platform or hub requirements. — Confirm compatibility and required hubs before purchase, including Wi-Fi band and automation support.
- Pairing several devices at once and losing track of which one failed. — Add and test one device at a time, giving each a distinct name and room.
- Creating a routine with too many triggers or conditions before testing the basics. — Start with one trigger and one action, verify them, then add conditions one at a time.
- Placing a sensor where furniture, sunlight, or its angle blocks detection. — Follow placement guidance and test detection from the places people will actually move through.
Troubleshooting
Problem: The app cannot find the device during pairing.
Solution: Confirm that the device has power and is in pairing mode. Move it near the router or hub, enable Bluetooth if the instructions require it, and check the device’s Wi-Fi band requirements. Restart pairing using the manufacturer’s steps.
Problem: The device connects but appears offline or responds slowly.
Solution: Check Wi-Fi coverage at the device’s location and restart the router, hub, and device in the order their instructions recommend. Install available firmware updates and check the service status in the app.
Problem: The automation is saved but does not run.
Solution: Confirm that it is enabled and that the trigger, time zone, conditions, and selected device are correct. Test the trigger directly and check the app’s activity history for a recorded event or error.
Problem: A sensor detects motion inconsistently.
Solution: Adjust its position and angle according to its instructions, clear obstructions, and check battery level. Test from the area it should cover, then change one placement detail at a time.
What Success Looks Like
The app shows all intended devices online, lets you control them individually, and lists an enabled automation with the correct trigger and action. When you perform the trigger, the selected device responds as expected. Run the test more than once, including after a short wait or app refresh, to check that the routine continues to work.
Next Steps
Use the automation for a few days and review its history or behavior. Adjust timing, sensor placement, or conditions if it runs too early, too late, or too often. Add another device only after the first routine is reliable, and keep a simple list of device names, rooms, and hub requirements for future changes.
Frequently Asked Questions
Do all smart home devices need a hub?
No. Some devices connect directly to Wi-Fi, while others need a hub for pairing, communication, or automation features. Check the device’s requirements before buying.
Can devices from different brands work in one automation?
Often, if the same hub or platform supports both devices and exposes the trigger and action you need. Confirm compatibility in the platform’s device list and test the routine before relying on it.
Why does a smart device need 2.4 GHz Wi-Fi?
Some devices support only 2.4 GHz because it is common in low-power connected products and can cover more of a home than 5 GHz. Follow the device’s pairing instructions if your router uses one network name for both bands.
What is the simplest automation to test?
A scheduled action, such as turning on a lamp at a chosen time, is easy to observe. A motion sensor controlling a light is another simple choice if both devices are supported by the same platform.
What should I do if a device stops responding later?
Check its power, Wi-Fi or hub connection, and app status first. Restart it using the maker’s instructions, update firmware if available, and review whether the router or account settings changed.