
To create sharp color-block walls, start by planning your layout with precise measurements and guides. Use painter’s tape to mask off each section carefully, pressing it firmly to prevent paint bleed, especially on textured walls. Apply multiple colors in thin, even coats, removing the tape promptly at a 45° angle once the paint is dry. With proper prep and tape techniques, you’ll achieve professional-looking, clean lines that make your design stand out—continue exploring how to master each step with confidence.
Key Takeaways
- Sketch your layout with precise measurements and plan color placement for visual harmony.
- Use painter’s tape to mask edges, pressing firmly to prevent paint bleed, especially on textured surfaces.
- Apply tape along straight lines and corners, smoothing edges with a putty knife for sharp, clean boundaries.
- Remove tape at a 45° angle after paint dries to ensure crisp, professional-looking color blocks.
- Consider wall texture when placing tape and designing transitions to maintain accuracy and clean lines.

Scotch Felt Pads 162 PCS Beige, Felt Furniture Pads for Protecting Hardwood Floors, Round, Assorted Sizes Value Pack, Self-Stick design, Protecting from nicks, dents and scratches (SP845-NA)
- Suitable for Various Furniture: Protects chair legs, tables, and more
- Easy to Install: Self-adhesive for quick application
- Protects Multiple Surfaces: Safeguards hardwood, tile, laminate, vinyl
As an affiliate, we earn on qualifying purchases.
Planning Your Color Blocking Design
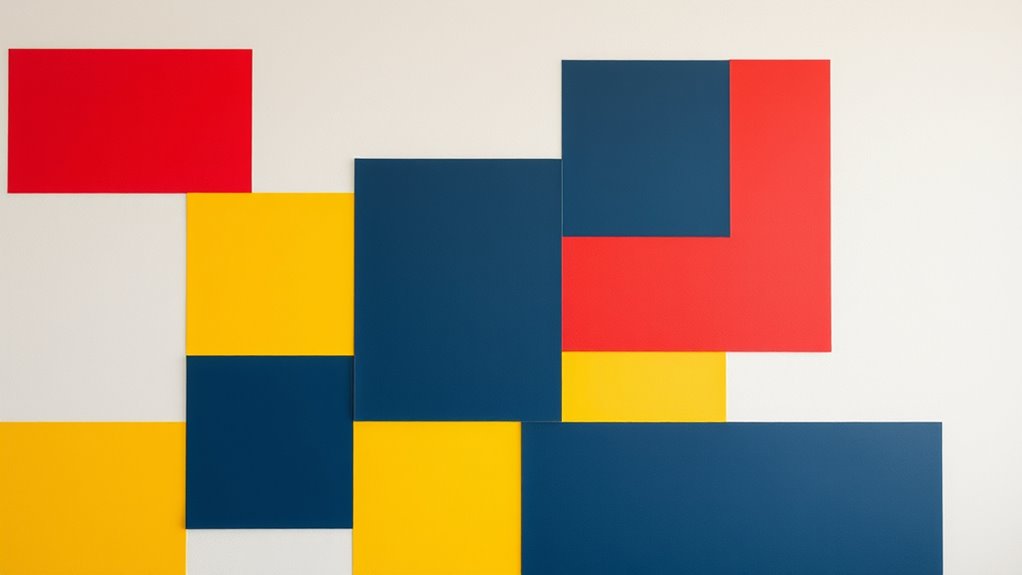
Before you begin, it is essential to plan your color blocking design carefully. Start by considering color harmony, which guarantees your chosen shades complement each other and create a cohesive look. Think about the mood you want to set in the space; warm tones evoke energy and comfort, while cool hues promote calmness and relaxation. Sketch your layout, deciding where each color will go and how the blocks will interact. Measure your walls precisely to determine the size and shape of each section. Keep in mind that balanced designs often feel more harmonious, so arrange your colors thoughtfully. Planning ahead prevents mistakes and helps you achieve a polished, intentional look that enhances your room’s overall atmosphere. Additionally, understanding color blocking techniques can improve the visual impact of your design. Incorporating elements like vintage decor and natural textures, as seen in farmhouse bedrooms, can further elevate your wall color layout. Being aware of drivetrain wear and how to avoid cross-chaining during color transitions in your design can also contribute to a smoother visual flow. To enhance your planning process, consider organizing your space and supplies beforehand, which ties into effective home organization practices.
Felt Furniture Pads X-PROTECTOR 133 PCS Premium Furniture Pads - Felt Pads
- Floor Protection for Various Surfaces: Protects hardwood, laminate, and tiled floors
- Includes Two-Pack for Complete Coverage: One brown and one beige pack, 133 pieces total
- Multiple Sizes for Perfect Fit: Various sizes to fit all furniture legs
As an affiliate, we earn on qualifying purchases.
Choosing the Right Paint and Tools

Choosing the right paint type and tools can make or break your color block project. You’ll want to pick a durable, high-quality paint and use painter’s tape and primer to guarantee clean lines. Decide between brushes and rollers based on your design’s detail and size for a smooth finish. Additionally, selecting the appropriate paint thinning ratio can significantly influence the sprayability and final appearance of your paint application. Using an electric bike generator can help power your tools sustainably, ensuring consistent performance. Incorporating automation technology can further streamline your application process and improve efficiency. Choosing the right projector screen material can also greatly enhance the vibrancy and clarity of your color blocks.
Paint Type Selection
Selecting the right paint and tools is essential for achieving a clean, vibrant color-blocked wall. Your choice of paint finish impacts the overall look—flat finishes hide imperfections, while satin or semi-gloss add durability and sheen. Consider your wall texture; smooth surfaces work well with all finishes, but rough or textured walls may require thicker paints or multiple coats for even coverage. Opt for high-quality, pigmented paints to ensure vivid colors that last. Use brushes and rollers suited to your chosen paint finish to avoid streaks or uneven application. Applying the correct paint type not only enhances the sharpness of your color blocks but also guarantees they stay crisp over time. Choosing wisely helps you achieve a professional, polished result that truly stands out.
Tape and Primer Use
Using painter’s tape and primer correctly can make or break the sharpness and longevity of your color-blocked wall. Choose the right primer based on your wall surface and paint type; a high-quality primer guarantees better adhesion and vibrant colors. When applying tape, press down firmly to prevent bleeding, and remove it carefully after the paint dries to avoid smudging. Proper tape removal is essential for clean lines. Use this guide to select the best primer and tape techniques:
| Primer Selection | Tape Removal Tips |
|---|---|
| Based on wall material | Remove tape at a 45° angle |
| Oil-based or water-based | Do it slowly for sharp edges |
| Consider adhesion needs | Wait until paint is fully dry |
This approach guarantees crisp lines and durable results. Additionally, understanding headphone compatibility can help ensure your tools work seamlessly with your workspace or project environment. Being aware of spearfishing safety practices can also inform the safe use of specialized equipment like primers and tapes to avoid accidents during your DIY projects.
Brush vs. Roller
When deciding between a brush and a roller for your color-blocking project, consider the size and detail of the areas you’re painting. For intricate edges and sharp lines, brush techniques give you more control and precision, helping you achieve clean, crisp borders. Use a high-quality angled brush for edges and corners to minimize bleeding. Rollers are ideal for larger, flat surfaces, providing smooth roller finishes that save time and effort. They create even coats and reduce visible brush strokes. For large sections, a roller speeds up the process, while brushes are better suited for detailed or tight spots. Combining both tools allows you to maintain sharp lines with brushes and achieve seamless coverage with rollers, resulting in a polished, professional look. Additionally, choosing the right painting tools can significantly improve your results and efficiency, especially when considering the importance of attention to detail in creative projects.

Scotch Felt Pads 32 PCS Beige, Felt Furniture Pads for Protecting Hardwood Floors, 1" Round, Easy-to-apply, Self-Stick design, Reliable protection from nicks, dents and scratches (SP802-NA)
- Suitable for various furniture: Protects finished surfaces from damage
- Self-stick application: Easy to attach and use
- Facilitates furniture movement: Allows easy sliding on floors
As an affiliate, we earn on qualifying purchases.
Creating a Precise Layout With Measurements and Guides

To guarantee your color-blocking walls look sharp and professional, start by creating a precise layout with accurate measurements and guides. Begin by evaluating your wall texture, as rough surfaces may require different techniques for marking measurements. Use a tape measure and level to mark where each color block will go, ensuring straight, even lines. Consider how lighting effects will impact the appearance of your design, as shadows can alter perceived edges. Lightly draw guides with a pencil or painter’s tape to outline your blocks before applying paint. Double-check measurements and alignments to avoid mistakes. A well-planned layout minimizes errors and saves time, giving your finished wall a clean, crisp look that highlights your color choices effectively. Proper measurement accuracy is essential for achieving a professional appearance in your color-blocking project. Incorporating techniques for precision can further enhance the clean lines and overall quality of your design, especially when working with detailed measurements and guides. Additionally, understanding arcade machine mechanics and layout can inspire innovative design ideas for your space.

2 Pack 94.5 x 5.9 Inch Felt Furniture Pads Large Non Slip Self Adhesive Felt Strip Heavy Duty Cuttable Furniture Pads for Protecting Hardwood Floors Wall Chair
- Large Size: 94.5 x 5.9 inches, customizable
- Premium Material: Durable, high-quality felt with reinforced backing
- Multi-Function Protection: Non-slip, scratch-resistant, reduces noise
As an affiliate, we earn on qualifying purchases.
Techniques for Applying Painter’s Tape for Sharp Lines
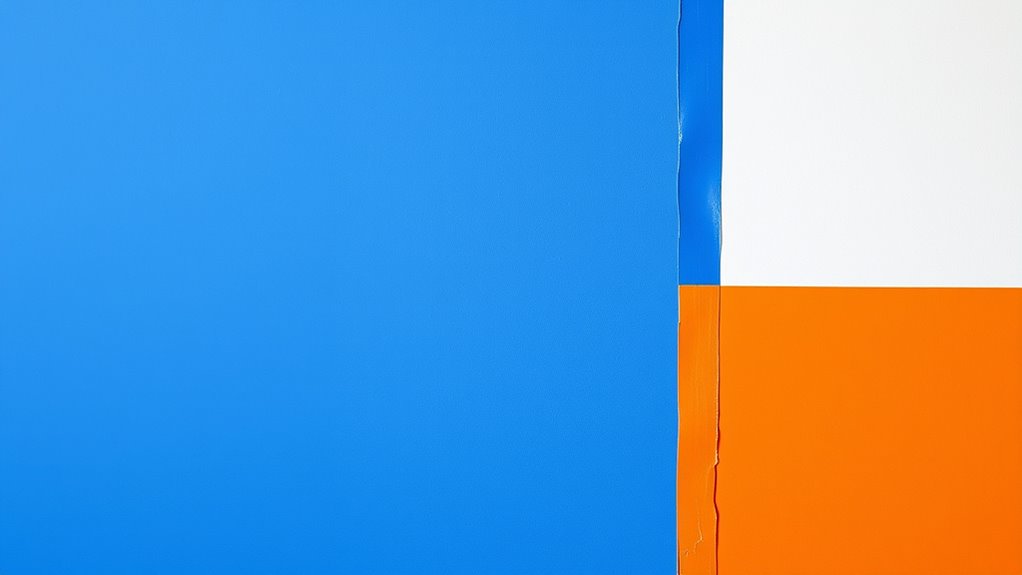
To achieve sharp, clean lines, you need to focus on precise tape placement, making sure it aligns exactly with your design. Overlap and seal the edges carefully to prevent paint bleed and guarantee crisp borders. Proper technique here sets the foundation for a professional-looking finish. Additionally, paying attention to emotional support during the painting process can help maintain patience and focus, especially if working with children or in a shared space. Being aware of local resources like support systems or community advice can also provide reassurance and guidance throughout your project. Understanding security practices such as sealing tape edges effectively can further enhance the quality of your result. Incorporating techniques for building tension in your preparation process can also help ensure your lines stay sharp and precise.
Precise Tape Placement
Achieving sharp, clean lines in color-blocking walls depends heavily on how accurately you apply painter’s tape. Start with proper tape alignment by carefully lining up the tape along your chosen edge, ensuring it’s straight and flush. Use a level or ruler if needed to maintain precision. Press down firmly on the tape’s edges to promote a tight seal, which is vital for preventing paint bleed. Focus on edge sealing by tucking the tape firmly into corners and along curves, smoothing out any bubbles or wrinkles. Proper placement and sealing eliminate gaps where paint could seep underneath, resulting in crisp, professional-looking lines. Take your time during this step, as Effective tape sealing is essential for achieving those crisp, sharp lines you desire, especially considering that storage in a cool, dark place can prolong the effectiveness of your tape and prevent deterioration over time. Additionally, maintaining good privacy and cookie management ensures your painting projects remain secure and enjoyable throughout your process.
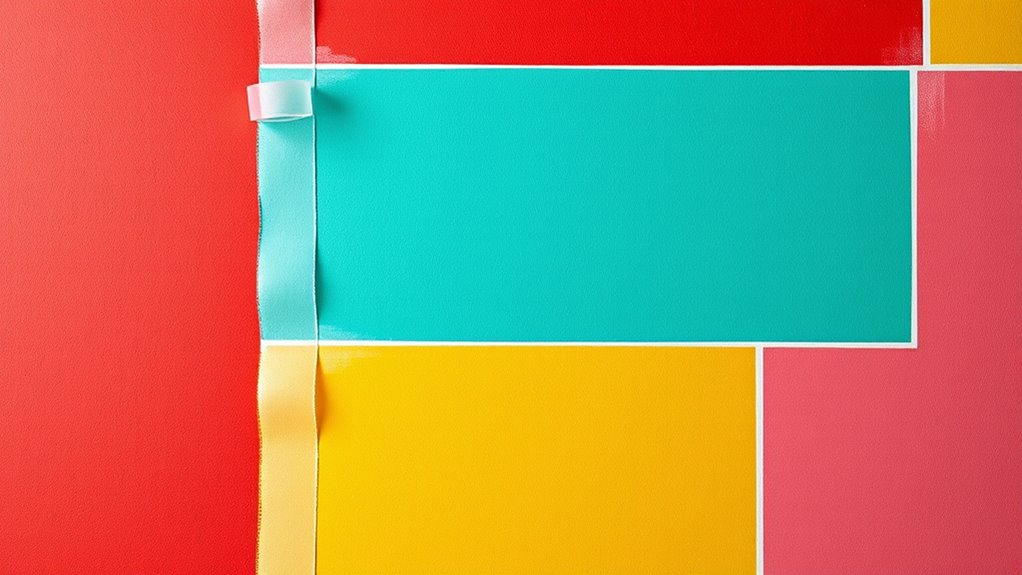
Overlap and Sealing
Proper overlap and sealing of painter’s tape are essential for creating sharp, clean lines in your color-blocking walls. Before applying tape, verify the surface is well-prepared—clean, dry, and free of dust or grease—to promote better paint adhesion and prevent bleeding. Overlap tape edges slightly, pressing firmly to eliminate gaps where paint can seep through. Use a putty knife or your fingernail to seal down edges thoroughly, especially along corners and seams. For extra protection, consider sealing the tape’s edge with a light layer of the base wall color before applying your new paint. This technique helps lock the tape in place and minimizes paint bleed. Proper surface preparation and careful sealing are key to achieving crisp, professional-looking color blocks.
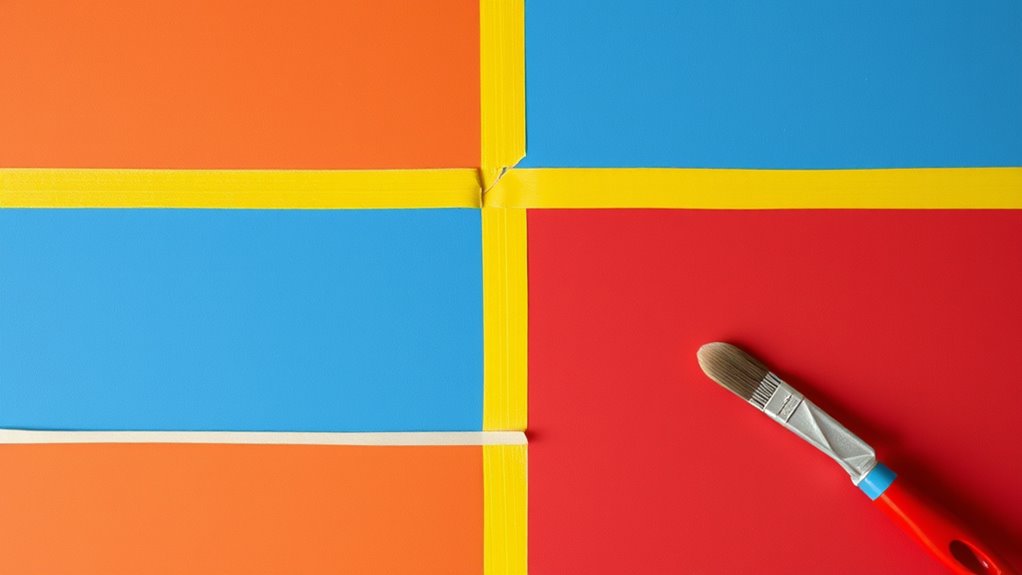
Using Masking Tape for Clean Edges and Corners
Using masking tape is vital for creating crisp, clean edges and sharp corners when color-blocking walls. To achieve this, apply the tape carefully along the lines you want to define, pressing down firmly to prevent paint bleed. For smooth edges, focus on edge smoothing by using a putty knife or your finger to press the tape’s edges, ensuring they’re sealed tightly. When the paint is dry, gently remove the tape at a 45-degree angle to prevent smudging or peeling. Proper tape removal is essential for sharp lines, so take your time and peel slowly. This technique helps you produce professional-looking, clean color blocks with well-defined boundaries, making your wall design stand out beautifully.
Tips for Preventing Bleeding and Smudging

To prevent bleeding and smudging when color-blocking walls, it’s essential to prepare your surfaces properly before applying tape and paint. Clean the walls thoroughly to remove dust and grease, which can cause paint to seep underneath. Use a high-quality, low-tack painter’s tape designed for clean lines, and press it down firmly along the edges to ensure a tight seal. Applying a thin coat of primer or base color along the tape line can help with smudging prevention, as it creates a barrier that reduces paint seepage. When painting, work in thin, even layers and avoid overloading your brush or roller, which can cause paint to bleed under the tape. These steps will help you achieve sharp, crisp color blocks without unwanted bleeding or smudging.
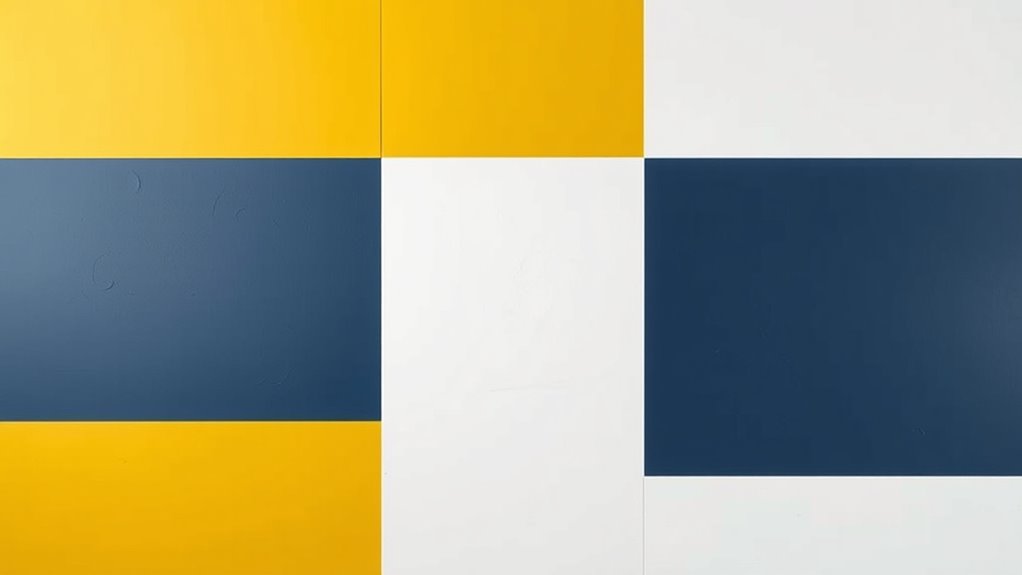
Applying Multiple Colors Seamlessly

Achieving seamless shifts when applying multiple colors on your walls requires careful planning and technique. To facilitate smooth transitions, consider the wall’s texture and how it interacts with your paint. Using tape with sharp edges helps create clean lines, and choosing colors that promote harmony prevents visual clutter. For complex designs, plan your layout with a detailed color scheme in mind. Use the table below to organize your color placements:
| Section | Color Choice |
|---|---|
| Top | Soft Blue |
| Middle | Warm Gray |
| Bottom | Creamy White |
| Accent | Deep Navy |
| Borders | Light Taupe |
This approach helps maintain color harmony and accounts for wall texture variations, ensuring a professional, seamless finish.
Correcting and Touching Up Mistakes
When mistakes happen, you can fix tape lines or blend edges to create a clean look. Repainting small areas helps cover errors without affecting the surrounding paint. With a steady hand, you can correct imperfections and achieve a flawless finish.
Fixing Tape Lines
Mistakes happen, but fixing tape lines doesn’t have to be a hassle. If you notice uneven or jagged edges, start by carefully removing the tape without peeling off fresh paint. Use your fingertips or a steady hand to gently peel back the tape at a sharp angle to minimize damage. Once the tape is removed, check for any rough or uneven edges. To improve edge smoothing, lightly sand the area with fine-grit sandpaper, blending the paint for a cleaner look. If needed, touch up small imperfections with a small brush, feathering the paint outward to blend seamlessly. Patience is key—taking your time ensures crisp, professional-looking lines without damaging your work. Proper tape removal and edge smoothing make your final result look polished and intentional.
Blending Edges Seamlessly
Even with careful tape removal, small imperfections or uneven edges can still stand out. To fix this, focus on edge blending techniques to create a smooth color shift. Use a small brush or sponge to gently feather the paint along the edges, softening any harsh lines. Lightly blending the new paint into the surrounding wall helps conceal mistakes and ensures a seamless look. If needed, apply a thin layer of the original wall color over the edge to smooth out uneven spots. Work patiently and gradually, checking your progress frequently. Remember, the goal is to create a natural color transition that hides imperfections without overworking the area. Proper edge blending restores a polished appearance, making your color-blocked wall look professionally done.
Repainting Mistake Areas
Accidents happen, and paint mistakes can easily occur during the color-blocking process. When you notice a flaw, proper repainting is key. First, carefully remove any excess paint using paint removal techniques to avoid damaging the wall. Next, make sure the wall is fully dry and clean for ideal wall preparation. To correct mistakes effectively, follow these steps:
- Lightly sand the area to smooth out uneven paint edges.
- Use painter’s tape to mask off surrounding areas for precise touch-ups.
- Apply a thin, even coat of matching paint, feathering the edges for seamless blending.
- Allow adequate drying time before removing tape to prevent smudges.
These steps help you fix mistakes cleanly and restore your wall’s flawless finish.
Protecting Your Walls and Surroundings During Painting

To keep your walls and surroundings clean during painting, it’s essential to take proper protective measures before you start. First, assess your wall texture; rough or textured surfaces may cause paint splatters, so cover nearby furniture and floors thoroughly. Use painter’s tape to mask edges and protect baseboards, window frames, and door trims. Move or cover furniture with drop cloths or plastic sheeting to prevent paint stains. If your walls have an uneven texture, take extra care when taping to ensure clean lines and prevent paint bleed. Wearing protective gear like gloves and masks also helps keep your skin and lungs safe from dust and fumes. Precise preparation minimizes cleanup time and keeps your surroundings pristine during your color-blocking project.
Finishing Touches and Maintaining Your Color Blocked Walls

Once you’ve completed your color-blocking walls, adding finishing touches will enhance the overall look and guarantee your work lasts. To keep your walls stunning, consider these steps:
Elevate your color-blocked walls with finishing touches for lasting beauty and vibrant appeal.
- Refine wall texture – lightly sanding any imperfections creates a smooth surface for touch-ups and future updates.
- Adjust lighting effects – strategic lighting can highlight the bold colors and add depth, transforming the space.
- Seal the paint – applying a clear protective coat preserves the vibrant colors and makes cleaning easier.
- Regular maintenance – clean with a soft cloth and avoid harsh chemicals to prevent fading or damage over time.
Frequently Asked Questions
How Do I Choose Complementary or Contrasting Color Combinations?
To choose complementary or contrasting color combinations, use color theory as your guide. Complementary colors sit opposite each other on the color wheel, creating a vibrant, eye-catching visual impact. Contrasting colors are next to each other, offering dynamic interest. Trust your instincts and consider the mood you want to evoke. Test small areas first, and remember, balancing these choices enhances your space’s overall harmony or boldness effectively.
What Are the Best Tape Brands for Clean Lines?
Imagine your wall’s lines sharper than a laser beam—top-quality painter’s tape makes that happen. Brands like FrogTape and 3M ScotchBlue excel with unbeatable painter’s tape durability, ensuring clean, crisp edges every time. Master tape application techniques by pressing down firmly and removing tape at a sharp angle while the paint’s still wet. Trust these brands for flawless lines that transform your color-blocking project into a masterpiece.
How Do I Prevent Paint From Peeling Over Time?
To prevent paint from peeling over time, focus on proper surface preparation and choosing durable paint. Clean and sand the surface thoroughly before painting, removing any dust, grease, or loose material. Use high-quality, paint durability products suited for your surface. Applying a primer helps improve adhesion. Finally, make sure to allow adequate drying time between coats, which ensures a strong, long-lasting finish that resists peeling.
Can I Use This Technique on Textured Walls?
Imagine turning your textured wall into a vibrant canvas with bold color blocks. Yes, you can use this technique on textured walls, but proper wall preparation is crucial. First, clean and sand the surface gently. Then, apply a high-quality painter’s tape with firm, even pressure to guarantee it adheres well to the uneven surface. Carefully plan your layout, and you’re ready to create striking, crisp lines even on textured walls.
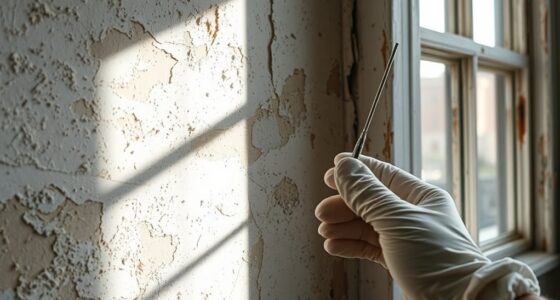
How Do I Remove Painter’s Tape Without Damaging the Paint?
To remove painter’s tape without damaging the paint, start by gently peeling it back at a 45-degree angle. Use your fingers or a plastic scraper to assist with edge trimming if needed. Do this slowly, especially along delicate edges, to avoid peeling paint. If you encounter resistance, apply a little warm water or a solvent like vinegar behind the tape to loosen it, making tape removal smoother and safer for your freshly painted wall.
Conclusion
Your color-blocked walls are more than just a design choice—they’re a reflection of your creativity and confidence. Each sharp line symbolizes clarity and precision, while the vibrant hues represent your unique personality. As you finish, remember that your space becomes a canvas of self-expression, inspiring those who enter. Embrace this transformation, knowing that your careful planning and dedication have turned a simple wall into a bold statement of who you are.