To sample paint the right way, use large boards instead of small swatches to see how the color interacts with lighting and decor. Apply paint with smooth, even strokes for an accurate preview. Assess the samples in natural light at different times and under various artificial lights, like incandescent or LED, to see how the color shifts. Continuing will help you master the best techniques for a confident, true-to-life color choice.
Key Takeaways
- Use large boards to accurately preview how paint interacts with lighting and decor.
- Apply paint with consistent, smooth strokes for a true representation of color and sheen.
- Evaluate samples in natural and artificial lighting at different times of day for comprehensive assessment.
- Observe how lighting conditions affect the perceived hue, brightness, and finish of the paint.
- View samples from multiple angles and lighting setups to ensure the final color choice suits the space.

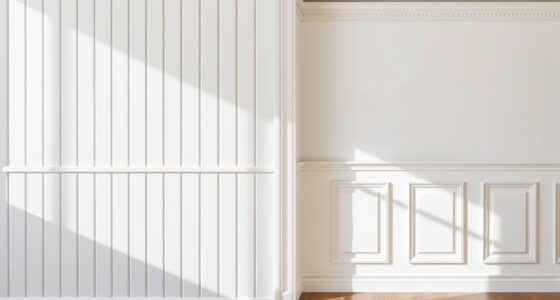
Sampling paint correctly is vital to guarantee you choose the perfect color for your space. When you’re testing colors, using large boards instead of small swatches allows you to see how the paint interacts with the room’s lighting and your existing decor. This approach gives you a more accurate preview of how the color will look once applied to your walls. To make the most of your samples, pay close attention to your brush techniques. When applying paint to the boards, use consistent strokes and even pressure, so you get a true representation of the color’s appearance. Avoid heavy or uneven brushwork, which can create shadows or variations that are not present on a smooth wall. Instead, opt for long, smooth strokes, overlapping slightly to ensure consistent coverage. This way, you see the true hue and sheen of the paint, helping you make an informed decision.
Lighting conditions play a pivotal role in how a paint color appears. Natural light varies throughout the day, casting different tones and shadows, so it’s imperative to observe your samples in various lighting scenarios. Place the large boards near windows to see how daylight affects the color in the morning, midday, and late afternoon. Then, move the boards to a shaded area or turn on artificial lighting to observe how the color looks under different light sources. Incandescent, fluorescent, and LED lights all have distinct color temperatures that can alter your perception of the paint. By examining your samples under these different conditions, you’ll discover whether the color shifts in a way that complements your room’s ambiance or if it becomes dull or overly vibrant.
Furthermore, considering the Glycolic Acid Benefits for Skin can help you maintain healthy skin that reflects your overall well-being, which is important when preparing your space for a new look. The key is to view your samples from different angles and at different times of day. This extensive approach helps you avoid surprises once the paint is on your walls. Remember, lighting doesn’t just affect how the color looks; it also influences the sheen and depth of the paint. Glossier finishes tend to reflect more light, making the color appear brighter, while matte finishes absorb light, creating a softer, subtler effect. By combining the right brush techniques with careful evaluation under diverse lighting conditions, you can confidently select a paint color that enhances your space, matches your style, and looks great at any time of day. Sampling paint this way ensures that your final choice isn’t just a beautiful swatch but a true reflection of how your room will look once finished.
Frequently Asked Questions
How Do I Choose the Best Lighting for Accurate Paint Sampling?
To choose the best lighting for accurate paint sampling, opt for natural daylight whenever possible, as it shows true color without distortions. If natural light isn’t available, use consistent lighting with neutral, white bulbs to prevent color shifts. Avoid fluorescent or overly warm lighting, which can alter how colors appear. Make sure lighting remains steady and uniform across your samples to accurately compare and select the perfect paint shade.
What Types of Large Boards Are Ideal for Paint Testing?
You should use large, smooth, and non-porous boards like primed drywall or MDF for paint testing. These surfaces help you accurately assess how paint adheres and looks, minimizing texture variations. Avoid rough or textured boards, as they can skew results. By choosing flat, uniform surfaces, you guarantee consistent sampling, allowing you to see true color and finish, which helps you make better painting decisions and achieve professional results.
How Can I Prevent Paint Color From Changing Under Different Lighting Conditions?
Ever wonder why your perfect paint color looks different at home? To prevent color shifts, always test under various lighting conditions, paying attention to color temperature and gloss level. Choose lighting that mimics your space’s natural and artificial light. By doing so, you guarantee your chosen shade stays true, no matter where or when you view it, creating a consistent and beautiful finish that feels just right every time.
Are There Specific Tools Recommended for Applying Paint Samples on Large Boards?
You should use quality brush tools and roller techniques to apply paint samples on large boards. A flat, angled brush allows precise application, especially around edges, while a roller helps cover large areas quickly and evenly. Choose brushes with synthetic bristles for smooth application and a roller with a nap suitable for your surface. This approach guarantees consistent coverage, making it easier to compare colors accurately under different lighting conditions.
How Do I Store Paint Samples for Future Comparison?
To store paint samples for future comparison, use airtight containers like small jars or squeeze bottles to keep the paint fresh and prevent drying out. Label each container clearly with the color name and date. Store samples in a cool, dark place to maintain color integrity. For accurate color comparison techniques later, keep samples organized and in consistent lighting conditions, so you can easily assess how the shades look over time.
Conclusion
By choosing the right large boards, lighting your samples properly, and observing under different conditions, you guarantee your paint choice is confident and accurate. Embrace the process, trust your eyes, and compare your samples thoughtfully. Remember, patience and attention to detail lead to perfection. When you sample paint the right way, you create a space that reflects your true style—bright, bold, or subtle—because quality decisions come from quality preparation and careful observation.