
To plan picture frame molding around your furniture, start by identifying focal points and ensuring the molding complements your layout without obstructing pathways. Measure wall lengths carefully, considering doorways and windows, and align the molding with key furniture pieces like sofas or cabinets for a balanced look. Choose molding proportions that match your room’s scale and style. With thoughtful placement, you’ll create a cohesive space that enhances your decor—discover more strategies to perfect your design.
Key Takeaways
- Identify focal points and furniture placement to ensure molding enhances, not obstructs, room flow.
- Measure wall lengths carefully, considering doorways and windows, for precise molding framing.
- Align molding with furniture edges, such as sofas or built-in units, for cohesive visual integration.
- Choose molding scale and profile that complement furniture style and room proportions for harmony.
- Use lighting to highlight molding details and adapt design based on natural and layered light effects.

Planning picture frame molding around your furniture layouts can seem tricky, but with a clear approach, it becomes much easier. The key is to visualize how the molding will complement your existing space, especially considering your wall color and lighting design. Your wall color sets the tone for the entire room, influencing how the molding will stand out or blend in. Lighter walls might call for more prominent, contrasting moldings, while darker or richly colored walls can support more subtle, integrated designs. Think about the mood you want to create—bold and dramatic or soft and understated—and choose your molding thickness, finish, and pattern accordingly.
Lighting design plays an essential role in how the molding will appear throughout the day and night. Natural light highlights the details, so consider how sunlight falls across your walls and furniture. If you have large windows, your molding might look different at various times, emphasizing certain features. For rooms with layered lighting—like ceiling fixtures, sconces, or lamps—you can use lighting to accentuate the molding at night, creating a warm, inviting glow. Proper lighting also helps you see how the molding interacts with your furniture layout, ensuring it frames the space harmoniously. Additionally, understanding how the biodiversity of your space influences your overall design can help create a more harmonious environment that reflects natural elements.
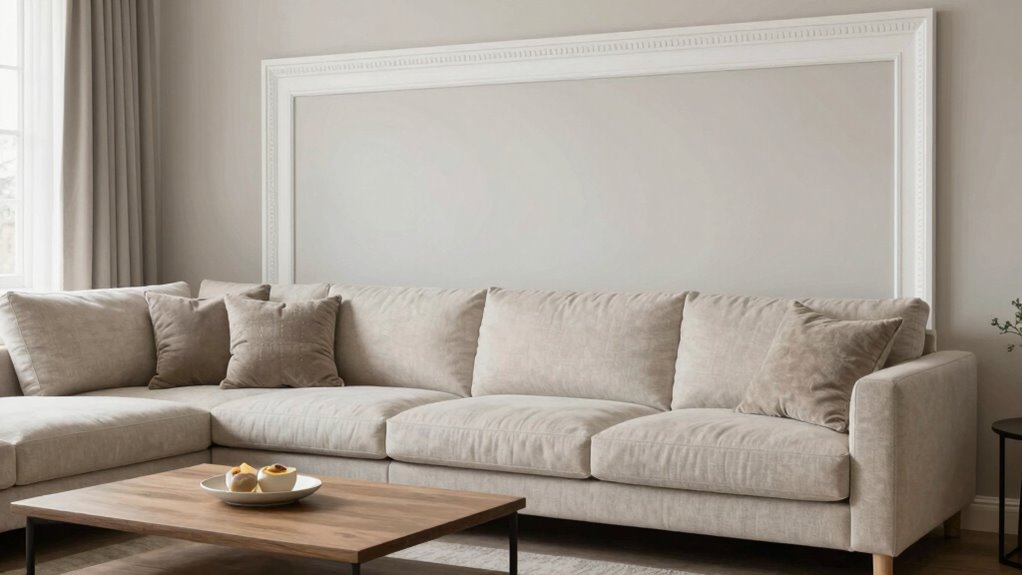
Next, when planning your furniture arrangement, keep in mind the focal points and the flow of the room. You want the molding to enhance, not obstruct, your furniture layout. If you plan to have a sofa against a particular wall, consider how the molding will align with it. You might want the molding to frame a specific area or to run continuously around the room to create a cohesive look. Measure the length of each wall carefully, factoring in doorways and windows, so you know exactly where to place the molding. This helps prevent awkward cuts or mismatched joints that can distract from the overall aesthetic. It’s also helpful to consider how wall color and lighting will change the perception of your moldings at different times of the day. Recognizing the scale of your moldings in relation to your room’s dimensions can also guide you in choosing profiles that won’t overpower or underwhelm the space.
Furthermore, consulting design principles and considering the overall style of your space can assist in choosing the most suitable molding profile and placement. As you map out your design, think about the scale of the molding in relation to your furniture and ceiling height. For rooms with high ceilings, wider, more elaborate moldings can add a sense of grandeur. Conversely, in smaller spaces, simpler, thinner moldings may be more appropriate to avoid overwhelming the room. Keep in mind that the molding should complement the existing style of your furniture—modern, traditional, or eclectic—and tie the room together seamlessly. By balancing these elements—wall color, lighting, furniture layout, and scale—you can craft a picture frame molding design that enhances your room’s beauty and harmony.

Art3d Pre-Cut Wall Molding Set of 6 pcs, Ready-to-Assemble Wainscoting Panels for Interior Wall Décor Living Room Bedroom Accent Wall – Installed with Glue, 3 Top 3 Bottom
Transformative – Art3d pre-cut molding trim adds depth and character to walls, gives traditional elegance with a hint…
As an affiliate, we earn on qualifying purchases.
As an affiliate, we earn on qualifying purchases.
Frequently Asked Questions
What Tools Are Best for Installing Picture Frame Molding?
You’ll want a miter saw or a handsaw for precise cutting, along with a measuring tape for accurate measurements and layout. A level helps verify your molding hangs straight, while a hammer or nail gun makes fastening easier. For adhesive options, use construction adhesive or finishing nails with a nail gun for a secure hold. Remember to double-check your measuring techniques to prevent mistakes and guarantee perfect alignment.
How Do I Choose the Right Molding Style for My Room?
Choosing the right molding style is like finding the perfect frame for a masterpiece—your decor style guides this. If your room’s modern, sleek materials like MDF or lacquered wood work well. For a cozy, traditional look, opt for ornate designs with rich wood or plaster. Consider your room’s vibe and material options, then pick a molding style that complements and enhances your space’s overall aesthetic.
Can Molding Be Adjusted After Installation?
Yes, you can adjust molding after installation through post-installation modifications. If you notice gaps, uneven cuts, or misalignments, you can carefully remove and reattach sections or add filler strips. Use caulk or wood filler to smooth out seams and imperfections. Keep in mind that adjusting molding might be tricky if it’s glued or nailed tightly, so take your time and work gently to avoid damage.
How Do I Coordinate Molding With Existing Wall Decor?
To coordinate molding with your existing wall decor, start by matching the wall color to the molding’s finish for a cohesive look. Consider your room size; in a smaller space, choose narrower molding to avoid overwhelming the area, while larger rooms can handle more elaborate designs. Arrange your decor around the molding’s lines, ensuring they complement each other. This balance creates a harmonious, polished appearance that enhances your room’s style.
What Are Common Mistakes to Avoid During Installation?
You can easily mess up installation if you ignore common mistakes. Avoid rushing, which can make your work look sloppy, and never skip wall preparation—proper cleaning and patching guarantee a flawless finish. Pay attention to painting tips, like using painter’s tape for clean edges. Double-check measurements before drilling, and don’t forget to level each piece. Taking your time and following these steps guarantees your molding looks professional and stunning.

JSIWOTH 0.25in × 20Ft Peel and Stick Wall Molding Trim – Flexible Self Adhesive Molding Trim for Walls, Edges, Borders, Window Frames, Backsplash Tiles – White (Paintable) Waterproof Trim
【Flexible Peel and Stick Molding Trim】20ft (6.1m) long × 0.25in (6.4mm) wide × 0.04in (1mm) thick. Please note:…
As an affiliate, we earn on qualifying purchases.
As an affiliate, we earn on qualifying purchases.
Conclusion
By carefully planning your picture frame molding around furniture layouts, you create a cohesive, polished look that enhances your space. Consider the flow, balance, and proportions to guarantee harmony between the molding and your furniture. Think about symmetry to achieve order, and contrast to add interest. With thoughtful attention and precise execution, you’ll craft a room that feels both intentional and inviting, where every element complements and elevates the overall design.

Art3d 10-Pack 47Ft White Ceiling Crown Molding Trim, High Impact Polystyrene Decorative Ceiling Moulding, Installed with Glue
Coverage – Includes 10-pack ceiling crown molding trim, each measuring 56.4" in length, providing an impressive coverage of…
As an affiliate, we earn on qualifying purchases.
As an affiliate, we earn on qualifying purchases.

Flexible Molding Trim Self Adhesive Decorative Trim Molding Peel and Stick Border for Mirror Frame Backsplash Tile Cabinet Ceiling Furniture Wall Edge Home DIY Decoration (Light Brown, 15mm/10ft)
Elegant and Paintable: The flexible trim molding features 3D embossed pattern with a unique modern design, enhancing your…
As an affiliate, we earn on qualifying purchases.
As an affiliate, we earn on qualifying purchases.