
Before wallpapering, you should apply lining paper after removing any old wallpaper and thoroughly preparing the wall surface. This step creates a smooth base, improves adhesion, and makes future removals easier. Measure, cut, and hang the lining paper carefully, ensuring it overlaps slightly and is smoothed out to prevent air bubbles. Allow it to dry completely before applying your wallpaper. Following these steps helps achieve a professional finish—continue with the process to learn all the key techniques involved.
Key Takeaways
- Apply lining paper after thoroughly preparing and cleaning the walls, especially if they are textured or uneven.
- Measure, cut, and hang lining paper from the top, smoothing out bubbles and overlaps for a smooth surface.
- Ensure the lining paper is completely dry before applying your chosen wallpaper for better adhesion.
- Use appropriate adhesive and follow manufacturer instructions to securely fix the lining paper to the wall.
- Proper preparation and drying of lining paper make wallpaper removal easier and prevent future peeling issues.

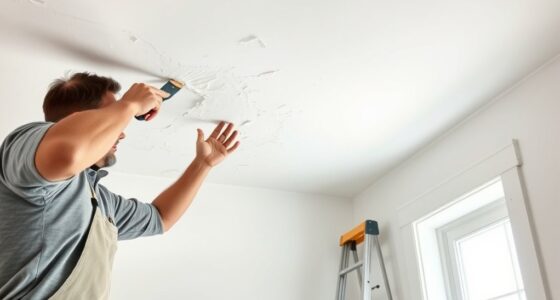
Before you hang wallpaper, applying lining paper is an essential step that can make a significant difference in the final look. Proper wall preparation sets the foundation for a smooth, long-lasting finish, and using lining paper is often the key to achieving that. If your walls have old wallpaper, the first step is to remove it carefully. Wallpaper removal can be a tedious process, but it’s necessary to make sure your walls are clean, smooth, and free of peeling sections. Use a wallpaper stripper or a mixture of warm water and mild detergent to loosen the adhesive. Carefully scrape away any remnants, being gentle to avoid damaging the plaster or drywall beneath. Once the old wallpaper is gone, inspect the walls for imperfections such as cracks, holes, or uneven patches. Filling these with a suitable filler and sanding smooth will help create an even surface, which is essential for the best wallpaper adhesion. Additionally, understanding wall surface preparation can help ensure a professional-looking finish that lasts.
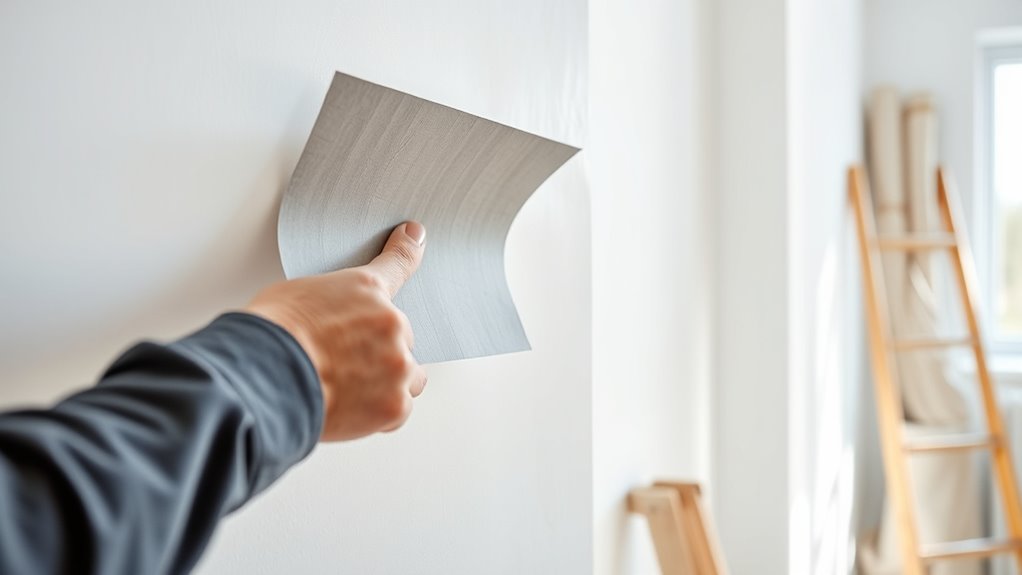
After your walls are clean and smooth, you should focus on wall preparation for the lining paper. This involves making certain the surface is dry, dust-free, and free of grease or dirt that could interfere with adhesion. Wiping the walls with a damp cloth can remove dust and loose debris. If the walls are particularly textured or uneven, consider applying a coat of primer or a specialized wall primer to improve adhesion and provide a uniform surface. Once the walls are prepped, you can start hanging the lining paper. Measure and cut strips that are slightly longer than your walls to allow for trimming later. Apply a suitable adhesive to the back of the lining paper, following the manufacturer’s instructions carefully. Use a brush or roller to ensure an even coat, especially along the edges and corners.
When hanging the lining paper, start at a corner or a straight edge and smooth it out with a wallpaper brush or a clean, damp sponge. Work from the center outward to remove air bubbles and make good contact with the wall. Overlap the edges slightly if necessary, and trim excess at the top and bottom with a sharp blade. Once the lining paper is in place and trimmed, let it dry thoroughly before hanging your wallpaper. This process not only improves wall preparation but also helps with wallpaper removal in the future. If you need to strip wallpaper later, having a properly hung lining paper makes the process easier and reduces the risk of damaging your walls. Overall, investing time in wall preparation and lining paper application pays off by giving you a flawless, professional-looking finish that lasts.
Frequently Asked Questions
Can Lining Paper Be Reused for Different Rooms?
You can reuse lining paper for different rooms, but it’s not always ideal. Recycling options are limited because lining paper may be damaged or stained. To reuse it, check for tears or heavy wear and carefully clean it. For a more eco-friendly choice, consider alternative materials like recyclable wallpaper or eco-friendly lining options. Keep in mind, reusing lining paper works best if it’s still in good condition and properly stored.
How Long Does Lining Paper Typically Last?
Lining paper typically lasts around 10 to 15 years, depending on wall preparation and paper durability. If your walls are properly cleaned and primed, the lining paper can stay in good condition longer. Proper wall preparation helps prevent peeling and damage, extending its lifespan. Over time, wear and tear may require you to replace it, especially in high-traffic areas or if the paper shows signs of deterioration.
Is Lining Paper Suitable for Damp or Humid Environments?
They say “a stitch in time saves nine,” and that applies here. Lining paper isn’t ideal for damp or humid environments because it lacks moisture resistance. If you’re dealing with high humidity, you need proper wall preparation and moisture-resistant lining paper to prevent mold and peeling. Otherwise, traditional lining paper may deteriorate quickly, compromising your wall’s integrity and the overall look of your wallpaper.
Do I Need to Prime the Wall Before Applying Lining Paper?
You should prime your wall before applying lining paper to guarantee proper wall preparation. Priming helps the lining paper adhere better and prevents issues like bubbling or peeling. Use a suitable primer based on your lining paper type, whether it’s standard or heavyweight. Applying a primer creates a smooth, even surface, making the wallpapering process easier and more durable. Always follow the manufacturer’s recommendations for best results.
What Are the Signs That Lining Paper Needs Replacing?
You might notice peeling, bubbling, or tears in your lining paper, which indicate it’s time to replace it. Over time, wall preparation and the durability of the lining paper weaken, causing these issues. Sometimes, a slight discoloration or warping appears, subtly signaling that the paper no longer adheres properly. If these signs appear, replacing the lining paper guarantees your wallpaper stays smooth and secure, maintaining a fresh, polished look.
Conclusion
Applying lining paper before wallpaper is like giving your walls a gentle shield, ensuring your beautiful wallpaper stays true for years to come. It’s a simple step that strengthens and smooths, transforming your space into a flawless canvas. Don’t skip this essential layer; it’s the foundation that holds everything together. Treat your walls with care now, and they’ll reward you with a stunning, lasting finish—like a well-tended garden that blooms with confidence.