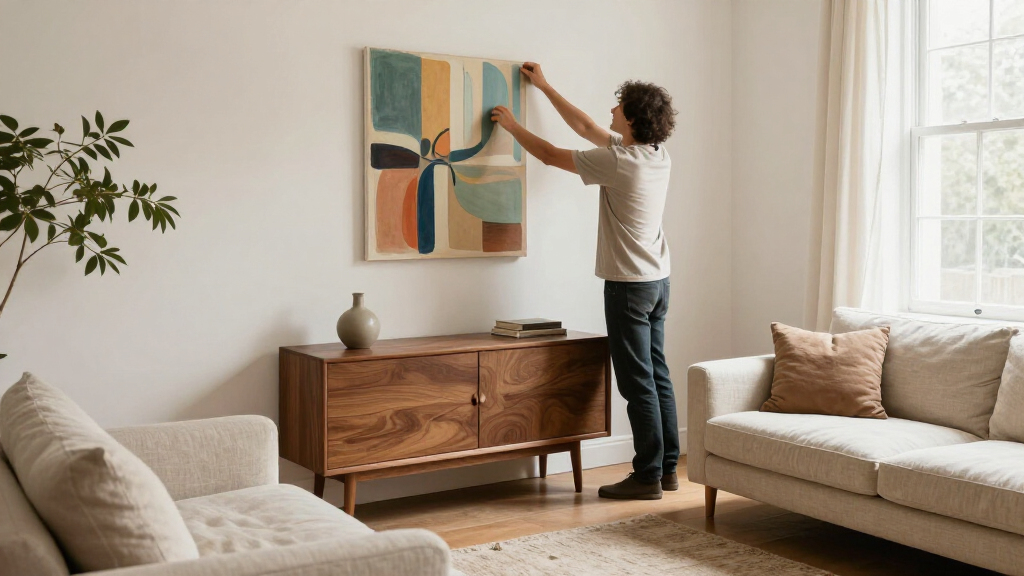

Choose modern wall art that fits your living room, coordinate it with the room’s colors and furniture, and hang it securely. This guide is for beginners who want a practical plan before buying or installing artwork. Allow 2-4 hours for measuring, arranging, and hanging pieces you already own; shopping and delivery take extra time.

Get furniture and decor delivered free with Prime
- Fast, free delivery on millions of items
- Prime Video, Amazon Music and more included
- Member-only deals all year

Thalasse 3-Piece 3D Textured Wall Art, 24 × 36 Inches
- ✔ Set size: 3 panels
- ✔ Panel dimensions: 24 × 36 inches (60 × 90 cm) each
- ✔ Relief depth: Over 2 cm

Muolunna Tropical Beach Seascape Framed Canvas Wall Art, 20 x 40 Inches
- ✔ Brand and model: Muolunna; BK6750
- ✔ Dimensions: 40 × 20 inches
- ✔ Orientation and shape: Landscape; rectangular

MXUNYZ Minimalist Blue and Brown Abstract Canvas Wall Art, 24 x 48 Inch
- ✔ Dimensions: 48 × 24 inches
- ✔ Color: Blue and brown
- ✔ Material: Canvas
Difficulty: Beginner | Time: 2-4 hours, plus delivery time if you need to buy art
What You’ll Need
Tools & Materials:
- Tape measure
- Painter’s tape or paper for making templates
- Pencil
- Level
- Hammer or drill suited to your wall
- Wall hooks, screws, or picture-hanging hardware rated for the artwork’s weight
- Stud finder for heavy pieces or drywall installations
Knowledge:
- Basic measuring and safe use of a hammer or drill
- How to check the artwork’s weight and the wall type
Gather the dimensions and hanging hardware for each piece before planning the layout. Check for electrical wires or pipes before drilling. If you rent, review your lease or ask the property manager about permitted wall fixings.
Thalasse 3-Piece 3D Textured Wall Art, 24 × 36 Inches
For a living room that needs presence without a busy image, Thalasse brings actual depth to the wall. Its geometric relief rises more than 2 cm from a matte, sand-colored surface, so the panels can catch changing light and add dimension where a flat print might feel understated. The pale beige finish and walnut-toned Catalpa frames create a warm, natural combination that fits comfortably with minimalist, neutral, or Wabi-Sabi-inspired rooms.The three-panel format is the key distinction from both single-canvas alternatives. Spread across a sofa or console, it can establish a wider visual rhythm than the 40-inch Muolunna or 48-inch MXUNYZ canvas, while keeping its imagery abstract rather than introducing a beach scene or a defined blue-and-brown composition. That makes it our most compelling all-around choice when the room calls for texture more than a specific subject.We would plan the wall carefully before choosing it. Each panel is 24 by 36 inches, so the set needs substantial space, and the provided information does not specify hanging hardware or installation requirements. The relief also becomes a more prominent feature than a flat canvas, which may compete with patterned furnishings or an already layered gallery wall. Choose it for an open wall and a calm palette; skip it if you need a simple, compact piece with clearly described mounting.
Pros:
- Relief over 2 cm deep creates changing shadows and dimension.
- Matte sandstone-like finish limits glare and keeps the surface visually quiet.
- Solid Catalpa wood frames with walnut finish give each panel a defined profile.
- Three panels provide broad coverage across a large living room wall.
Cons:
- Three large panels require substantial wall space and careful layout.
- Specific hanging hardware and installation requirements are not provided.
Best for: Living rooms with a broad, uncluttered wall and neutral furnishings where tactile depth can act as the main decorative feature.
Not ideal for: Small rooms, busy gallery walls, or buyers who need installation hardware and setup requirements clearly specified.
Bottom line: Choose Thalasse when we want a warm, sculptural focal point with more depth and wall coverage than either single canvas can offer.
“Choose Thalasse when we want a warm, sculptural focal point with more depth and wall coverage than either single canvas can offer.”
Muolunna Tropical Beach Seascape Framed Canvas Wall Art, 20 x 40 Inches
When we want the living room art to establish a clear mood, Muolunna makes the coastal direction unmistakable. Turquoise water and white clouds give this horizontal canvas a bright, open feel, while its 40-by-20-inch shape suits the area above a sofa, sideboard, or low console. Compared with Thalasse’s tactile but image-free geometry, this print offers a recognizable scene and a more immediate splash of color.Its practical details also make it the easiest pick to assess for hanging. The canvas is stretched over a wooden frame and includes pre-installed metal hooks, so buyers have more specific mounting information than the Thalasse listing provides. The waterproof surface can be wiped clean, and fade-resistant inks are stated as part of the print; those features make routine care more straightforward than the MXUNYZ canvas, which is described as dusted with a dry cloth.The tradeoff is stylistic specificity. A tropical beach can anchor a coastal palette, but it may feel less at home in a room built around earthy neutrals, formal traditional pieces, or varied accent colors. It is also explicitly for indoor use, so it should stay in a living room rather than a weather-exposed space. We’d choose it when the scene itself is part of the room’s identity, and look to MXUNYZ for a subtler blue accent or Thalasse for texture without scenery.
Pros:
- Turquoise water and white clouds create a distinct coastal focal point.
- 40-by-20-inch landscape format works well over a sofa or console.
- Waterproof canvas surface can be wiped clean.
- Wooden frame and pre-installed metal hooks are included.
Cons:
- The tropical subject is less adaptable than the abstract Thalasse and MXUNYZ designs.
- Specified for indoor use only.
Best for: Buyers furnishing a coastal or relaxed living room who want one horizontal, colorful scene with clearly stated hanging hooks.
Not ideal for: Rooms where literal beach imagery would clash with the decor, or anyone seeking art for an outdoor or exposed area.
Bottom line: Muolunna is the most straightforward choice when we want a ready-to-hang coastal scene to bring brighter blue into the living room.
“Muolunna is the most straightforward choice when we want a ready-to-hang coastal scene to bring brighter blue into the living room.”
MXUNYZ Minimalist Blue and Brown Abstract Canvas Wall Art, 24 x 48 Inch
MXUNYZ keeps the composition abstract while pairing teal blue with warm brown, making it a considered middle ground between Thalasse’s neutral relief and Muolunna’s unmistakable beach scene. Its 48-by-24-inch horizontal canvas brings color to a wide wall without asking the room to follow a coastal theme. That flexibility suits a living room where the art should echo a few existing accents and stay in the background of everyday conversation.Compared with Thalasse, this is a flatter and simpler visual statement: there is no listed raised surface or three-panel arrangement, but the single canvas is easier to plan around. It is also wider than Muolunna by eight inches, which can help it hold its own over a long sofa. The wooden wrapped-canvas frame and included hanging hardware mean the basic presentation is specified, and fade-resistant inks are stated. For care, the product description recommends dry-cloth dusting.The listing leaves some useful questions unanswered. It does not specify available size options, so buyers have less room to adapt the piece to an unusually narrow wall, and “hanging hardware” is not described in the same detail as Muolunna’s pre-installed hooks. Its blue-and-brown palette is calmer than a tropical print, but still needs to coordinate with the room’s wood tones and accent colors. Choose it for a broad wall and a quiet abstract note; skip it if you want tactile relief, a multi-panel installation, or a defined landscape.
Pros:
- Abstract teal and brown palette offers color without a literal landscape.
- 48-by-24-inch horizontal format suits a broad living room wall.
- Wooden wrapped-canvas frame and hanging hardware are included.
- Fade-resistant inks are specified, with dry-cloth dusting for care.
Cons:
- Available size options are not specified.
- The listing gives less specific hanging information than Muolunna’s pre-installed hooks.
Best for: Living rooms with a long wall and teal or warm brown accents that call for abstract art rather than a literal scene.
Not ideal for: Buyers who need confirmed alternate sizes, detailed mounting information, or a textured multi-panel focal point.
Bottom line: Pick MXUNYZ when we want a wide, low-key abstract canvas whose blue and brown tones can bridge modern furnishings.
“Pick MXUNYZ when we want a wide, low-key abstract canvas whose blue and brown tones can bridge modern furnishings.”
As an Amazon Associate we earn from qualifying purchases.
Before You Start
Decide whether you are selecting new art, rearranging pieces you own, or doing both. Take a photo of the room in daylight and note the main colors in the sofa, rug, curtains, and wood or metal finishes. Modern art can be abstract, graphic, photographic, or minimalist; it does not need to match the furniture exactly. A shared color, shape, or mood can make different pieces feel related.
Keep artwork away from direct sunlight, damp areas, and heat sources such as radiators. Use a second person to help lift large or heavy pieces. For heavy artwork, fragile walls, or uncertain wiring, use suitable professional help.
Step-by-Step Instructions
Step 1: Choose the wall and viewing position
Stand in the places where you usually sit and look at the room’s main walls. Choose a wall that is visible from the seating area and has enough clear space for the artwork. Check what is already on the wall, including switches, sconces, vents, and windows, and leave room for them. Consider glare from windows and lamps by viewing the wall at different times of day.
Tip: A wall behind a sofa is a common focal point, but a smaller wall near a reading chair or dining area can also work.
Check: You can name the intended wall, see it from your usual seat, and identify nearby features that the layout needs to avoid.
Step 2: Measure the wall and furniture
Measure the usable width of the chosen wall and the width of the furniture beneath it. If the art will hang over a sofa, measure between the sofa’s outer edges rather than counting the full wall. Record the height from the floor to the top of the furniture and note the ceiling height. Mark any areas where doors, trim, or other objects limit placement.
Tip: Use the furniture width as your main reference when choosing a single large piece or a group. A group that is much narrower than the sofa can look disconnected.
Check: Your notes include the usable wall width, the furniture width, and the space available above it.
Step 3: Set a size for the artwork
Choose a piece or group that has enough presence to balance the furniture. As a starting point, let artwork above a sofa occupy roughly two-thirds to three-quarters of the sofa’s width, counting the full outer span of a group. Leave visible space at the sides and avoid pieces that extend beyond the furniture. For a tall wall or a large, open room, consider a larger work or a vertical arrangement. Check the art’s actual dimensions before ordering.
Tip: Treat the two-thirds to three-quarters range as a guide, not a rule. A deliberately small piece can work when it is paired with other objects or given generous space.
Check: The art’s width and height suit the furniture and available wall, and you have enough clearance around the planned arrangement.
Step 4: Select art that works with the room
Pick a subject, style, and palette that you want to see every day. Look for one or two links to the room, such as a color in the rug, a repeated geometric shape, or a similar warm or cool mood. Decide whether you want one statement piece or a group. For several works, choose a connection that makes the set feel intentional, such as a related color range, framing style, subject, or visual rhythm. Read the listing for dimensions, materials, frame details, and whether hardware is included.
Tip: Bring home sample images or use a digital room preview when available. Screen colors can differ from print colors, so check return terms before ordering.
Check: You can explain what connects the artwork to the room, and you have confirmed its size and framing details.
Step 5: Plan the arrangement on the floor
For a group, place the pieces on the floor beneath the chosen wall. Arrange them in a balanced shape, keeping spacing consistent; gaps of about 2-4 inches are a useful starting point. Align the top edges, bottom edges, or centers when that suits the collection. Step back and check the outline against the furniture width. Take a photo when the arrangement looks right, then measure the group’s overall width and height.
Tip: Mixing frame sizes can add variety, but repeat at least one feature, such as a frame finish or color, to give the set a clear relationship.
Check: You have a layout photo, consistent spacing, and the total dimensions of the complete group.
Step 6: Mark the placement with templates
Cut paper templates to match each frame’s outside dimensions. Arrange them on the wall with painter’s tape, using your floor-plan photo as a reference. Center a single piece over the furniture or center the full group. A common starting point is to place the center of the artwork near 57 inches from the floor, then adjust for seated viewing, high ceilings, and the furniture below. Leave a comfortable gap above a sofa, often about 6-10 inches, so the art feels connected without touching the furniture.
Tip: Sit in the room and check the taped templates from your usual viewing position. Move them before making holes if the art feels too high, low, or crowded.
Check: The templates look balanced from the seating area, fit within the measured space, and leave room around nearby fixtures.
Step 7: Choose hardware and mark fixing points
Check the artwork’s weight and the wall material, then select hooks or anchors rated for that load. For a heavy piece, attach the hardware to a wall stud when possible, or use anchors designed for the wall type. Find the hanging point on the frame by measuring from its top edge to the wire or bracket when it is pulled taut. Transfer that distance to the wall template and mark the fixing point. Use the level to check marks for frames that need to hang straight.
Tip: Do not rely on a small nail or an unrated adhesive strip for heavy artwork. Follow the hardware maker’s weight limits and installation directions.
Check: Each fixing point is marked, the selected hardware suits the wall and the frame’s weight, and the frame’s hanging mechanism is accounted for.
Step 8: Install the hardware and hang the art
Remove the templates and install each hook, screw, or anchor according to its instructions. Wear eye protection when drilling overhead, and stop if you encounter unexpected resistance or suspect a pipe or wire. Lift the artwork onto its fixings with help for large pieces. Check each frame with a level, then adjust the wire or hardware until the piece sits securely and lies flat against the wall.
Tip: Use two hanging points for frames designed for them; this can reduce tilting and help keep the piece level.
Check: Every piece is stable, level, and supported by hardware appropriate for its weight.
Step 9: Check the finished layout
View the arrangement from the sofa, the room entrance, and any other regular viewing position. Turn on the usual lamps and check for reflections or harsh shadows. Adjust the angle of a lamp or shift a piece slightly if glare distracts from the artwork. Confirm that frames do not block switches, doors, vents, or pathways.
Tip: Look again in daylight and in the evening; window glare and artificial lighting can change how a piece reads.
Check: The composition feels balanced from the main seating area, the frames stay in place, and the art is visible without distracting glare.
Common Mistakes to Avoid
- Buying art before checking the wall and furniture dimensions. — Measure the usable space first, then compare it with the artwork’s full framed dimensions and return policy.
- Hanging the art too high above a sofa. — Use a paper template and check the placement while seated; keep the art visually connected to the furniture.
- Using hardware that cannot support the frame or wall type. — Check the frame’s weight, identify the wall material, and follow the hardware rating and installation directions.
- Choosing a group with no visual connection. — Repeat a color, frame finish, subject, or shape so the pieces read as one arrangement.
Troubleshooting
Problem: The art looks too small above the sofa.
Solution: Widen the arrangement by adding a related piece, choose a larger work, or group the current piece with a lamp or wall object. Use the sofa’s width as a visual reference.
Problem: The frames keep tilting or slipping.
Solution: Check that the hook fits the frame’s hanging hardware. Add a second fixing point if the frame allows it, and use frame bumpers or a suitable stabilizer to limit movement.
Problem: The artwork reflects window or lamp light.
Solution: Shift the piece away from the reflection path, change the lamp angle, or use glazing with reduced reflection when selecting or reframing the work.
Problem: A wall anchor turns or pulls loose during installation.
Solution: Stop and remove the load. Check the wall material and use an anchor made for it, or attach the hardware to a stud. Repair damaged holes before rehanging.
What Success Looks Like
The finished wall has art sized in proportion to the furniture, arranged with deliberate spacing, and hung at a comfortable viewing height. The pieces remain level and secure, the layout can be seen clearly from the main seating area, and glare or nearby fixtures do not interfere with viewing.
Next Steps
Keep the care instructions for framed or unframed work, and dust frames with a soft, dry cloth. Check the fixings after moving furniture or after a frame is bumped. If you later change the sofa, rug, or wall color, reassess the art’s placement and balance before buying replacement pieces.
Frequently Asked Questions
How high should modern art hang above a sofa?
Start with the artwork’s center near 57 inches from the floor, then adjust for seated viewing and room proportions. Above a sofa, leave roughly 6-10 inches between the furniture and frame as a starting point, and use a template to judge the gap in the room.
How wide should art be over a living room sofa?
A single piece or complete group often looks balanced when its total width is about two-thirds to three-quarters of the sofa’s width. Treat that as a starting range and adjust for the wall, frame sizes, and other objects nearby.
Can I mix different styles of modern art?
Yes. Give the pieces a visible link, such as a shared color, frame finish, subject, or shape. Lay them out on the floor first and check the complete group from across the room.
What should I use to hang a heavy framed print?
Use hardware rated for the frame’s weight and suited to the wall material. Attach heavy pieces to a stud when possible, or choose an appropriate wall anchor. Follow the manufacturer’s directions and get help lifting large frames.
How do I know whether art is too high?
If the artwork feels disconnected from the sofa or is uncomfortable to view while seated, it may be too high. Tape up a full-size paper template and assess it from your usual seat before drilling.
Halloween Picks
halloween
As an affiliate, we earn on qualifying purchases.