
To install DIY acoustic felt wall panels, start by selecting high-quality felt in your preferred colors or patterns. Cut the felt into your desired sizes, then attach it securely to lightweight frames like wood or foam boards using spray adhesive or hot glue. Mount the finished panels on your walls using picture hooks, command strips, or nails, arranging them in a grid or pattern for both sound absorption and visual appeal. Keep going to discover more tips on making your space both stylish and acoustically optimized.
Key Takeaways
- Measure wall areas and cut acoustic felt into desired sizes for your panels.
- Attach felt to lightweight frames using spray adhesive or hot glue for secure mounting.
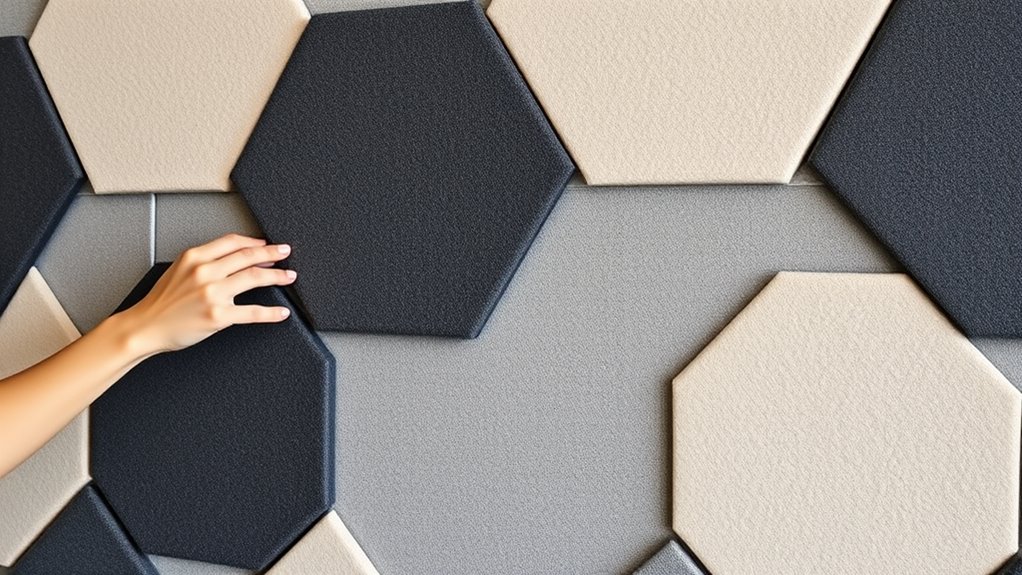
- Arrange panels in a grid or staggered pattern to enhance both sound absorption and visual appeal.
- Mount panels on the wall with picture hooks, command strips, or nails for easy installation and repositioning.
- Customize colors, textures, and sizes to match decor and optimize acoustic performance.

If you’re looking to improve your room’s acoustics without breaking the bank, DIY acoustic felt wall panels are an excellent solution. These panels not only help absorb sound but also add a touch of style to your space, making them a popular choice for DIY enthusiasts. When you start exploring options, you’ll find that incorporating soundproofing techniques through felt panels is straightforward and effective. Felt naturally absorbs sound waves, reducing echo and background noise, which makes your environment more comfortable and functional. Plus, they serve as decorative wall coverings, allowing you to personalize your space while enhancing its acoustics.
Creating your own acoustic felt wall panels is simple and cost-efficient. First, select high-quality acoustic felt in colors or patterns that match your decor. You can find this material online or at craft stores, often in large sheets or rolls. To assemble your panels, cut the felt into your desired dimensions—common sizes are 12×12 inches or 16×24 inches—based on the wall area you want to cover. Once cut, you can attach the felt to a lightweight frame, such as a wooden or foam board, using spray adhesive or hot glue. This step ensures your panels are sturdy and easy to hang.
Installation is quick and flexible. Use picture hanging hooks, command strips, or nails to mount your panels directly onto the wall. For larger areas, arrange the panels in a grid or staggered pattern to create visual interest and maximize sound absorption. Since felt is a versatile decorative wall covering, you can also experiment with different textures and colors to complement your room’s design. This DIY approach allows you to tailor the look and feel of your space, making your acoustic treatment a unique feature instead of just a functional one.
One of the key benefits of DIY acoustic felt wall panels is their ability to blend soundproofing techniques with decorative appeal. Unlike bulky or industrial-looking soundproofing options, felt panels provide a sleek, modern aesthetic. They’re lightweight, easy to move, and can be easily removed or repositioned if needed. Additionally, because you’re making them yourself, you can control the quality and quantity, tailoring your project to fit your budget and acoustic needs precisely.
Frequently Asked Questions
Can Acoustic Felt Panels Be Painted or Customized?
Yes, you can paint felt panels to customize their look. When you paint felt panels, make sure to use fabric-friendly paints to avoid damaging the material. This allows you to achieve the panel customization you desire, whether adding colors or designs. Just remember, painting felt panels may slightly alter their acoustic properties, so test first to ensure you get the desired balance of sound absorption and aesthetic appeal.
How Do I Remove Felt Wall Panels Without Damage?
Did you know that improper panel removal can cause 30% more damage to your walls? To remove felt wall panels without damage, gently loosen the edges with a plastic pry tool, avoiding excessive force. Work slowly and evenly across the panel, lifting from the corners. This careful approach helps guarantee damage prevention, keeping your walls intact while you shift or replace your acoustic panels.
Are There Specific Adhesives Recommended for Felt Panel Installation?
For felt panel installation, you should consider adhesive options like double-sided tape, spray adhesives, or low-tack glue to guarantee easy removal later. When applying, follow installation tips such as cleaning the wall surface thoroughly and applying adhesive evenly. This helps prevent damage and ensures a secure hold. Always test a small area first to confirm compatibility, and use adhesives that are designed for felt and wall surfaces for best results.
What Is the Lifespan of Diy-Installed Felt Acoustic Panels?
Did you know that properly installed felt acoustic panels can last up to 10 years? Their durability largely depends on your maintenance tips and installation quality. If you regularly dust or spot-clean the panels, you’ll extend their lifespan considerably. Avoid moisture and direct sunlight, which can degrade the material. With proper care, your DIY-installed felt panels will maintain their sound-absorbing qualities and panel durability for many years to come.
Can Felt Panels Be Used Outdoors or in Humid Environments?
Felt panels aren’t ideal for outdoor use or humid environments because they lack outdoor durability and humidity resistance. Exposure to moisture can cause them to warp, mold, or degrade over time. If you want acoustic solutions outdoors, look for panels specifically designed for outdoor durability and humidity resistance. These are made with weatherproof materials that handle moisture better, ensuring your investment lasts longer and maintains its acoustic performance.
Conclusion
Now that you know how to install acoustic felt wall panels yourself, you’re ready to improve your space’s sound quality. Imagine transforming your home office into a quiet oasis, just like Sarah did when she added panels behind her desk—cutting down noise and boosting focus. With a few simple steps, you can create a cozy, sound-optimized environment that’s both stylish and functional. So go ahead, get DIY-ing and enjoy your peaceful, improved space!