
To reduce seams and cracking in cross-lined walls, you should reinforce joints with metal mesh or strips to add strength and evenly distribute stresses. Incorporate expansion joints or flexible sealants to manage thermal movement and prevent cracks caused by temperature changes. Properly planning joint placement during construction and choosing durable materials can also help achieve a seamless finish. Keep exploring these techniques to ensure your wall stays durable and crack-free over time.
Key Takeaways
- Reinforce wall joints with metal mesh or strips to distribute stresses evenly and minimize crack formation.
- Incorporate expansion joints or flexible sealants to accommodate thermal movement and prevent cracks.
- Properly plan and place joints during construction to allow controlled movement and reduce seam visibility.
- Use durable, crack-resistant finishes and materials that hide seams and enhance long-term stability.
- Focus on comprehensive reinforcement and thermal management to maintain a seamless, durable cross-lined wall.
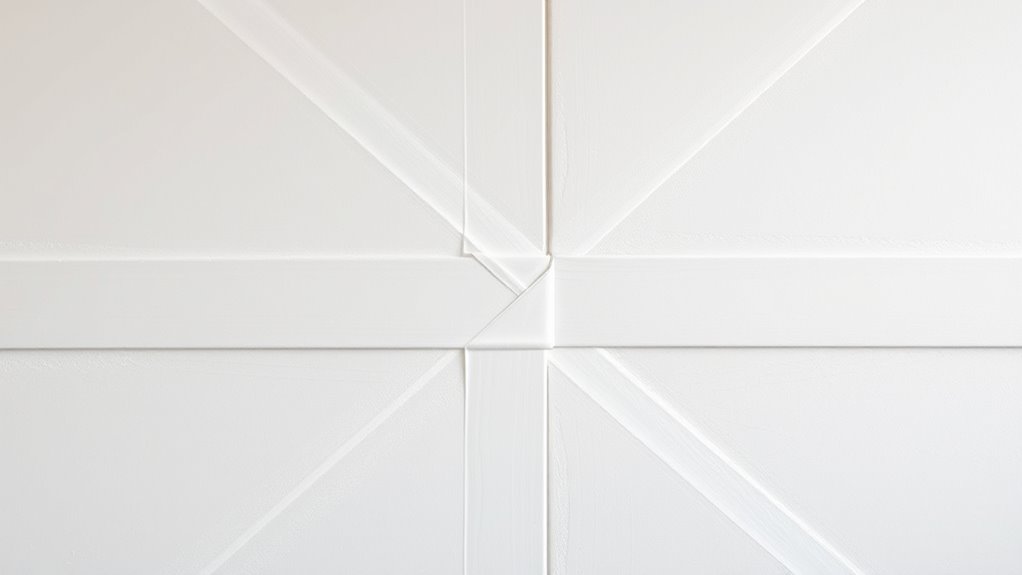
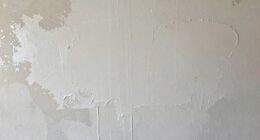
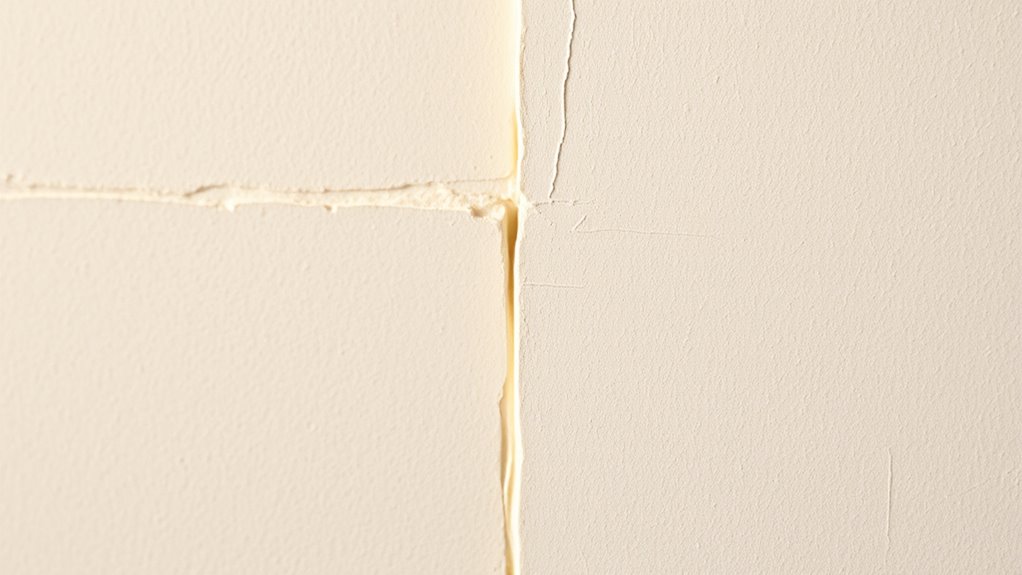
Have you ever wondered how some walls seem to extend beyond their boundaries, connecting different spaces in unexpected ways? It’s often due to the way walls are constructed and how they handle environmental factors like temperature changes. When you’re working on cross-lining walls, understanding the importance of joint reinforcement and managing thermal expansion can make all the difference in achieving a seamless finish. These elements help prevent unsightly cracks and reduce seams that can weaken the structure over time.
Joint reinforcement is vital when it comes to cross-lining walls because it provides added strength and stability at the joints where different sections meet. By reinforcing these joints, you’re essentially giving the wall a backbone, which resists movement and cracking caused by shifting or settling. This reinforcement can be achieved through various methods, such as adding metal mesh or reinforcing strips, which tie the different parts of the wall together and distribute stresses evenly. When done properly, joint reinforcement minimizes the risk of cracks forming along the seams, especially in areas prone to movement or vibration.
Reinforcing joints strengthens walls, prevents cracks, and ensures stability in cross-lining construction.
Thermal expansion is another key factor to think about. Walls expand and contract with temperature fluctuations, and if you don’t account for this natural movement, you’ll likely see cracks develop over time. To combat this, you should incorporate expansion joints or flexible sealants that allow for slight movements without causing damage. These joints act as controlled points of movement, ensuring that the wall can expand during hot weather and contract when it cools down without cracking or splitting. Proper planning for thermal expansion not only maintains the integrity of your wall but also extends its lifespan, saving you from costly repairs down the line.
When constructing or repairing cross-lining walls, always pay close attention to how the joints are reinforced and how thermal expansion is accommodated. Using appropriate materials and techniques guarantees that your wall remains durable and visually seamless. Remember, the goal isn’t just to hide seams but to create a structure that withstands environmental stresses gracefully. By focusing on joint reinforcement and managing thermal expansion, you reduce the chances of cracks forming and seams opening up over time. This attention to detail leads to a cleaner, more professional finish that will stand the test of time, keeping your space looking polished and intact for years to come.
Additionally, selecting the right wall surface finishes can further enhance the durability and appearance of your walls, minimizing the visibility of seams and cracks.

Stainless Steel Mesh Screen Mesh Steel Wool Mice Control Wire Mesh Weep Hole Covers for Brick Walls Wire Mesh Hole Fill Fabric Stainless Steel Mesh Roll Easy to Work- 5 Inch x 60 Inch
STURDY DURABLE MATERIAL – Stainless steel screen mesh made of 304 stainless steel, with a knitted construction, this…
As an affiliate, we earn on qualifying purchases.
As an affiliate, we earn on qualifying purchases.
Frequently Asked Questions
How Long Does Cross-Lining Wall Repair Typically Last?
Cross-lining wall repair typically lasts 10 to 15 years, depending on longevity factors like climate, wall movement, and initial installation quality. To extend its lifespan, you should follow maintenance tips such as inspecting for cracks, keeping the area dry, and addressing issues promptly. Proper preparation and using high-quality materials also help guarantee your cross-lining work remains durable, reducing the need for frequent repairs.
Can Cross-Lining Be Applied Over Painted Surfaces?
Yes, you can apply cross-lining over painted surfaces if you prepare the paint properly. First, make sure you clean the surface thoroughly to remove dirt and grease. Then, lightly sand the painted area to improve surface compatibility, creating a rough texture for better adhesion. Proper paint preparation is essential for the new layer to adhere well and prevent issues like cracking or peeling over time.
What Tools Are Best for Cross-Lining Walls?
You should use a straightedge or chalk line for cross-lining walls, ensuring accuracy. Start by cleaning the surface thoroughly to remove dust and debris, then apply a primer if needed for better adhesion. Use a pencil or chalk to mark your lines, and consider a level or laser for precision. These tools help you create straight, even lines, reducing seams and cracking while making your wall project smoother and more professional-looking.
Is Special Preparation Needed Before Cross-Lining?
Like prepping a canvas before painting, you need to guarantee your wall is ready. You should clean the surface thoroughly, remove dust, and fill any holes or cracks. Then, apply a primer to promote adhesion and prevent future issues. Proper surface preparation and primer application create a smooth, stable base, making cross-lining more effective and reducing the risk of seams and cracking down the line.
How Much Does Cross-Lining Wall Repair Cost?
The cost to cross-line your wall repair varies based on several factors, including the size of the area, repair complexity, and material options. Typically, you might spend between $300 to $1,000, but larger or more intricate jobs could cost more. High-quality materials like drywall or plaster can influence costs, so consider your budget and needs when choosing options. Always get a detailed estimate from a professional for accurate pricing.

SIKA Sikaflex Self-Leveling Sealant, Gray Polyurethane, Fast Curing, for Concrete Expansion Joints, Waterproof, Paintable, Fills Cracks up to 1.5 in., 10.1 fl. oz Cartridge
EASY VERSATILE APPLICATION — Apply self-leveling concrete sealant to expansion joints without concern for uneven surfacing. Perfect for…
As an affiliate, we earn on qualifying purchases.
As an affiliate, we earn on qualifying purchases.
Conclusion
By mastering cross-lining techniques, you protect your walls from the fate of ancient ruins, where cracks once told stories of neglect. Think of your home as a canvas—each seamless line a brushstroke of care and craftsmanship. When you reduce seams and cracks, you’re not just improving walls; you’re creating a sanctuary where memories will stand the test of time. Embrace this skill, and let your walls whisper tales of durability and pride.

Breliter Drywall Patch Repair Kit – Drywall Repair Kit for Wall Texture, Holes, Cracks, Graffiti & Stains, Patches/Scrapers/Sandpaper/Texture Sponge/Putty Knife, Formaldehyde-Free, White (8.8oz)
All-In-One Complete Wall Repair Kit – This Breliter drywall repair kit includes every tool (12 items) you need…
As an affiliate, we earn on qualifying purchases.
As an affiliate, we earn on qualifying purchases.

Peohud Drywall Corner Tape, 100 Feet by 2 Inch Reinforced Drywall Corner Bead, Inside Outside Corner Tape with Metal for Wall Crack Repair, No Adhesive Side
Value Pack: You will get 1 roll of drywall tape, the length is about 100 feet and the…
As an affiliate, we earn on qualifying purchases.
As an affiliate, we earn on qualifying purchases.