To treat efflorescence before painting, start by identifying and addressing water sources that cause salt migration. Use a chemical efflorescence cleaner to dissolve salts, then scrub the surface with a stiff brush and rinse thoroughly. Guarantee the surface dries completely before applying primer and paint to prevent future issues. Proper moisture management and surface cleaning are key to long-lasting results. Continue exploring ways to effectively prepare your surfaces for the best paint adhesion.
Key Takeaways
- Identify and address moisture sources to prevent salt migration before cleaning efforts.
- Use specialized chemical efflorescence cleaners according to manufacturer instructions for effective removal.
- Thoroughly scrub and rinse surfaces after chemical treatment, ensuring all salts and residues are eliminated.
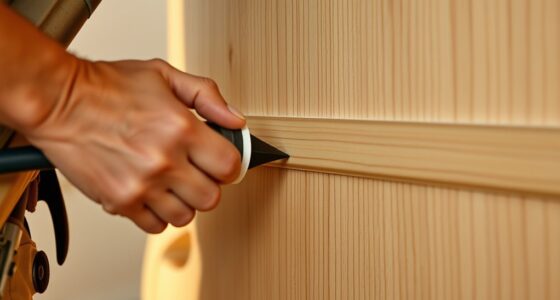
- Allow masonry to fully dry before applying primer or paint to avoid trapping moisture.
- Implement ongoing moisture control measures, such as sealing cracks and proper drainage, to prevent future efflorescence.
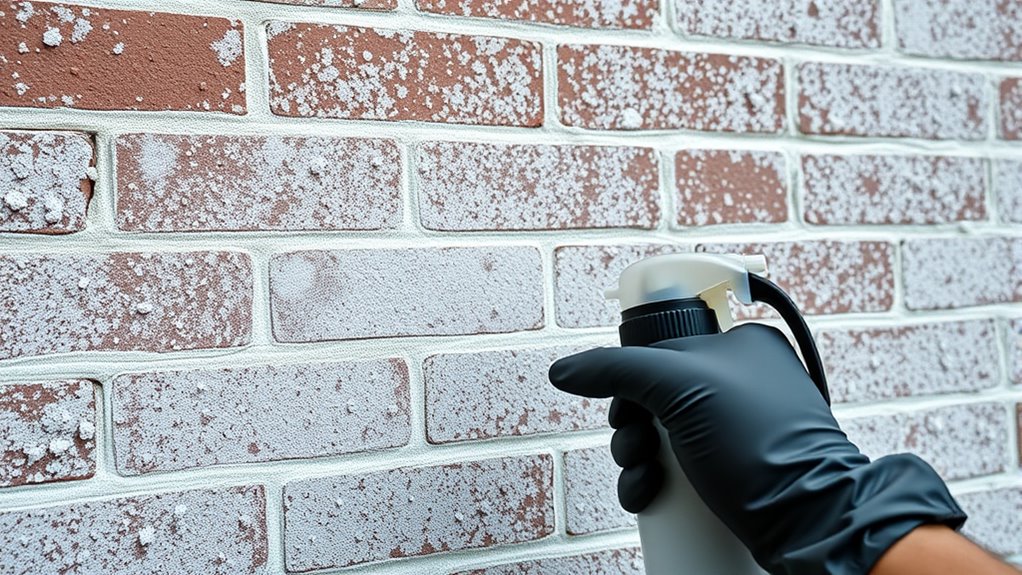
Efflorescence is a common problem that occurs when soluble salts migrate to the surface of masonry or concrete, leaving a white, powdery deposit. If you’re preparing to paint over a surface affected by efflorescence, it’s essential to address this issue properly to guarantee the paint adheres well and lasts. One of the most effective methods is chemical removal, which involves using specialized cleaners to dissolve and eliminate the salts. These chemical treatments penetrate the surface, breaking down the salts so they can be washed away or brushed off. When choosing a chemical remover, look for products specifically formulated for efflorescence; they work best on a variety of masonry types and are generally easy to apply. Always follow the manufacturer’s instructions carefully to avoid damaging the surface or creating health hazards.
Before applying any chemical removal, you need to control the source of moisture that causes efflorescence in the first place. Moisture control is vital because if you don’t address the underlying water problem, new salts will keep migrating to the surface, and the efflorescence will return even after treatment. Start by inspecting the area for leaks, poor drainage, or any other water intrusion points. Seal cracks, install proper drainage systems, and consider applying vapor barriers if necessary. Reducing moisture levels not only prevents future efflorescence but also enhances the effectiveness of your cleaning efforts. Keep the surface as dry as possible during and after treatment, especially before painting. Proper moisture management is crucial, especially since self-watering plant pots demonstrate how consistent water levels can prevent over- or under-watering—similar principles apply when controlling moisture for masonry surfaces.
Once you’ve performed chemical removal and controlled the moisture, you need to thoroughly clean the surface to remove any residual salts or cleaning agents. This step ensures that the surface is neutral and ready for primer and paint. Use a stiff brush and water to scrub away any remaining deposits, then rinse with clean water and allow the surface to dry completely. It’s important to wait until the masonry or concrete is fully dry before painting, as moisture trapped under the new coating can cause the efflorescence to resurface or lead to paint failure.

Akona Concrete/Masonry Restoration Cleaner – Clean & Restore Concrete, Masonry, Brick, Pavers, & More, Removes Efflorescence, Indoor or Outdoor, Multipurpose (1 Gallon, 1)
STRONG REMOVAL: Dissolve and remove efflorescence (white mineral deposits) and rust stains
As an affiliate, we earn on qualifying purchases.
As an affiliate, we earn on qualifying purchases.
Frequently Asked Questions
How Long Does Efflorescence Treatment Typically Last?
Efflorescence treatment typically lasts several years, but its lifespan depends on how well you address the underlying moisture issues. Proper cleaning and sealing can improve treatment durability, extending its effectiveness. If moisture continues to seep through, efflorescence may reappear sooner. To maximize lifespan, verify proper drainage and ventilation, and reapply treatments as needed. Regular maintenance helps keep the surface looking good and prevents future efflorescence buildup.
Can Efflorescence Reappear After Treatment?
Efflorescence can come back like a ghost if you don’t master moisture control and surface preparation. After treatment, if you don’t address underlying moisture issues or properly seal the surface, salts can migrate again through tiny pores. To prevent this, guarantee you control moisture sources and thoroughly prepare the surface before painting. Neglecting these steps is like leaving a door open for efflorescence to sneak back in.
Are There Eco-Friendly Efflorescence Removal Options?
Yes, eco-friendly methods and natural remedies exist for efflorescence removal. You can use vinegar or lemon juice, which are natural acids, to dissolve the salts. Baking soda mixed with water creates a gentle abrasive that helps remove efflorescence without harmful chemicals. These eco-friendly options are safe for your environment and effective, especially when combined with proper surface cleaning and moisture control.
Is Professional Help Necessary for Severe Efflorescence?
For severe efflorescence, you might need professional help, especially if DIY solutions don’t work. While tackling mild cases is manageable on your own using eco-friendly removal options, extensive buildup may require a specialist’s expertise to guarantee proper treatment and prevent future issues. Consider the cost implications—professional services might be more expensive but can save you time, effort, and potential damage, making it a worthwhile investment for thorough and lasting results.
How Can I Prevent Efflorescence in New Buildings?
To prevent efflorescence in new buildings, you should focus on moisture control and material selection. Guarantee proper drainage and ventilation to minimize water buildup. Choose materials with low porosity and avoid excessive moisture retention. Use vapor barriers and sealants where needed. Regularly inspect and maintain the building to catch any moisture issues early. These steps help keep efflorescence at bay and protect your investment.

Cleen Products Eff-Pro Efflorescence Remover for Concrete, Brick, Pavers
POWERFUL FORMULA: Specialized cleaning solution specifically designed to dissolve and remove stubborn efflorescence deposits from masonry surfaces
As an affiliate, we earn on qualifying purchases.
As an affiliate, we earn on qualifying purchases.
Conclusion
By tackling efflorescence before painting, you’re fundamentally clearing the canvas of a ghostly vapor, allowing your masterpiece to breathe and shine. Think of it as peeling back the fog that veils your wall’s true color, revealing a fresh, vibrant surface ready to embrace new life. When you treat efflorescence now, you’re not just preparing for paint—you’re orchestrating a symphony of durability and beauty, ensuring your work endures as a proof to your careful touch.

Bon Acid Proof Gong Brush Extra Stiff Plastic Bristles with 20 in. Durable Plastic Handle Heavy Duty Scrub Brush for Concrete Masonry and Surface Prep with 4 1/2 in. Wide Head and 1 1/2 in. Trim
Built with extra stiff blue plastic bristles designed to deliver aggressive scrubbing power while resisting breakdown from acid,…
As an affiliate, we earn on qualifying purchases.
As an affiliate, we earn on qualifying purchases.
Ames Block & Wall™ Liquid Rubber Waterproofer Multi-Purpose Coating & Sealant – 1 Gallon – Perfect to Use As Concrete Sealer and Waterproofer for Basements and Foundations – Made in The USA, White
Item Weight: 9.25 lb
As an affiliate, we earn on qualifying purchases.
As an affiliate, we earn on qualifying purchases.