When planning your mirror tile wall, measure your space carefully and choose the right tile size and pattern that complements your decor. Use a high-quality adhesive designed for mirror installation, applying it evenly to prevent air pockets and guarantee a smooth surface. Properly align and level each tile for a seamless look, and allow sufficient drying time. With attention to detail, you’ll create a stunning reflective feature—keep exploring to master the full installation process.
Key Takeaways
- Measure wall dimensions accurately to determine the number and size of mirror tiles needed.
- Plan your layout and pattern before installation to ensure a seamless, aesthetic design.
- Choose high-quality adhesive formulated specifically for mirror tiles for secure adhesion.
- Apply adhesive evenly, following manufacturer instructions, to avoid air pockets and misalignment.
- Allow sufficient drying time before cleaning or finishing to ensure proper bonding and durability.
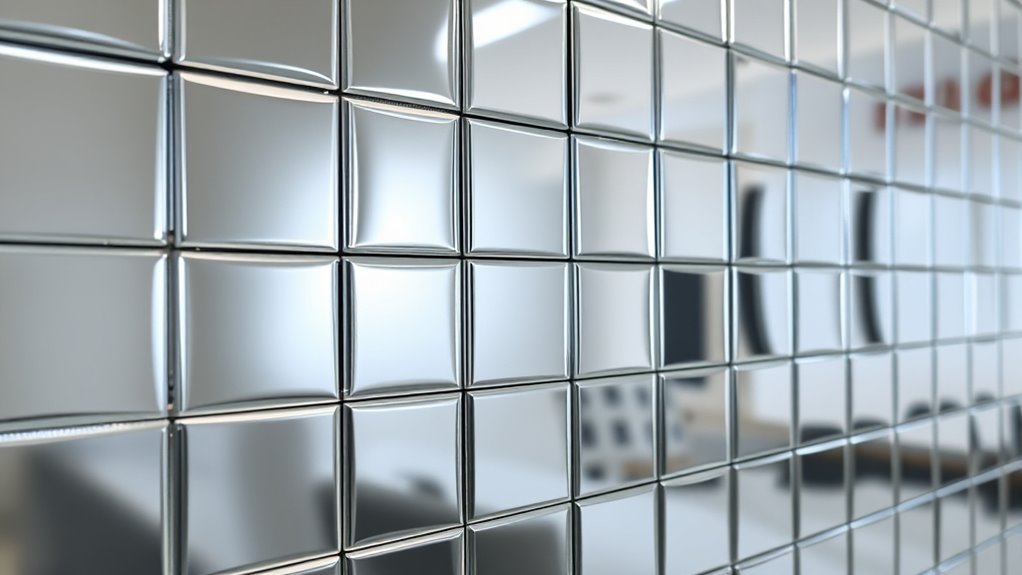
Have you ever considered how mirror tile walls can transform a space? These reflective surfaces instantly brighten rooms, add a sense of depth, and elevate your decor. But before you start, planning is essential to ensure your installation looks sleek and professional. Begin by measuring your wall carefully, deciding on the layout, and choosing the right mirror tiles. It’s crucial to consider the size and shape of each tile, as well as how they’ll fit into the overall design. When planning, think about the lighting fixtures in the room. Proper lighting enhances the mirror tiles’ reflective qualities, making the space feel more open and vibrant. You might want to position fixtures to highlight the tiles without causing glare or harsh reflections. Installing dimmable lights or adjustable fixtures allows you to control the ambiance, ensuring the mirror tiles serve as a focal point without overwhelming the room.
Next, selecting the right adhesive and understanding the adhesion process is key to a successful installation. Use a high-quality tile adhesive formulated specifically for mirror tiles and the wall surface you’re working with. Follow the manufacturer’s instructions carefully, applying the adhesive evenly to prevent air pockets or uneven surfaces. During installation, make sure each tile is level and aligned properly to maintain a seamless look. Once adhered, allow sufficient drying time before applying any finishing touches or cleaning. Proper planning and adhesion techniques will save you time and effort in the long run. Additionally, considering the contrast ratio of the lighting can help achieve the perfect ambiance and highlight the mirror tiles effectively.
When it comes to maintenance, mirror tile walls are relatively easy to keep pristine, but some tips help prolong their beauty. Regularly dust or wipe the tiles with a soft, damp cloth to remove fingerprints, smudges, or dust buildup. Avoid abrasive cleaners or harsh chemicals, as they can damage the mirror surface or the grout lines. For stubborn spots, use a glass cleaner or a mixture of water and mild soap, then buff with a lint-free cloth. Incorporate thoughtful lighting fixtures into your cleaning routine to prevent streaks or water spots caused by moisture or condensation, especially in bathrooms or kitchens. Keep an eye on the grout lines, and if you notice any discoloration or mold, clean with a gentle brush and a vinegar solution or a specialized grout cleaner. Regular maintenance not only preserves the aesthetic appeal but also extends the lifespan of your mirror tile wall, ensuring it remains a stunning feature in your space for years to come.

Unbreakable Mirror Tiles, 4PCS 10”x10” Peel And Stick on Mirror for Wall Mirrors Decorative, Toddlers for Kids Bedroom, Plastic Gym Frameless Door Small Adhesive Mirrors for Classroom Decor Stickers
HD Full Body Mirror – 4 PCS: 10X10 inch mirror squares tiles. The mirrors are clear and not…
As an affiliate, we earn on qualifying purchases.
As an affiliate, we earn on qualifying purchases.
Frequently Asked Questions
What Are the Best Lighting Options for Mirror Tile Walls?
For mirror tile walls, you should focus on lighting design that enhances their reflective quality. Opt for fixture selection that provides soft, even illumination to avoid glare and highlight the tiles’ shimmer. LED strip lights or sconces with dimmable features work great, offering flexibility for different moods. Position lights strategically to reduce shadows and showcase the mirror tiles’ beauty, creating a bright, inviting space.
How Do I Clean and Maintain Mirror Tile Walls?
Remember, even in a world of digital screens, cleaning mirror tile walls is straightforward. Use gentle cleaning tips like a soft cloth and a mix of mild soap and water. Avoid abrasive cleaners that could scratch the surface. Regular maintenance routines, like wiping weekly and addressing smudges immediately, keep your mirror tiles sparkling. This approach preserves their shine and ensures your wall stays stunning for years to come.
Can Mirror Tiles Be Used Outdoors or in Humid Areas?
You can use mirror tiles outdoors or in humid areas if they have good outdoor durability and humidity resistance. Look for specially designed mirror tiles made with weatherproof materials to prevent rust and damage from moisture. Proper sealing and installation help maintain their appearance and longevity. Keep in mind that regular cleaning and maintenance are essential to prevent mold and ensure the tiles stay shiny and intact in these environments.
What Are Common Mistakes to Avoid During Installation?
To avoid mistakes during installation, focus on proper surface preparation to guarantee the tiles adhere well. Don’t rush grout application; apply it evenly and wipe off excess promptly for a clean finish. Avoid skipping primer or using incompatible adhesives, as these can cause tiles to loosen. Also, don’t neglect proper spacing and alignment, which can lead to uneven surfaces and gaps. Taking your time and following these steps ensures a durable, professional-looking mirror tile wall.
How Do I Repair or Replace Broken Mirror Tiles?
To repair or replace broken mirror tiles, start by carefully removing the damaged tiles through gentle mirror removal techniques, avoiding damage to surrounding tiles. Once removed, clean the area thoroughly and apply new adhesive suited for mirror tiles. Then, position the replacement tile precisely, pressing firmly to ensure proper adhesion. Allow the adhesive to set completely before cleaning the surface and checking for stability.
Unbreakable Mirror Tiles, 4PCS 10”x10” Peel And Stick on Mirror for Wall Mirrors Decorative, Toddlers for Kids Bedroom, Plastic Gym Frameless Door Small Adhesive Mirrors for Classroom Decor Stickers
HD Full Body Mirror – 4 PCS: 10X10 inch mirror squares tiles. The mirrors are clear and not…
As an affiliate, we earn on qualifying purchases.
As an affiliate, we earn on qualifying purchases.
Conclusion
Now that you know how to plan and adhere mirror tile walls, you’ll be ready to transform your space confidently. Did you know that glass tiles, including mirrors, can boost a room’s perceived size by up to 40%? With proper planning and adhesion, you can create a stunning, reflective feature wall that not only looks great but also makes your room feel more open. So go ahead—get started and enjoy the beautiful, bright results!

DGSL Tile Leveling System with Tile Plier – 300-Piece Tile Spacers Clips and 100-Piece Reusable Wedges – Tile Tools Set for Stone Installation (1/8 Inch Tile Spacers)
Professional Tile Leveling System: DGSL Tile Installation Set – great tools for floor/wall setting. The system ensures flatness…
As an affiliate, we earn on qualifying purchases.
As an affiliate, we earn on qualifying purchases.

The Pink Stuff Miracle Daily Shower & Shine Spray – 30oz Bathroom Cleaner for Glass, Tile, Mirrors & Chrome – Prevents Soap Scum & Watermarks – No Rinse Spray & Leave Formula
Spray. Leave. Shine: No scrubbing, no rinsing—trust this easy-care formula to keep your shower, mirrors, and chrome surfaces…
As an affiliate, we earn on qualifying purchases.
As an affiliate, we earn on qualifying purchases.